Slidegenius, Inc.

4 Types of Charts You Should Use for Business Presentations

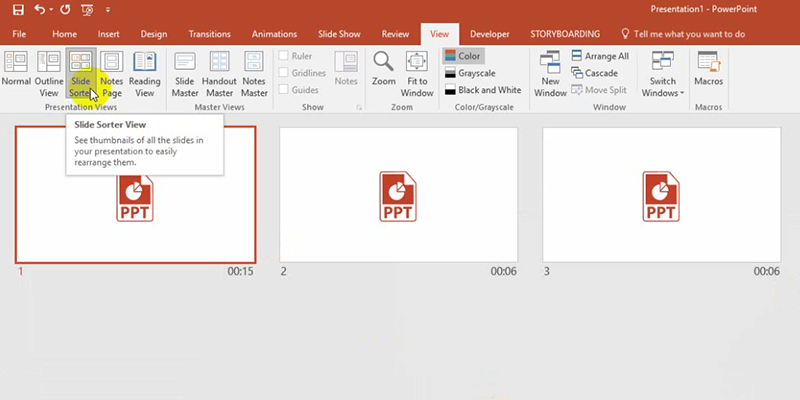
Using charts is tricky for business presentations. More often than not, they tend to overload your slides with numbers and distract your audience from your main findings.

Similar to using spreadsheets, these are tools used to analyze data before presenting them. However, charts have one advantage over spreadsheets: They can visually compare and show relationships between numbers and information, making them more understandable for the audience. This also lets you hold their interest long enough to get your point across.

If you absolutely need to use charts, these are the four basic types that can help simplify an otherwise long and boring topic.

1. The Organizational Chart

Business Presentations: Organizational Chart

This chart is used to explain relationships between members of a group.

Here, information is displayed in a top-to-bottom format, with the executive or manager at the top. The chart branches out to show direct and indirect relationships between staff, managers, and executives.

This gives everyone a clear picture of who reports to whom and who is responsible for what.

While the organizational chart explains structures, it doesn’t show how a company operates. You can use flowcharts to explain how your company does business with others. You can also use these to talk about any other type of business procedure.

2. The Flowchart

Business Presentations: Flow Chart

The flowchart is more linear, sometimes circular, in nature.

It’s best for explaining processes, especially during business presentations. The flowchart builds a clear picture of where something begins, what happens in between, and where it ends.

When using this chart, start with the first step. When an order comes in, what step follows next? Is there a step where the request is evaluated? Arrange them sequentially, and add if-and-then statements if something goes wrong with that step.

The more complicated a process is, the harder it is to illustrate with a flowchart. Stick to the basics and keep your illustration simple to avoid confusing your audience with too many numbers.

3. The Line Graph

Business Presentations: Line Graph

One of the simplest to create and the easiest to understand, line graphs show progressions and can also forecast results.

If you were to track, for example, the increase and decrease of your company’s earnings per year, simply plot the period of time you need to measure on the horizontal X-axis. The vertical Y-axis will be used to measure the amount gained or lost.

After plotting the data, simply connect the points with a line to show their progression. You can even use it to compare similar types of data by using different colored lines.

Line graphs are great at comparing progressions, but if you want to accurately show increases and decreases in value, bar graphs are perfect for the job.

4. The Bar Graph

Business Presentations: Bar Graph

While they can also show comparisons over time like line graphs, bar graphs are used for measuring larger changes.

The two main variants for bar graphs are horizontal and vertical graphs. Both rely on rectangles to show how much one thing is worth against another. For example, if you were to measure the net worth of similar companies with a vertical bar graph, you could arrange the company names in the horizontal X-axis, and set the values in the vertical Y-axis. The higher the rectangle displayed, the more valuable the company is. For horizontal graphs, these are more appropriate for data with longer labels. The usage is the same with a vertical graph, except that the X and Y axes are reversed.

Which Chart Should You Use?

4 Types of Charts

Instead of you simply talking about information with a slide full of text, these charts can conveniently illustrate your data.

It can be about procedures, your organizational structure, or even the progressions and comparisons between information.

While these four graphs can illustrate and compare several things at once, they can overload your slides if they contain too much information. Keep only the most essential processes and state only the most important individuals in any organizational structure.

It’s best to limit your comparisons to at least three things to make your presentation easier to understand.

Check out and share our infographic!

References:

“Types of Graphs – Bar Graphs.” Types of Graphs. n.d. www.typesofgraphs.com/bar.html
“Types of Graphs – FlowCharts.” Types of Graphs. n.d. www.typesofgraphs.com/flow.html
“Types of Graphs – Line Graphs.” Types of Graphs. n.d. www.typesofgraphs.com/line.html
“Types of Graphs – Organizational Chart.” Types of Graphs. n.d. www.typesofgraphs.com/organizational.html

Display a Live Twitter Feed in PowerPoint 2016

Adding a live Twitter feed in your PowerPoint is one of the many ways to make your presentation more engaging. Fortunately, only a few presenters know how to insert a website in their presentation, which is why using this feature gives you the opportunity to take advantage of your listeners’ curiosity and make a good, lasting impression.

Apart from spicing up your presentation by making it interesting and more interactive, having a live Twitter feed lets you expand your ideas as you deliver your speech. You can show it during the first part of your presentation to encourage the audience to tweet about your talk, or with the help of a hashtag, put it at the end of your speech to show them the live tweets of the event.

To get a clear picture of how to successfully add a live Twitter feed in your presentation, here’s an infographic that will give you a step-by-step tutorial using PowerPoint 2016.

Let’s Get Visual: 3 Reasons Why You Should Use Infographics

Infographics are a popular medium of data presentation. While they don’t necessarily replace research, it’s become a go-to medium for quick information sharing.

In her article on Piktochart, digital strategist Nevyana Karakasheva explains how infographics compress your content into easily digestible visuals that can go viral online, depending on how much social shares you generate. The potential for sharing makes it an effective marketing tool, both for sharing relevant content to your prospects and subtly promoting yourself.

What exactly influences the infographic’s overall appeal? When reading infographics, people ask these three common questions:

Why are infographics the current trend?

What’s an infographic’s selling point?

Will using these visual aids attract your target audience?

Here are some answers that could help:

Q: Why are infographics the current trend?

Visual learning is in. With 65% of the population identifying as visual learners, according to professor Patricia Vakos of Pearson Prentice Hall, it’s no wonder why infographics are an attractive option to the majority.

An infographic’s strategic use of color, layout, image, and text appeal to the visual learner’s desire for creative knowledge. Even for the not-so visually-inclined, infographics help break down the data overload many of us experience in today’s world.

In a world bogged down by too much information, having something to summarize data into appealing and easily digestible points is like a breath of fresh air. Because of its all-around charm, an infographic can attract the interest of most audiences, making it perfect for presenting facts and statistics.

Q: What’s an infographic’s selling point?

It helps explore your creativity when planning its design and layout. You can opt to place content to an existing infographic template or play around with design elements.

Challenge your creativity while dishing out valuable information. After all, the sky’s the limit when it comes to creating an infographic.

You can make use visuals to point and connect to facts or illustrate them. This makes your material engaging and more attractive than plain textual overload.

Q: How will using these attract your target audience?

It’s accessible to users, mostly online. Because they are being shared over social media, infographics are more appealing and accessible. Their various layouts and visual designs also make plain data more interesting to look at.

An infographic turns difficult statistics into discernible information. It also makes your brand easier to share and understand. The added exposure and clarification help expand your network, boost your page views, and introduce you to prospective clients.

Although nothing beats a face-to-face presentation, having infographics on your site or your slide deck saves you time explaining facts.

Conclusion

Infographics are striking sources of information.

Contrary to popular belief, they don’t just cater to visual learners; they also attract all types of people. The visual aspect leaves you free to explore the infographic’s creative possibilities.

At the same time, they also break down difficult data into easily readable information. This lets viewers easily process them and share it with their friends. If you want to get yourself out there, consider putting up your own infographic.

Need advice for your infographic design? Let our SlideGenius experts assist you. Contact us today for a free quote!

References:

Karakasheva, Nevyana. “Why Infographics Are An Inseparable Part of a Successful SEO Campaign.” Piktochart Infographics. June 1, 2015. www.piktochart.com/why-infographics-are-an-inseparable-part-of-a-successful-seo-campaign
Vakos, Patricia. “Why the Blank Stare? Strategies for Visual Learners.” Pearson Education, Inc. 2003. www.phschool.com/eteach/social_studies/2003_05/essay.html
“The Visual (Spatial) Learning Style.” Learning Styles Online. n.d. www.learning-styles-online.com/style/visual-spatial

Featured Image: “Visual Acuity” by Elizabeth Hann on flickr.com

Canons of Rhetoric: The Power of Memory in Presentations

Missing out an important part of a presentation sometimes causes fear. Those speech pauses, stutters, and eye twitches can prove a sudden feeling of emotional tension and mental block.

In this post, we’ll highlight the importance of rhetorical memory in recalling a presentation material for maximum impact. Let’s see how it can save you from sabotaging your pitch’s success.

What about Memory?

The art of rhetoric in the form of oration has become existential in political debates, legal proceedings, and philosophical inquiries in ancient Greece and Roman times.

In Renaissance period, memory or memoria played a significant role in the educational system. According to Paul Gehl, print historian and custodian of the Wing Foundation, texts were learned by repetitive memorization and then reread for meaning.

What is Memory?

The fourth canon of memory is defined as the “firm retention in the mind of the matter, words, and arrangement.” The Latin manuscript Ad Herrenium considers this principle as the “treasury of things invented,” linking to the topics of invention or, rather, the process of refining your arguments.

It’s not only about memorizing a speech but also embodying innate knowledge of one’s topic for better delivery.

Here, we’ve listed the three elements of the rhetoric memory and how they can guide you throughout your presentation:

Memorizing Your Speech

Ancient orators memorize their speeches to speak with confidence. The Classical Age believed that memorization should take place to absorb the material and deliver it naturally. This improves total recall of a presentation idea and flow and establishes maximum speaking credibility.

A good command of memory allows for on-the-spot improvisation of key points, response to questions, and refutation on opposing arguments. To improve memory retention, read the speech out loud and do it repeatedly. A 2010 study by psychologist Dr. Art Markman from the University of Texas found that spoken words were remembered better than those read silently.

Break the speech into parts to have designated feel and purpose. Represent your main points with images to remember it easily.

Making it Memorable

“Thinking memorable thoughts is the primary means of retaining and retrieving carefully articulated thought,” said Walter Ong, a cultural and religious historian and philosopher. This implies that memorizing your pitch alone isn’t enough for your audience to absorb your speech.

Avoid depending too much on your script. It may only distance you from the crowd.

Learn your speech by heart by focusing on your key points. Think of some ways to keep them stuck on you and your topic by associating them with images or events you can easily recall.

Limit your main points to no more than three for easier retention. Arrange your speech in the classic structure—beginning, middle, and end to emphasize points. In effect, tell a story instead of simply verbalizing facts to guarantee attention.

Keeping a Treasury of Rhetorical Fodder

Roman rhetoricians like Cicero and Quintilian encouraged their students to keep a commonplace book, a simple notebook for jotting down anything that catches your interest for future references. These include ideas, quotes, anecdotes, and general information.

In today’s presentation world, keeping a treasury of rhetorical fodder like in the ancient times is also a good practice. After all, there’s always a chance you will have to cite current events or the occasional pop culture reference for your audience to relate more to your speech.

Coming in prepared with useful data in mind and on hand not only cures your stage fright, but also bolsters your presenting image. Store up relevant quotes, facts, observations, and stories to your core message. Incorporate supporting visuals like images, videos, and infographics to add a fun element. Translate numerical figures in the form of graphs, charts, and tables to make hard data easier to understand.

Improve Your Working Memory

The rhetorical canon of memory eases the fear of public speaking.

With combined memorization and full grasp on your topic, you’ll be able to deliver memorable presentations. Memorize a speech to absorb the material and deliver it naturally. Make it memorable to increase your audience retention. Keep a treasury of rhetorical fodder to boost your presenting image. Incorporate the three elements of memory to communicate your message more effectively.

References:

Gehl, Paul. A moral art: grammar, society, and culture in Trecento Florence. Ithaca: Cornell University Press, 2015.
The Canons of Rhetoric. Pearson: Higher Education.
Holiday, Ryan. “How And Why To Keep A ‘Commonplace Book’.” Thought Catalog. August 28, 2013. www.thoughtcatalog.com/ryan-holiday/2013/08/how-and-why-to-keep-a-commonplace-book
Markman, Art. “Say it loud: I’m creating a distinctive memory.” Psychology Today. May 11, 2010. www.psychologytoday.com/blog/ulterior-motives/201005/say-it-loud-i-m-creating-distinctive-memory
McKay, Brett and Kate McKay. “Classical Rhetoric 101: The Five Canons of Rhetoric – Memory.” The Art of Manliness. June 10, 2015. www.artofmanliness.com/2011/04/15/classical-rhetoric-101-the-five-canons-of-rhetoric-memory

Featured Image: “Now” by new 1lluminati on flickr.com

How to Rehearse Timings in PowerPoint 2013

Microsoft PowerPoint has animation features to create a livelier, more memorable presentation. These include a wide variety of options to visually enhance your topic.

But what if you’ve prepared a well-developed and engaging speech, then all of a sudden, your slide transitions seem stilted, or outright don’t work?

In this post, we’ll cover how you can take advantage of PowerPoint’s transitions and animation pane to get your timing on point.

What Can Go Wrong?

Awkwardly timed transitions on each slide might distract your audience from your main point. If a slide plays for too long, you might resort to using filler words until the next slide plays. But if the slide ends abruptly, you’ll scramble your thoughts in an attempt to keep your presentation on track.

Both outcomes make you look unprofessional. So we highly recommend rehearsing timings in PowerPoint 2013 to create a seamless flow during your pitch.

Set your timing right for live or self-running presentations. End your live presentations on the dot and create a compact and coherent self-running deck with the help of PowerPoint.

Simple Timing and Transitions

A simple presentation focuses on the core message. This avoids misleading the audience with distracting motions and effects. A standardized flow of timings and transitions works well with a simple deck.

If you have a simple presentation at hand, open it and we’ll quickly add timings and transitions.

1. Click on the slide object itself that you want to adjust, then select the Transitions tab.

rehearse timings in PowerPoint 2013: PPT logo2. Under the Timing group, go to the Duration box to set how many seconds you want the object’s animation to last.

rehearse timings in PowerPoint 2013: timing3. Set your slide’s duration under the same group. Check the After box and put in the amount of time you want your slide to appear on screen.

rehearse timings in PowerPoint 2013: After OptionYou can click Apply to All if you want to set the same duration to all the slide objects and slide timing. But you won’t be warned by a dialog box to accept the changes, so be careful about applying this option to your entire deck.

rehearse timings in PowerPoint 2013: Apply to AllAdvanced Timing and Transitions

When we need to impress a client, a bare-bones presentation won’t cut it. Rehearse your timings to see the overall appearance of your deck and synchronize your delivery with each slide.

We’ll need to have a deck ready for this tutorial. So open up your presentation and we can synchronize your slide timings and animation.

1. Go to the Slide Show tab. Under the Set Up group, click on the Rehearse Timings icon.

rehearse timings in PowerPoint 2013; rehearse timings2. Your presentation will now play in Slide Show mode. On the upper left corner, the Recording menu will appear. It has three buttons and two timers.

rehearse timings in PowerPoint 2013: recordingClicking Next will take you to the next slide to record your next timing. You can also click on the slide itself to move to the next slide.

The Pause Recording button pauses your recording. A dialog box will prompt you to resume it.

The Repeat button will delete your recording. Use it when you need to repeat the recording of your slide timings.

The middle timer displays how long the current slide is playing, while the second displays the total running time of recorded slide timings.

3. When you’re finished recording, a dialog box will show you the total running time of your presentation.

rehearse timings in PowerPoint 20134. Click Yes. You’ll be sent back to Normal view.

rehearse timings in PowerPoint 2013: Normal ViewYou can see how long each slide timing lasts by going to the View tab and selecting Slide Sorter view under the Presentation Views group.

rehearse timings in PowerPoint 2013: Slide sorter viewIn the bottom-right corner of each slide, you’ll be able to see the time you recorded with the Rehearse Timings function marked with a small gray star.

Now let’s return to Normal view. If you need to go back to a slide to change how long it plays, go to the Transitions tab and look for the Timing group. Click the arrows in the After box to add or subtract one second to the slide timing. Refine your slide timing and leave enough room in your speech to pause before the next slide begins.

rehearse timings in PowerPoint 2013: timingMore Tips

If you’re wondering why your presentation won’t run at the exact amount you specified when you look at the timer in Presenter view, it’s because the total running time of your slide will be the sum of the numbers found in the Duration and After box.

rehearse timings in PowerPoint 2013: durationThe Duration box contains the length of your transition’s animation, while the After box contains the amount of time that your slide will last between the transition until the next slide.

Run Presenter view again and look at the timer then return to the Transitions tab to make the adjustments.

Delete all your timings in one go by going to the Slide Show tab and clicking on the dropdown menu below Record Slide Show in the Set Up group.

rehearse timings in PowerPoint 2013: Record Slide showChoose Clear from the dropdown menu and select Clear Timings on All Slides.

rehearse timings in PowerPoint 2013: Clear Timings on all slidesA dialog box won’t prompt you about confirming the changes, so be careful of clicking this option.

Final Pointers

Before inserting animations and transitions to your slide deck, choose transitions wisely to avoid confusing audiences. If your slides discuss simple topics, it’ll be better to set all the slides to the same duration to promote consistency and readability.

Double check if each slide’s speed timing is set. This prevents you from an awkward and mistimed presentation. If you notice that a slide doesn’t have any transition synchronized, check the setting again.

Preview each slide and observe if each animation functions. Check the other animation options, such as entrance or exit, to see if they’re all working. If one of them fails, rearrange and redo until you get it right.

Ensure that your timings and transitions don’t distract from your overall message.

Apply each reminder and be mindful of these tips to deliver clear and successful pitches.

To help you make an error-free PowerPoint presentation, SlideGenius experts can offer you a free quote!


References

Michael, Jackie. “How to Troubleshoot a PowerPoint Animation Problem.” EHow. Accessed January 29, 2016. www.ehow.com/how_7289937_troubleshoot-powerpoint-animation-problem.html
“Rehearse Timings for a Slide Show.” Office Support. Accessed January 28, 2016. https://support.office.com/en-US/Article/Rehearse-timings-for-a-slide-show-4fcac25a-d244-4047-b340-c3d683c3f549

Why You Should Improve Your PowerPoint with Animation

Last November, Microsoft released two of its newest PowerPoint features for 2016– Designer and Morph.

While Designer smartly matches an appropriate layout for your content, Morph is a handy tool in creating basic animation. This feature improves on the animation process with a more user-friendly approach.

It removes the hassle of previous animation options including key frame, motion path, and flash once, which deterred presenters from animating their deck.

To use Morph, click Transitions, then Effect Options. You can choose to animate either objects, words, or characters.

It sounds like a good improvement in terms of visuals, but it’s more than just an added aesthetic to your deck.

Here’s why you should improve your PowerPoint with animation:

Transition with Ease

It seems like the future of presentations is headed towards increased accessibility, particularly with the help of digital media and the Internet.

With more ways to upload your deck online, and share it to a wider audience, your deck will sometimes need to stand on its own. Latest innovations in the program like hyperlinks, voice narration, as well as automatic and manual timings made it possible to pitch self-presenting PowerPoints to anyone at any time.

If you want to create your own stand-alone slides, animation serves as an effective transition tool without needing to switch between slides.

For PowerPoint Morph users, simply move your selected images or text in a certain path after you select the Morph button, similar to creating a work path.

Once you apply Morph to the objects on your deck, they’ll move on their own without needing a prompt.

Gain Positive Attention

It’s already established that 65% of people are visual learners, according to Prime Infographics.

Using graphics is a more effective method of reaching out to them than simply relating hard facts with too much text and numbers.

That said, why not engage the visual learners in your audience further by animating your images? Add some spice to your slides by animating them. But don’t let your deck look dated and unappealing with static and overused clipart.

The fluid movement of the animated objects on your slide can keep your audience’s attention as you expound on your key points.

Tell Your Story

One of the most effective ways to appeal to people is through their emotions. This gets them to see things from your perspective, and eventually sympathize with you.

Tap into their emotions by crafting a story around your pitch that everyone can relate to. You can do this verbally during your actual pitch, or through your deck.

While your PowerPoint serves as a visual aid, it doesn’t have to stay flat all the time. Let your deck tell your story with you. Craft an animated slide with a beginning, middle, and end without needing too many clicks on your part.

Conclusion

The recent development in deck animation lets you explore creative possibilities on your slide.

Use PowerPoint Morph to create stand-alone slides with fluid transitions. Let your visuals interact with your audience by strategically animating slide elements. This will help you not only explain difficult concepts better with visuals, but also tell a good story.

Work together with your visual aid through animation, and let it complement your pitch.

Need a guide for your presentation needs? Contact our SlideGenius experts today for a free quote!


References

“65% of All People Are Visual Learners.” Prime Infographics. Accessed December 18, 2015. http://primeinfographics.com/65-of-all-people-are-visual-learners

“PowerPoint “Morph” Brings Animation to Microsoft’s Widely Used Presentation Software.” GeekWire. November 13, 2015. Accessed December 18, 2015. www.geekwire.com/2015/powerpoint-morph-brings-animation-to-microsofts-widely-used-presentation-software

“Using the Morph Transition in PowerPoint 2016.” Office Blogs. Accessed December 18, 2015. https://support.office.com/en-US/article/Using-the-Morph-transition-in-PowerPoint-2016-8dd1c7b2-b935-44f5-a74c-741d8d9244ea


Featured Image: “Art class” by Pavlina Jane on flickr.com

5 Productivity Hacks to Get You Going at Work

Let’s admit it, there are down days in the office, a time when we force ourselves to work but just can’t. It’s those days where no matter how hard you try or how often you shake your head just to get answers, you still get nothing. All you’re left with is a blank stare and an empty, nagging feeling of “I’m completely wasting my time doing absolutely nothing.”

Don’t worry about it. It happens to everyone, even CEOs. But just because it’s a normal event doesn’t mean you can get away with not doing anything to deal with it. It’s like falling down: what counts is how you get back up.

In this case, it’s how you make yourself productive again. It’s what you do to get the creative juices flowing. There are many ways to do this, ranging from daydreaming to taking a vacation. Below are five things you can easily do to save precious time—and money. Learn all about it in this 5 Productivity Hacks infographic from SlideGenius.

Is it Okay to Apologize during Your Sales Presentation?

Saying sorry has its pros and cons: it can win audience’s sympathy or lose your credibility.

While there are unexpected events that may occur when giving your sales presentation, knowing the right time to say sorry makes a difference.

Why Apologize?

Apologizing isn’t a bad thing. In fact, people who acknowledge their mistakes are seen humble and down-to-earth.

When things didn’t happen the way you planned it, apologizing may be your last resort to keep your clients interested in your pitch.

However, it doesn’t apply in some occasions. Apologizing may stem from two reasons: you want to show your sincerity or you feel humiliated and you need to say sorry.

Either which, you need to know how it can affect you positively and negatively.

Just like crafting your PowerPoint deck, all the elements required for your subject goes through intensive planning to effectively get your message across on the big day.

When to Say Sorry

Addressing the crowd’s question – “What’s in it for me?” – is one of the goals which prevent you from disappointing them and wasting their time.

Failing to meet their expectations may result in a huge problem, thus putting your credibility at stake.

However, instances such as microphone malfunction, your laptop crashes, and outside noises are examples of technical difficulties that may arise at a time that you least expect it.

Avoid this beforehand by familiarizing yourself with the venue and having backup plans that can help you survive.

Apologizing can put your clients at ease and make them feel that you care about them.

Handle it Wisely

Facing the consequences due to lack of preparation is key to learning from your mistakes.

Adjusting to the situation allows you to manage your response and focus on your objective – to encourage clients to take action.

When your original plan didn’t work out, go to plan b. Remember that your audience has no idea about your presentation outline.

You can still save your performance by changing your mindset and avoiding negativity.

Nobody wants to be in an awkward presentation. So when inevitable circumstances happen, apologize gracefully, then proceed to your pitch.

Conclusion

Only you get to decide for yourself if you’ll be apologizing or not.

All you need to do is be truthful to your audience and confident in delivering your message.

Preparation is vital to achieving your client’s expectations and satisfying their needs.

You may have found qualified prospects to listen to your pitch, but it’s not enough to gather sales.

Letting them see that you’re professional and credible convinces them to purchase your product offering.

Keep their interests in mind  and convince them to understand your pitch.

This way, you won’t only win them over, you’ll also make them want to go back and listen.

When you feel like apologizing to your clients, keep this in mind: just keep going.

Back up your skills with a well-designed PowerPoint presentation by letting our team to assist and offer you a free quote!


References

Dlugan, Andrew. “Should a Speaker Apologize to the Audience?” Six Minutes, February 1, 2008. Accessed November 2, 2015. http://sixminutes.dlugan.com/audience-apology-public-speaking

Featured Image: “apologize” by Jason Taellious on flickr.com

3 Bullet Point Alternatives that Will Improve Your Deck

PowerPoint is one of the standard presentation tools of our time. It’s undergone plenty of changes and has come a long way since its inception.

Throughout the course of innovation, some features have become outdated by the turnover of new design trends – this includes tacky transitions and flying word art. The bullet point stands as one of these features, taking its place beside Comic Sans in Jarek Wasielewski’s list of PowerPoint taboos on ClickMeeting.

SlideGenius Blog Module One

Download free PowerPoint templates now.

Get professionally designed PowerPoint slides weekly.

Sign Up Now

The reason behind this is that bulleted lists are mistaken as a way of loading more text on a slide. Although they previously acted as a replacement for sentence chunks and long-winded paragraphs, bulleted slides tend to do the same thing and saturate its viewer with too much information.

Relieving your audience of the information overload on your deck can help them process your points better.

Avoid pushing your viewers’ limits with the bullet point, and opt for these timely alternatives:

1. Single-Text Slides

It may seem counterintuitive, but one of the solutions to the overflowing text of wild bullet points is also text.

By this we mean, one word per slide, or at the most, a phrase. The less words on your slide, the more room you have to expound on your points, and the more opportunity you have to draw attention to yourself as the speaker.

Your PowerPoint shouldn’t be a replacement for your stage presence, so don’t let it overshadow you. Only put in keywords that will serve as the takeaway for your further discussion. This also serves as consideration for your listeners, since people can only process so much information at a time, according to Psychology Today.

Make sure your audience retains most of your presentation by giving them single-text slides that only highlight important parts of your pitch.

2. Powerful Images

Images can also have the same effect as keywords. In fact, they may even have a greater impact. Karla Gutierrez of SHIFT eLearning stated that majority of the population are visual learners, meaning they process visual information more than simple text or verbal instruction.

Placing pictures related to your discussion instead of jotting down text in a bulleted list helps viewers associate your words and your slide with the emotions these images stir in them. Be creative in picking out the image you place on your deck. Consider basic graphic design principles to maximize the effect it will have on your audience.

These principles include white space, color, and contrast to emphasize a crucial aspect of an image and evoke feelings in the viewer. Depending on how they’re used, these elements can have different effects on people. Play around with your visual design to get the reactions and attention you want from your listeners.

SlideGenius Blog Module One

Get hundreds of PowerPoint slides for free.

Sign up for your free account today.

Sign Up now

3. Diagrams and Visual Data

Images are good for eliciting reactions from viewers, but if you want something that’s both informative and attractive, present visual data.

These include diagrams, bars, graphs, and pie charts, which can make hard information easier to digest for an audience member who doesn’t want to get overwhelmed by the numbers.

Don’t settle for bullets on your slides in presenting the figures. Visual data summarizes all those points neatly for you, giving you leeway to discuss the details.

However, presenting information visually still requires some graphic design on your part. Use warmer and more attractive colors to draw eyes towards your information and help them focus on it.

When it comes to diagrams and charts, labeling your data is essential. Don’t assume that your audience knows what the colors and lines stand for.

Putting up something like a legend for the viewers’ reference can greatly help them understand the information you’re presenting.

The Takeaway: Drop the Bullet

There are many ways to design your deck. Avoiding a slide deck faux pas can mean something as simple as cutting back on bullet points and opting for more timely alternatives.

Keeping a single keyword or phrase on your slides will help the audience remember these points better after your presentation. In the same way, putting images instead of words can help them associate the emotions created by the image with your speech.

If your purpose is both to attract and inform, use diagrams to summarize numbers into neat visual treats for the eyes. Still having trouble choosing the right design? Contact our SlideGenius experts today for a free quote!

Featured Image: “Success by Design: Negotiation Spread” by changeorder on flickr.com

Your Quick Guide to Outline Text Fonts in PowerPoint 2013

Outlining fonts in PowerPoint allows you to emphasize words or statements displayed on-screen. Aside from helping your audience better understand your main idea, it also lets them read your text clearly using a few adjustments. In this post, we’ll focus on how to outline fonts to emphasize your key message.

Bring Up the Interface in PowerPoint 2013

1. Select the text that you wish to format by dragging your cursor from the start to the end of the word. You can also select all of the text by using the keyboard shortcut Ctrl+A.

2. Right-click on the highlighted text. A context menu will appear.

3. Click on the “Format Text Effects…”, which is the second to the last option.

Outline Text Fonts in PowerPoint 2013 Tips:  Format text effectThe Format Shape window pane will appear on the right side of the screen. It displays two main options: Shape Options and Text Options.

Outline Text Fonts in PowerPoint 2013 Tips:  Format Shape4. Click on Text Options. There will be three icons underneath.

5. Click the leftmost icon which is the Text Fill & Outline icon (this is the “A” icon with a rectangular shape beneath it).

Outline Text Fonts in PowerPoint 2013 Tips: Fill text and outline6. Click on Text Outline to expand the menu.

Text Outline

There are two submenus underneath Text Options, namely Text Fill and Text Outline. These settings individually control the look of your font. Expand or collapse each submenu by clicking on the triangle on the left of each word. Outline text fonts in PowerPoint 2013 by toggling the three options underneath Text Outline

If you don’t want any outline effect on the selected text, click on No line. This is selected by default.

Outline Text Fonts in PowerPoint 2013 Tips: No lineChoose the Solid line option under the Text Outline if you want your text outlined with a single flat color. You can also adjust the transparency, width, compound lines, dashes, cap, and join type.

Outline Text Fonts in PowerPoint 2013 Tips: Solid LineClick the Gradient line button if you want the outline to start from one color and slowly fade into another color. You can choose what specific colors the gradient should use, how it should look (Linear, Radial, Rectangular, or Path), and what angle it should show at. You can also adjust its Position, Transparency, and Brightness.

Outline Text Fonts in PowerPoint 2013 Tips: Gradient lineText Fill

1. Select Text Fill under Text Options to alter the font color without making any changes on the text outline.

Outline Text Fonts in PowerPoint 2013 Tips: Text fill2. Click the Text Effects This is the icon next to Text Fill & Outline icon, which is also an “A” icon with only an outline. Choose among the six submenus: (Shadow, Reflection, Glow, Soft Edges, 3-D Format, and 3-D Rotation) to apply additional effects to the selected text.

In the example below, the Glow effect is used to improve the appearance of the selected text.

Outline Text Fonts in PowerPoint 2013 Tips:  GlowCustomize Your Text

You don’t need to download a different font every time you want it to look a certain way. Simply format a pre-existing font within PowerPoint and have free reign on your font’s design. Outlining text enhances your key points, making them more readable and understandable for your audience. If you want to highlight your text and convince the crowd to focus on your main idea, apply the instructions above to achieve visually compelling PowerPoint presentations.

Aiming to deliver a more visually-pleasing PowerPoint presentation? SlideGenius experts can assist you by offering you a free quote!


References

“Change the Color of WordArt.” Office Support. Accessed January 22, 2016. www.support.office.com/en-US/article/Change-the-color-of-WordArt-4F506FF1-9C83-4214-A0AE-390D394813CD
Weedmark, David. “How Do I Outline a Font in PowerPoint?” eHow, January 10, 2015. Accessed September 17, 2015. www.ehow.com/how_7195619_outline-font-powerpoint.html

-->