Slidegenius, Inc.

3 Easy Steps to Your Own PowerPoint Design

Don’t let an important message get buried under bad PowerPoint design. A great story can fall short if your visuals end up boring the audience.

The standard bullet point design won’t do much for your success. If you really want to be impressive and make sure your message sticks, be diligent in creating effective PowerPoint slides, which you can do in three easy steps.

Today, we’re sharing tips on how you can create unique and memorable designs without ruining your schedule.

Step 1: Customize a PowerPoint template

Creating your own deck design from scratch is a daunting task. Unless you have a perfectly planned concept, it’s better to go down another route. Start with a PowerPoint template that you can customize, which you can apply using the Slide Master function.

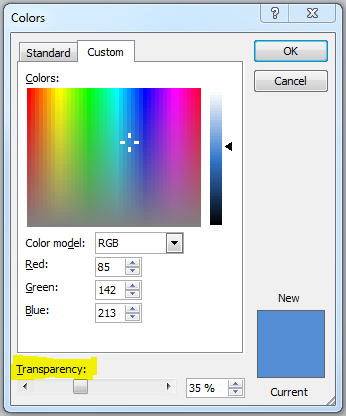
To upgrade default PowerPoint templates, create your own color schemes. You can follow the color patterns of your company’s branding efforts or use programs like Adobe Color CC to find the perfect combination.

You can also use high-quality images as backgrounds to some of your slides. Just remember to choose images that aren’t too heavy on the eyes. They shouldn’t stick out from the overall visual theme of your PowerPoint design.

Step 2: Add carefully curated images

Aside from images for backgrounds, it’s also important to illustrate your points with pictures.

There are plenty of different images find on the Internet that will fit the subject matter of your presentation. Just be sure to carefully browse through your wealth of choices, aiming for images that allow for a unified look in your PowerPoint design.

Other than the overall theme of your images, make sure that they all match visually. You might find some images are too saturated and underexposed.

To solve the problem, make adjustments and corrections using photo-editing tools in PowerPoint.

Step 3: Be mindful of good design practices

As you put the different elements of your slide deck together, it’s important to keep good design practices in mind. These include the sparse use of text and animation, as well as the careful consideration on which font types to use.

Among our most important lessons is the proper use of white space in PowerPoint slides.

Contrary to what some may think, minimalistic design is not simply the absence of extraneous objects on the slides, but in removing distracting clutter and helping the viewers’ eyes focus on more important elements.

Tap into this principle and keep your design and layout balanced and in order as you craft your overall deck.

PowerPoint design comes from inspiration

If starting with these three steps still feels a bit overwhelming, you can find inspiration from all over the web.

Creativity stems from inspiration, so keep looking for designs that catch your eye. Start by browsing samples designs and studying their methods for inspiration.

Not sure where to begin? Contact us and consult with our PowerPoint experts today!


References

Design Ideas: How to Improve PowerPoint Templates.” SlideGenius, Inc. December 9, 2014. Accessed February 4, 2015.
Ivanoff, Ada. “Design Minimalism: What, Why & How.” SitePoint. June 6, 2014. Accessed February 4, 2015.
Tutorial: How to Use PowerPoint as a Photo Editor.” SlideGenius, Inc.. February 2, 2015. Accessed February 4, 2015.
Using White Space in PowerPoint Design-a Closer Look.” SlideGenius, Inc. December 4, 2014. Accessed February 4, 2015.
Where to Find Unique Images for Your Presentation Design.” SlideGenius, Inc. December 18, 2014. Accessed February 4, 2015.


Featured Image: Life of Pix

Tutorial: How to Use PowerPoint as a Photo Editor

Despite what others might think, PowerPoint remains to be a flexible tool. It may get a bad reputation from the “Death by PowerPoint” dilemma in board rooms, but like any other tool, correct use of PowerPoint lies on your ability to familiarize yourself with its different functions.

If you take the time to learn what you can, you’ll find space to explore your creativity.

In this regard, we thought it might be useful to discuss using PowerPoint for other purposes. Other than building slide decks, you can actually tap into the classic presentation software in plenty of ways, one of which is using PowerPoint as a photo editor.

If you don’t know your way around Photoshop yet, use PowerPoint to do basic photo editing and enhance images you want to use for your presentations.

For the purpose of this tutorial, we’ll be using PowerPoint 2010 to demonstrate the program’s various functions.

Here’s everything you need to know to get started:

The basic commands

To start using PowerPoint as a photo editor, we have to familiarize ourselves with the Format tab under Picture Tools. Insert the image you want to edit into a blank slide. Once you select that picture, this tab appears on your ribbon:

powerpoint photo editor 01
(Click for larger view)

From this tab, the most basic photo editing commands you’ll need to know are the following:

1.) Pictures Style – This entire group signified by the icons that fill most of the tab allows you to easily customize pictures with just a click. There are plenty of styles to choose from. You can choose to add different effects or borders, and even change the shape of your picture. The icon for Picture Layout allows you to convert your picture into a SmartArt graphic.

2.) Corrections – The sun icon on the left side of the tab allows you to edit a photo’s brightness and contrast. You can also choose to either sharpen or soften its focus.

3.) Color – Right beside the Corrections icon is where you can change the saturation and tone of your chosen picture. It also gives you the option to overlay different color filters to get the exact look you’re going for.

4.) Crop – On the right most part of the tab, you’ll find the Crop icon. Aside from using it to trim down your image to a particular size, you also have the choice to crop your image into a particular shape. All you have to do is click the arrow right below the Crop icon and choose Crop to Shape.

Adding captions to images

Something else that you might want to do is add text to your images. Adding captions is pretty straightforward on PowerPoint. All you have to do is use the TextBox as you usually would when building a PowerPoint slide. Click on the Insert tab and select the Text Box icon.

powerpoint photo editor 04

From there, you just have to create a TextBox anywhere you’d like on the picture and start typing your caption from there. To make the text stand out, you can add a background color by selecting Shape Fill. Adjusting the transparency of the box will often give you the best look.

powerpoint photo editor 05
(Original image from Death to the Stock Photo)

For this example, we set the Shape Fill effect at about 30% transparency. You can adjust this by selecting the Shape Fill icon and choosing More Fill Colors.

powerpoint photo editor 07

From here, it’s easy enough to adjust your TextBox to get the look that works best with the picture.

Saving your pictures

Once you’re happy with the edits you’ve made, you can go ahead and save your picture as its own file. All you have to do is right-click on your edited image and choose Save Picture As.

You can also save several objects as one picture. This will be useful if you added a text box for captioning. Hold the Shift key and select all the elements you want to include in a single picture. After that, all you have to do is right-click and choose Group. After that, you can finally save your picture as usual.

Creating a Polaroid effect 

Using these techniques, you can now edit your pictures easily. Practice your skills by trying your hand at creating a Polaroid effect on PowerPoint.

powerpoint photo editor 06

All you have to do is follow these steps:

1.) Select your image and crop it into a 1:1 ratio.
2.) Right above your cropped image, use the Shape tool to draw a rectangle.
3.) Select the rectangle and add a Shadow (Outer) effect through the Drawing Tools Format Tab. Once you get the drop-shadow, change the rectangle’s color to white and remove the shape outline.
4.) Select the rectangle again and right-click. Click on Send to Back and select Send Backward. From here, your cropped image will appear again.
5.) Adjust the picture to create the look of a Polaroid. Make sure you leave more space at the bottom when you’re moving the image around the rectangle.
6.) Finally, group the shape and the image together and save as instructed above.

As you can see, PowerPoint isn’t as stifling a tool as most people make it out to be. If you know how to get creative, you can use it as a photo editor and achieve unique designs. Explore and utilize its different functions to get the most out of this classic presentation software.


Featured Image: Death to the Stock Photo

A Presenter’s Guide to Building Audience Rapport

Presenting your audience with creative slides and well-structured content may not be enough to capture their attention for good.

Aside from compelling structure and design, presentations also rely on your ability to connect and communicate well. It’s not enough to know what to do and say, you also need to make sure that the audience is on board with what you’re presenting.

Here are a few things to consider when establishing audience rapport in presentations:

Stop thinking of the audience as a group of faceless individuals 

Presentations can be very difficult, and often require speakers to face large groups of people. Presentation trainer, Olivia Mitchell, explains how being in such situations can sometimes trigger a nervous reaction, particularly when we pressure ourselves to do well in front of others.

As such, we sometimes tend to view the audience as a hostile or indifferent group we need to face and overcome. This leads to the stress of presentation anxiety.

But as we’ve mentioned before, the people seated in front of you are interested to hear what you have to say. Be aware of each audience member’s unique viewpoint for you to relate your own ideas well.

Do your research to learn more about the people you’ll be presenting to and you’re guaranteed to feel less anxious and intimidated.

Don’t underestimate the power of eye contact

Can you imagine talking to a friend who can’t look you in the eye? Wouldn’t that feel suspicious? The same is true when delivering presentations.

As the presenter, it’s your job to make sure that the audience trusts what you say. If they don’t think you’re credible, they won’t listen to the message you’re trying to share. Maintaining eye contact is important in that regard.

This, of course, doesn’t mean that you have to look each and every person in the eye. That will be impossible to do, especially if you have a larger audience in front of you.

Just do your best to hold the gaze of particular individuals seated all over the venue. Most VIPs will be seated in the front row, but don’t limit yourself there.

Offer the same courtesy to those seated farther away from where you’re standing.

Get them thinking by asking rhetorical questions

Another secret to audience rapport is making sure that your audience feels included in your presentation.

With interactive media becoming more and more prevalent, people are looking to become part of an experience.

An easy way to do this is by asking a few rhetorical questions throughout your discussion. Andrew Dlugan, speech coach and founder of Six Minutes, suggests a few strategies when asking rhetorical questions.

This includes encouraging the audience to consider their position and think about the subject at hand.

Encourage interaction by involving them in the discussion

If you have time, take the previous tip one step further. Aside from asking rhetorical questions, you can also ask audience members specific questions that will allow them to play a more active role in the discussion.

Allot a few minutes to hear their answers. You can also use special interactive apps to receive their input straight from their own mobile devices.

Regardless of the method you choose, always incorporate audience answers and opinions as you move on with your discussion.

You’ll find that an inclusive performance wields a more nuanced and interesting discussion. To build stronger audience rapport, don’t forget to acknowledge the contributors by name as best as you can.

Establishing audience rapport doesn’t have to be a back-breaking task. For a presenter, it can be the quickest route to meet the goals you’ve set yourself. Keep these tips in mind to make sure your message is delivered successfully.


References

5 Presentation Tools to Encourage Audience Interaction.” SlideGenius, Inc.. January 12, 2015. Accessed January 23, 2015.
Dlugan, Andrew. “How to Use Rhetorical Questions in Your Speech.” Six Minutes. Accessed February 2, 2015.
How to Shake Off Your Pre-Presentation Jitters.” SlideGenius, Inc. November 6, 2014. Accessed February 2, 2015.
Mitchell, Olivia. “The Three Causes of Public Speaking Fear (and What You Can Do about Them).” Speaking about Presenting. Accessed February 2, 2015.


Featured Image: Startup Stock Photos

-->