Slidegenius, Inc.

PowerPoint Lesson: The Rule of Thirds in Slide Design

It seems like 3 really is a magic number—particularly when it comes to presentations. First, there’s the rule of threes. If you remember, we previously talked about how Steve Jobs and Tim Cook would masterfully structure their Apple keynotes into 3 main parts, making their discussions easier to understand. And now, there’s the rule of thirds. This will help ensure that your slides are both captivating and well-balanced.

What is the rule of thirds?

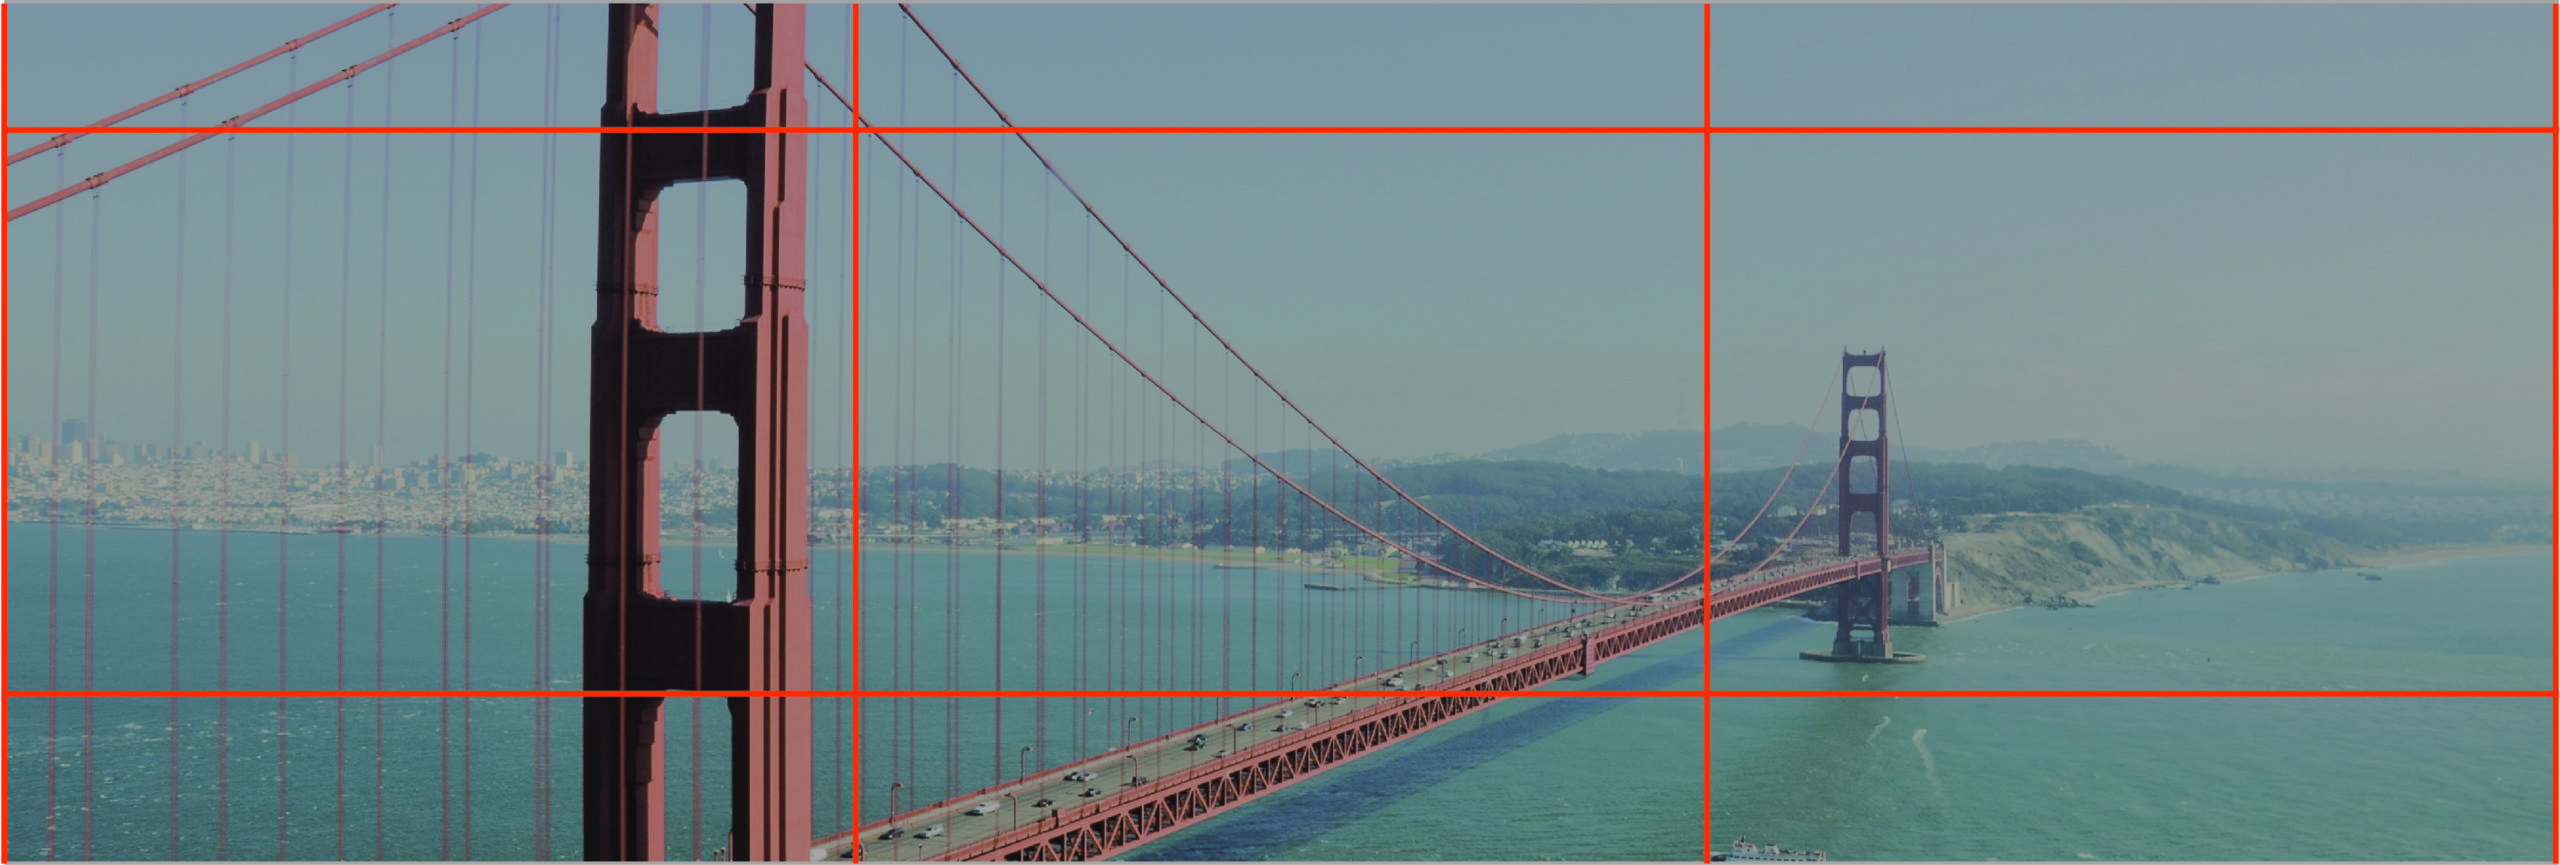
The rule of thirds is a basic guideline used in visual composition, most commonly associated with the field of photography.  Basically, it suggests that your canvas should be divided into thirds or 9 equal parts. The focal points of your design should then be placed along the lines or intersections that make up these parts.

rule of thirds picture sample
(Photo Source)

As you can see, the photo’s subject is perfectly aligned with the vertical line on the left side. The book and the hand that’s holding it in place are both on an intersection in the grid. (Quick fact—in technical terms, these intersections are referred to as “power points”!)

According to experts, using the rule of thirds will make your visual compositions a lot more interesting. David Peterson, a professional photographer, had this to say about why this technique works:

[If] your subject is in the middle of the image, it’s considered static. Your eye is drawn to it then has nowhere to go from there because the object is equal distance from all sides. Therefore when your subject is positioned closer to one of the edges, it forces your eye to follow it…to find it. This allows the viewer to linger on your image longer. It makes for a more captivating photo because it’s almost interactive. Like a conversation going on between the photo and you.

Of course, this isn’t only true for photography. The rule of thirds can also be a useful guide when designing presentation decks. As internationally acclaimed communication expert, Garr Reynolds puts it, “you will find that you can apply this guideline even to PowerPoint or Keynote visuals to give them a more symmetrical and professional look“.

Here are a few samples to illustrate:

rule of thirds powerpoint slide sample 01

You can see how the logo is placed in the upper left third of the slide, near an intersection. The main visual—picture of a tablet showcasing how the product works—is placed in the lower right third of the canvas, also near a “power point”.

rule of thirds powerpoint slide sample 02

In this slide, the focal point of this slide is placed in the left third of the canvas. Meanwhile, the accompanying text is in the lower right third.

rule of thirds powerpoint slide sample 03

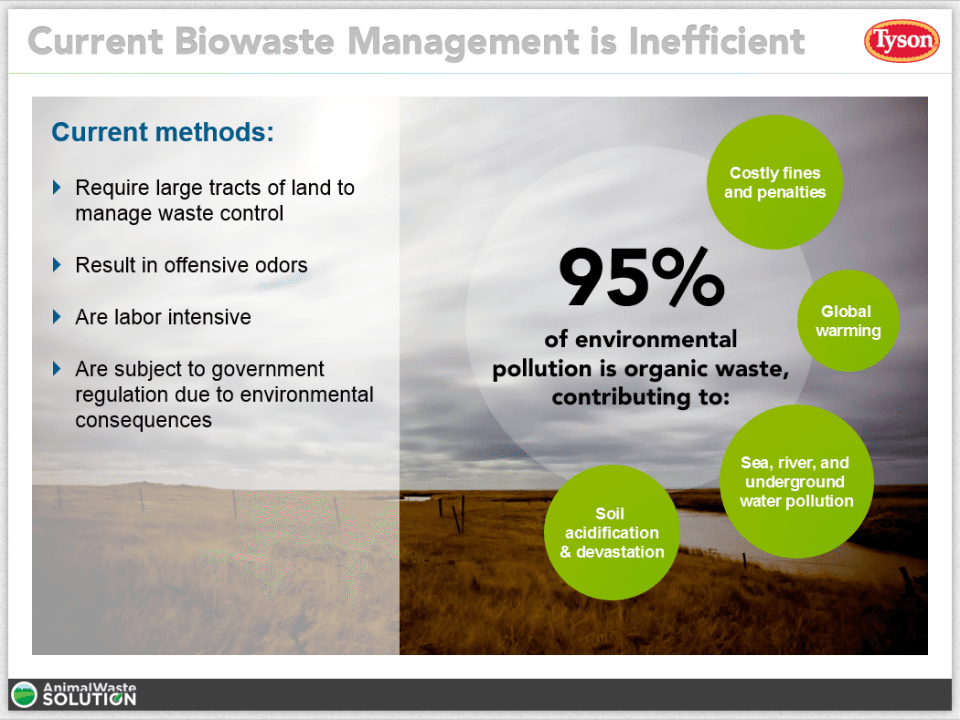
Here, the logo is near the upper left “power point”. This is balanced by how the brief text is aligned to the right, near the lower horizontal line. The way the background is composed also follows the rule of thirds. Notice how the corner where the road turns is near the lower left intersection.

How to use the rule of thirds in PowerPoint design

With all that said, here’s a quick tip that can help you apply the rule of thirds when working in PowerPoint. Some designers might be able to imagine where each guide line should go. For beginners, you can enable drawing guides to divide your slides easily.

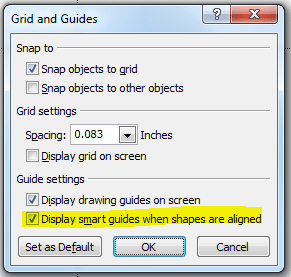
Right click on any area in the slide pane and choose Grids and Guides from the menu. When the dialogue box pops up, check the option for “Display drawing guides on screen”.

rule of thirds powerpoint steps 01

You’ll get two guidelines that intersect at the center of your slide. That means you’ll have to move them around to create 9 equal parts. Luckily, Gavin McMahon of makeapowerfulpoint.com already did the math. To create the guides, drag the horizontal line to 1.25 and the vertical line to 1.67. Repeat the step by holding down CTRL and dragging the lines to the opposite direction, placing them on the same coordinates. (For widescreen presentations, the horizontal guides should be placed on 0.92 for the 16:9 setting and 1.00 for 16:10.)

With these guide lines, you can easily see if your the layout and design of your slides are well-balanced and symmetrical. Try to play around with an old presentation and see how you can improve your designs with the rule of thirds.

Featured Image: From the SlideGenius portfolio

Design 101: Basic Principles for Your PowerPoint Designs

We’ve talked plenty about the different ways you can improve your PowerPoint designs. For marketers, the best tip is to make sure your slides perfectly highlight your brand.

There’s also the case for turning PowerPoint designs into highly visual experiences. Make your data digestible through unique charts and graphs, or illustrate difficult concepts with images and illustrations.

Before you can apply these different tips and techniques, you need a solid foundation to know where to start. Your PowerPoint designs will improve if you can understand and rationalize why each detail you include is necessary. In order to do that, we’ll need to go back to the basics.

To learn more about the core principles of design, let’s look at some slides from the SlideGenius portfolio.

Contrast

Differences add interest to your designs. When you put two opposing elements together, you’re able to highlight one element over the other. This is called contrast and you see it in every instance of visual design. Just take this website for example. The white background contrasts with the dark color of the text, allowing you to see and read it properly.

To add contrast to your PowerPoint designs, you need to create noticeable differences between two or more elements.

In this slide, we highlighted the client’s logo by placing a dark, textured background:

powerpoint designs - contrast color

You can also go beyond using contrasting colors. Aside from the bright green circles that stand out against the filtered background picture, we also made use of contrast in the text sizes.

powerpoint designs - contrast text

In order to emphasize the statistic presented in this slide, “95%” is in a larger font size than the rest of the text.

Alignment

It’s important for your audience to see that the elements in your PowerPoint designs weren’t randomly put together. They need to see that each item was carefully placed together to create a connection and narrative. The principle of alignment can help you with that.

Using the grid lines as a guide, look at how the company logo was aligned perfectly with the background image:

powerpoint designs - alignment

Following the “road map” theme, our designers used an open road as a background image. The company logo was then aligned precisely in the middle of the road. The fact that the logo’s geometric design resembles a compass adds to the overall “roadmap” theme.

Proximity

When the word “proximity” comes to mind, we think of how things are close together or far apart. In design, the principle of proximity is all about grouping together similar elements to create one cohesive visual unit.

Learn how you can apply the proximity principle to your PowerPoint designs with these examples:

powerpoint designs - proximity 1

powerpoint designs - proximity 2

Take note of how our PowerPoint designers grouped the different elements in these slides to create balance and harmony.

Repetition

It’s also important to look at your PowerPoint designs as a whole and not just individual slides. The principle of repetition allows you to create a unified overall design using the same elements throughout your PowerPoint deck. Stick with using the same fonts and colors throughout your presentation so that your audience can easily see a definite structure and a clear progression.

Here’s a quick sample:

powerpoint designs - repetition 1

powerpoint designs - repetition 2

powerpoint designs - repetition 3

You can easily see that these slides come from the same PowerPoint presentation because it maintains a similar template and color scheme throughout. The color green remains dominant in all three slides.

You can start creating great PowerPoint designs by learning the basics. After some practice and experimentation, you’ll see that these principles will become second nature.


Featured Image: Carol VanHook via Flickr

-->