Is it Okay to Apologize during Your Sales Presentation?

apologize

presentation

presentation ethics

Rick Enrico

SlideGenius

winning audience

Saying sorry has its pros and cons: it can win audience’s sympathy or lose your credibility.While there are unexpected events that may occur when giving your sales presentation, knowing the right time to say sorry makes a difference.

Why Apologize?

Apologizing isn’t a bad thing. In fact, people who acknowledge their mistakes are seen humble and down-to-earth.When things didn’t happen the way you planned it, apologizing may be your last resort to keep your clients interested in your pitch.However, it doesn’t apply in some occasions. Apologizing may stem from two reasons: you want to show your sincerity or you feel humiliated and you need to say sorry.Either which, you need to know how it can affect you positively and negatively.Just like crafting your PowerPoint deck, all the elements required for your subject goes through intensive planning to effectively get your message across on the big day.

When to Say Sorry

Addressing the crowd’s question – “What’s in it for me?” – is one of the goals which prevent you from disappointing them and wasting their time.Failing to meet their expectations may result in a huge problem, thus putting your credibility at stake.However, instances such as microphone malfunction, your laptop crashes, and outside noises are examples of technical difficulties that may arise at a time that you least expect it.Avoid this beforehand by familiarizing yourself with the venue and having backup plans that can help you survive.Apologizing can put your clients at ease and make them feel that you care about them.

Handle it Wisely

Facing the consequences due to lack of preparation is key to learning from your mistakes.Adjusting to the situation allows you to manage your response and focus on your objective – to encourage clients to take action.When your original plan didn’t work out, go to plan b. Remember that your audience has no idea about your presentation outline.You can still save your performance by changing your mindset and avoiding negativity.Nobody wants to be in an awkward presentation. So when inevitable circumstances happen, apologize gracefully, then proceed to your pitch.

Conclusion

Only you get to decide for yourself if you’ll be apologizing or not.All you need to do is be truthful to your audience and confident in delivering your message.Preparation is vital to achieving your client’s expectations and satisfying their needs.You may have found qualified prospects to listen to your pitch, but it’s not enough to gather sales.Letting them see that you’re professional and credible convinces them to purchase your product offering.Keep their interests in mind  and convince them to understand your pitch.This way, you won’t only win them over, you’ll also make them want to go back and listen.When you feel like apologizing to your clients, keep this in mind: just keep going.Back up your skills with a well-designed PowerPoint presentation by letting our team to assist and offer you a free quote

References

Dlugan, Andrew. “Should a Speaker Apologize to the Audience?” Six Minutes, February 1, 2008. Accessed November 2, 2015. http://sixminutes.dlugan.com/audience-apology-public-speakingFeatured Image: “apologize” by Jason Taellious on flickr.com

3 Bullet Point Alternatives that Will Improve Your Deck

bullet point

PowerPoint taboos

Powerpoint tips

presentation

Rick Enrico

SlideGenius

visual design

PowerPoint is one of the standard presentation tools of our time. It’s undergone plenty of changes and has come a long way since its inception.Throughout the course of innovation, some features have become outdated by the turnover of new design trends – this includes tacky transitions and flying word art. The bullet point stands as one of these features, taking its place beside Comic Sans in Jarek Wasielewski’s list of PowerPoint taboos on ClickMeeting.[sg-blog-modules module=two]The reason behind this is that bulleted lists are mistaken as a way of loading more text on a slide. Although they previously acted as a replacement for sentence chunks and long-winded paragraphs, bulleted slides tend to do the same thing and saturate its viewer with too much information.Relieving your audience of the information overload on your deck can help them process your points better.Avoid pushing your viewers’ limits with the bullet point, and opt for these timely alternatives:

1. Single-Text Slides

It may seem counterintuitive, but one of the solutions to the overflowing text of wild bullet points is also text.By this we mean, one word per slide, or at the most, a phrase. The less words on your slide, the more room you have to expound on your points, and the more opportunity you have to draw attention to yourself as the speaker.Your PowerPoint shouldn’t be a replacement for your stage presence, so don’t let it overshadow you. Only put in keywords that will serve as the takeaway for your further discussion. This also serves as consideration for your listeners, since people can only process so much information at a time, according to Psychology Today.Make sure your audience retains most of your presentation by giving them single-text slides that only highlight important parts of your pitch.

2. Powerful Images

Images can also have the same effect as keywords. In fact, they may even have a greater impact. Karla Gutierrez of SHIFT eLearning stated that majority of the population are visual learners, meaning they process visual information more than simple text or verbal instruction.Placing pictures related to your discussion instead of jotting down text in a bulleted list helps viewers associate your words and your slide with the emotions these images stir in them. Be creative in picking out the image you place on your deck. Consider basic graphic design principles to maximize the effect it will have on your audience.These principles include white space, color, and contrast to emphasize a crucial aspect of an image and evoke feelings in the viewer. Depending on how they’re used, these elements can have different effects on people. Play around with your visual design to get the reactions and attention you want from your listeners.[sg-blog-modules module=three]

3. Diagrams and Visual Data

Images are good for eliciting reactions from viewers, but if you want something that’s both informative and attractive, present visual data.These include diagrams, bars, graphs, and pie charts, which can make hard information easier to digest for an audience member who doesn’t want to get overwhelmed by the numbers.Don’t settle for bullets on your slides in presenting the figures. Visual data summarizes all those points neatly for you, giving you leeway to discuss the details.However, presenting information visually still requires some graphic design on your part. Use warmer and more attractive colors to draw eyes towards your information and help them focus on it.When it comes to diagrams and charts, labeling your data is essential. Don’t assume that your audience knows what the colors and lines stand for.Putting up something like a legend for the viewers’ reference can greatly help them understand the information you’re presenting.

The Takeaway: Drop the Bullet

There are many ways to design your deck. Avoiding a slide deck faux pas can mean something as simple as cutting back on bullet points and opting for more timely alternatives.Keeping a single keyword or phrase on your slides will help the audience remember these points better after your presentation. In the same way, putting images instead of words can help them associate the emotions created by the image with your speech.If your purpose is both to attract and inform, use diagrams to summarize numbers into neat visual treats for the eyes. Still having trouble choosing the right design? Contact our SlideGenius experts today for a free quote!Featured Image: “Success by Design: Negotiation Spread” by changeorder on flickr.com

How to Optimize and Embed Audio in PowerPoint 2013

audio

powerpoint 2013

powerpoint tutorial

presentation

Rick Enrico

SlideGenius

Adding audio to your PowerPoint presentation can bring your slides to life, whether you’re using background music, sound effects, or voiceovers. Optimizing and embedding audio files ensures smooth playback and a professional presentation experience. Here’s a step-by-step guide to optimizing and embedding audio in PowerPoint 2013.


1. Choose the Right Audio Format

To ensure that your audio plays smoothly during your presentation, it’s important to use the right file format. PowerPoint supports several audio formats, but MP3 is the most widely compatible.Why It’s Important:

  • Ensures Compatibility: MP3 files are supported across different devices and platforms.
  • Improves Playback: Optimized audio ensures smooth playback without lag or errors.

How to Do It:

  • Convert your audio files to MP3 format before embedding them into PowerPoint for the best compatibility.

2. Embed Audio in Your Presentation

Instead of linking to an external audio file, it’s better to embed the audio directly into your presentation. This ensures that the audio stays with your file and plays correctly, even if you share the presentation.Why It’s Important:

  • Ensures Audio Stays Linked: Embedding audio prevents issues where the file gets disconnected or lost.
  • Allows for Easy Sharing: Embedded audio travels with your PowerPoint file, making it easier to share.

How to Do It:

  • Go to the Insert tab in PowerPoint and click Audio.
  • Select Audio on My PC, navigate to your audio file, and click Insert.
  • The audio will now be embedded in your presentation, not linked.

3. Optimize Audio Settings

Once your audio is embedded, you can adjust the playback settings to ensure it plays exactly when and how you want.Why It’s Important:

  • Controls Timing: Optimizing settings allows you to control when the audio plays and how it behaves during your presentation.
  • Enhances Professionalism: Proper audio settings prevent awkward moments where the audio starts at the wrong time or overlaps with other elements.

How to Do It:

  • Select the audio icon and go to the Playback tab.
  • Choose whether you want the audio to start Automatically or On Click.
  • Use the Trim Audio tool to cut out unnecessary parts of the audio file.

4. Compress the Audio

Large audio files can make your PowerPoint presentation difficult to share or slow to load. Compressing the audio file helps reduce the overall size of your presentation without sacrificing too much quality.Why It’s Important:

  • Reduces File Size: Compression ensures that your presentation remains shareable and doesn’t take up too much storage space.
  • Improves Performance: A smaller file size means faster loading and smoother transitions.

How to Do It:

  • Select the File tab, click Info, and then click Compress Media.
  • Choose Internet Quality or Low Quality depending on your needs.

5. Test the Audio Before Presenting

Before delivering your presentation, it’s essential to test your audio on the device and environment where you’ll be presenting. This ensures there are no playback issues, especially if you’re presenting on a different system than your own.Why It’s Important:

  • Prevents Technical Issues: Testing ahead of time ensures smooth audio playback during your presentation.
  • Ensures Compatibility: Audio playback can sometimes behave differently on other systems, so testing prevents surprises.

How to Do It:

  • Play the entire presentation in Slide Show mode and make sure the audio starts and stops where you intended.
  • Test the audio’s volume level and clarity in the actual room where you’ll be presenting.

Final Thoughts

Embedding and optimizing audio in PowerPoint 2013 can add a dynamic layer to your presentation. By choosing the right file format, embedding the audio, adjusting playback settings, and compressing large files, you ensure a professional and smooth presentation experience. Don’t forget to test everything before your live presentation to avoid technical issues and ensure the audio enhances your message.

Converting Presentations into Videos in PowerPoint 2013

powerpoint 2013

powerpoint tutorial

presentation

Rick Enrico

SlideGenius

videos

videos in presentations

PowerPoint 2013 offers a built-in feature to convert your presentations into video files. This is particularly useful if you want to share your presentation in a format that can be viewed without PowerPoint or distributed via email, social media, or on websites. Turning your PowerPoint into a video helps retain animations, transitions, and narration, making it a great tool for training videos, webinars, and more.Here’s a step-by-step guide on how to convert your PowerPoint 2013 presentation into a video.

Step 1: Finalize Your Presentation

Before converting your PowerPoint presentation into a video, make sure everything is in place:

  • Check Slide Content: Ensure all slides are complete with the correct text, images, charts, and other elements.
  • Verify Animations and Transitions: Review your animations and transitions to ensure they flow as intended in the video.
  • Add Narration and Timings (Optional): If you want to include narration or specific timings for each slide, make sure to add them before starting the conversion.

How to Add Narration and Timings:

  1. Go to the “Slide Show” tab in PowerPoint.
  2. Click on “Record Slide Show” and choose “Start Recording from Beginning”.
  3. Record your voice narration and adjust the timing of each slide transition.
  4. Once done, PowerPoint will save the narration and timing with the slides.

Step 2: Save the Presentation as a Video

Once your presentation is finalized, you can start the conversion process.

Step-by-Step Process:

  1. Click the “File” Tab: Go to the upper left corner of the screen and click on the “File” tab.
  2. Choose “Export”: From the menu on the left, select “Export”.
  3. Select “Create a Video”: In the Export options, choose “Create a Video”.
  4. Set the Video Quality:
    • Choose the quality you want for your video from the “Create a Video” options. There are three quality settings:
      • Computer & HD Displays: Highest quality (1080p), best for large screens.
      • Internet & DVD: Medium quality (720p), ideal for sharing online or on DVDs.
      • Portable Devices: Lower quality (480p), good for mobile devices with limited storage.
  5. Set Timings and Narration:
    • If you recorded narration or timings, PowerPoint will automatically include them. Ensure that the “Use Recorded Timings and Narrations” option is selected.
    • If you didn’t record timings, you can set the duration for each slide manually by selecting “Don’t Use Recorded Timings and Narrations” and entering the number of seconds for each slide in the Seconds spent on each slide box.
  6. Click “Create Video”: After selecting the appropriate settings, click the “Create Video” button.

Step 3: Save and Export the Video

  1. Choose File Destination: After clicking “Create Video”, PowerPoint will prompt you to choose a location to save your video file. Browse to your desired folder and name the file.
  2. Select File Format: PowerPoint will automatically save the video as an MP4 file, which is the most common format. You can also choose Windows Media Video (WMV) if needed.
  3. Click “Save”: After choosing the file name and location, click “Save”. PowerPoint will begin converting your presentation into a video.

Step 4: Wait for the Conversion

Depending on the size and complexity of your presentation, it may take a few minutes for PowerPoint to convert your file. You can monitor the progress at the bottom of the screen. Once the conversion is complete, your video will be saved in the location you specified.

Step 5: Play and Share Your Video

After the video is created, you can play it in any media player that supports the MP4 (or WMV) format. You can also share it via email, social media platforms, or upload it to video-sharing sites like YouTube.

Additional Sharing Tips:

  • Upload to YouTube or Vimeo: If your presentation is meant for a wide audience, consider uploading it to video platforms like YouTube or Vimeo. These platforms make it easy to share your video via a link or embed it in websites.
  • Email or Share via Cloud: For smaller audiences, share the video via email or use cloud services like Google Drive, Dropbox, or OneDrive.

Tips for a Smooth Video Conversion

  1. Keep the File Size Manageable: High-quality videos can result in large file sizes, especially for lengthy presentations. If file size is a concern, consider lowering the resolution or compressing the video after exporting.
  2. Test Before Sharing: Always review the video after conversion to ensure all animations, transitions, and narrations are functioning properly.
  3. Optimize for Mobile: If you anticipate that your audience will view the video on mobile devices, use the Portable Devices (480p) setting for a lower resolution and smaller file size.

Conclusion

Converting your PowerPoint 2013 presentation into a video is an excellent way to share your presentation widely and ensure that viewers can access it without needing PowerPoint software. By following these steps, you can create a professional-quality video that retains all the animations, transitions, and narrations from your original presentation. This capability is perfect for webinars, online tutorials, and business presentations that need to be accessible on multiple platforms.

Recover Your Unsaved File in PowerPoint 2013

powerpoint 2013

powerpoint tutorial

presentation

recover

Rick Enrico

SlideGenius

unsaved file

Losing your work due to an unsaved PowerPoint file can be incredibly frustrating, especially if you’ve spent hours perfecting your presentation. Fortunately, PowerPoint 2013 provides several options to help you recover unsaved files so you can avoid starting from scratch.Here’s how to recover an unsaved file in PowerPoint 2013:


1. Check for AutoRecover Files

PowerPoint 2013 includes a built-in AutoRecover feature that automatically saves your work at set intervals. If your PowerPoint crashed or was accidentally closed before you could save, AutoRecover may have stored a temporary version of your file.How to Do It:

  • Open PowerPoint and go to the File tab.
  • Select Info and then click on Manage Versions.
  • From there, choose Recover Unsaved Presentations.
  • A list of unsaved presentations will appear. Select the file you were working on, and PowerPoint will open it.

Example: If your computer shuts down unexpectedly, you can use AutoRecover to restore the file to the last autosaved version.


2. Use the Document Recovery Pane

If PowerPoint 2013 crashed, it may automatically open the Document Recovery Pane the next time you launch the program. This pane lists any unsaved files that PowerPoint can attempt to recover.How to Do It:

  • When PowerPoint opens after a crash, check the Document Recovery Pane on the left side of the screen.
  • Click on the file you want to recover. PowerPoint will open the last autosaved version.
  • Save the recovered file to ensure it isn’t lost again.

Example: After a program crash, PowerPoint automatically opens the Document Recovery Pane, showing you a list of recent unsaved files that can be restored.


3. Look for Temporary Files

If the AutoRecover feature isn’t available, you may still be able to recover your unsaved file from temporary files that PowerPoint creates.How to Do It:

  • Navigate to C:Users[Your Username]AppDataLocalMicrosoftOfficeUnsavedFiles on your computer.
  • Look for a file with the .tmp extension that matches the time and date you were working on your presentation.
  • Rename the file to have a .pptx extension and open it in PowerPoint.

Example: If you forgot to save a presentation and PowerPoint didn’t crash, the unsaved temporary file may still be stored in the AppData folder.


4. Check the Recycle Bin

If you accidentally deleted a PowerPoint file or saved over an existing file, check your computer’s Recycle Bin. You may be able to recover the deleted version of the file from there.How to Do It:

  • Open the Recycle Bin on your desktop.
  • Search for the PowerPoint file you accidentally deleted.
  • Right-click the file and select Restore to return it to its original location.

Example: If you accidentally deleted a PowerPoint file while cleaning up your desktop, you can restore it from the Recycle Bin.


5. Recover Older Versions of a File

If you saved a PowerPoint file but later realized you made a mistake or saved over the wrong version, you may be able to recover an older version of the file.How to Do It:

  • Right-click the file in File Explorer.
  • Select Restore Previous Versions.
  • A list of previous versions saved by Windows Backup or File History will appear. Choose the version you want to recover.

Example: If you made significant changes to a presentation but want to revert to an earlier version, you can restore a previous version using this method.


Final Thoughts

Losing an unsaved PowerPoint file can be stressful, but with PowerPoint 2013’s built-in AutoRecover features and the ability to restore files from temporary or older versions, you have several methods for recovering your work. By following these steps, you can quickly recover unsaved files and avoid losing hours of hard work.

How Does Fidgeting Affect Your Professional Presentation?

bad habit

body language

fidgeting

nonverbal clues

preparation

presentation

presentation tips

Rick Enrico

SlideGenius

Good posture is essential in public speaking because it allows you to project confidence. Slouching, swaying, and moving restlessly will only make you look nervous and unprepared.Projecting yourself professionally involves cutting off bad habits like fidgeting. If you aren’t aware of how it can affect your performance, you’ll end up distracting and disappointing your audience.Fidgeting is a display of constant movements that disturb others. In her book, How to Talk to Anyone: 92 Little Tricks for Big Success in Relationships, internationally acclaimed communications expert and motivational speaker Leil Lowndes advises presenters to avoid committing the behavior: “Whenever your conversation really counts, let your nose itch, your ear tingle, or your foot prickle. Do not fidget, twitch, wiggle, squirm, or scratch.”Fiddling with your notes, playing with your hands, loosening your collar, and gripping the lectern’s corners are only a few examples of this behavior.Presenters subconsciously fidget when they’re experiencing performance anxiety or stage fright, which trigger stress hormones. Here are a few tips to cut off the bad habit and ace your professional presentation:

Observe Yourself

According to public speaking coach Jacki Rose, body language makes up the biggest part of successful communication. As you rehearse, consider recording yourself to observe how you behave during your pitch. It doesn’t only help you identify what you need to improve on; it also lets you pinpoint what needs to be removed, including unnecessary movements.Ask your peers to watch you and let them give feedback afterward. Do this several times and review what causes you to commit the same habit. Is it because of technical problems? Did someone from your listeners distract you?Once you recognize what prompted this act, use your positive habits to counter the negative ones and emphasize your ideas. If tapping your foot on the ground is one of those good habits, start stepping forward when explaining a certain point.

Take Time to Relax

You might think this is common for presenters, but it’s not.Reminding yourself to relax releases tension and lets you focus on what you need to accomplish. If speaking in front of a large crowd makes you fidget, develop positive self-talk and feed yourself with encouraging thoughts.Worrying won’t help. Believing in yourself improves your confidence, allowing you to maintain a positive outlook while speaking in public. Never allow fear to overpower your self-esteem. Calm your nerves by breathing deeply to soothe anxiety. With deliberate practice, you can improve your strengths and slowly overcome your weaknesses.

Be Well-Prepared

Whether you’re a skilled veteran or a novice, preparation is still vital for your success. Delivery is more important than well-prepared visuals in achieving an effective presentation.Preparation involves training yourself. In this case, you’re training to catch yourself fidgeting or projecting unnecessary gestures. Stand in front of a mirror to give you an idea of how you look while presenting.Once you’re ready, you’ll be more confident to speak and convince your audience to listen.

Stop Fidgeting

You won’t be able to overcome negative behavior without figuring out what causes bad mannerisms. Having a positive mindset will help you move toward achieving self-confidence.Remember, your audience doesn’t only rely on your presentation’s content. Nonverbal cues also contribute in interpreting your message clearly. Break bad habits by observing yourself, calming your nerves, and being well-equipped to prevent any distractions that can ruin your performance and delay your success.Resist the temptation to start fidgeting and notice how it makes you a better presenter.Back up your skills with a well-designed PowerPoint presentation by letting our team to assist and offer you a free quote!

References

Lowndes, Leil. How to Talk to Anyone: 92 Little Tricks for Big Success in Relationships. Chicago, IL: Contemporary Books, 2003.Rose, Jacki. “Body Language – stop your nervous fidgeting!” Public Speaking Can Be Fun, January 8, 2007. www.publicspeakingcanbefun.blogspot.com/2007/01/body-language-stop-your-nervous.html

2 Easy Ways to Avoid Missing Fonts in PowerPoint 2013

custom fonts

fonts

powerpoint slides

presentation

Rick Enrico

SlideGenius

Launching a presentation that fails to display your font choices can be disappointing. Not only can this scenario be completely avoided with a few simple checks, but it’s also a waste of time invested in picking a set of fonts that match your pitch.The problem happens when the fonts you used are unavailable on the computer you’re using for your presentation. Here are two easy ways to help you display custom fonts in your deck:

I. Embed Fonts

Embed fonts in PowerPoint first to guarantee font compatibility when transferring your deck to another computer. Follow these steps so that your fonts won’t go missing during a presentation:1. Click the File tab on the ribbon. You’ll be taken to the Backstage view.2. Click on Options at the bottom of the vertical ribbon.3. A window called PowerPoint Options will appear. Click on Save in the left column.4. Scroll down further and check the box for Embed fonts in the file under the heading that says Preserve fidelity when sharing this presentation.5. Select Embed only the characters used in the presentation (best for reducing file size).6. Click OK.Your custom fonts should now be embedded within the presentation. This method eliminates the need of having to install your custom fonts to every computer that will view the presentation.

II. Save as PDF

When you’re pressed for time, saving your presentation as PDF is also a great alternative. It’s ideal for maintaining the appearance of fixed slide layout and fonts. However, this format will be unable to play animations, so do take note if your pitch needs to be viewed with dynamic animation.1. Click on the File tab, select Export, then choose Create PDF/XPS Document.2. Click on Create PDF/XPS.3. A confirmation window will appear. Put a check next to Open file after publishing, below Save as type.4. Enable Standard (publishing online and printing).5. Give a file name for your presentation, then click Publish in the lower right corner.

Have a Backup Plan

Using great font combinations for your PowerPoint slides can give your presentation maximum readability. There’s also the added bonus of making your deck stand out from a sea of boring, default font types with a custom font unique to your presentation.That’s why instances like missing fonts and changes in font formats may put a dent on your well-designed deck. This doesn’t have to happen. Embed your fonts within PowerPoint 2013 to ensure that your custom fonts appear exactly as you want them to during your pitch. You also have the option to save your file as a PDF when you’re in a pinch. Although you’ll preserve the appearance of your slides, a PDF file can’t play any animations that you’ve set in each slide.Choose among these two easy options so that your fonts won’t disappear when you have a big presentation coming up.

References

“How to embed fonts in PowerPoint.” Microsoft. n.d. www.support.microsoft.com/en-us/kb/826832“Troubleshoot font problems.” PPTools. n.d. www.pptfaq.com/FAQ00402_Troubleshoot_font_problems.htm

Using Laser Pointers for Effective PowerPoint Presentations

body language

laser pointer

presentation

presentation tip

Rick Enrico

SlideGenius

How often do you use a laser pointer to highlight a key point on your slide? Though they’re useful tools for your presentation, laser pens or pointers can unintentionally distract audiences from focusing on your topic. This may happen when you’re overly focused on highlighting a certain point on your deck instead of explaining each idea clearly from your pitch.While they can help you emphasize a particular idea projected onscreen, they can also keep you from actively engaging your listeners. How? Pointing out something on your slides forces you to look at it rather than establishing an eye contact with your audience. If done frequently, it might prevent you from moving closer to the crowd and interacting with them.

To Use or Not to Use?

Pointing at data or objects on the slide with a laser pointer easily attracts attention. This is because the human eye is more sensitive to things in motion rather than still ones. That said, a gleaming and clear dot can be easily detected by our eyes, causing others to pay attention to the detail being pointed out.However, there are speakers who subconsciously wave it around the room. The reason might be forgetting to turn it off while trying to expound on facts and arguments. Other presenters can also mistakenly point it at their audience. This is why in-depth practice is needed to avoid such incidents. When preparing for the big day, make sure to rehearse your pitch together with your slides to give you an idea when to use the laser pointer when delivering your message.Whether caused by nervousness or unsteady hands, these actions negatively impact your presentation. Instead of drawing your audience to your performance and directing them to pay attention to your slides, they might get disturbed and distracted. This, in turn, will keep them from getting the intended message and understanding your point.This is why you need to be careful in handling this tool to avoid losing their interest.

What Should You Do?

You may be asking if a mere pointing device can really improve and strengthen your pitch. However, the answer may depend more on how you convey your message.With or without a laser pointer, an engaging and dynamic approach keeps your audience in tune with your discussion. However, in this post, we’ll focus on how its usage makes an effective pitch.Indeed, there are speakers who use laser pointers to read text or encircle an object on the slide. This can work well if you’re speaking in front of a few people. Take note that these shouldn’t be abused and overdone to avoid turning off your listeners.Aside from crafting a well-designed deck that summarizes your main points, here are a few tips on how you can amplify your performance with laser pointers:

1. Choose your words wisely

If you’re trying to put emphasis on a particular point, make sure not to state the obvious. Instead of uttering phrases like “This one,” start saying “The image shows” to describe the object displayed on your slide. Aside from displaying professionalism by not stating something that can be seen by the audience, it’s also beneficial to some members who find hard to see the laser pointer.Doing so also gives you the impression that you’re well-prepared and experienced in terms of speaking appropriate words that show respect to your listeners. If they notice that you’ve given much effort in it, they’re more likely to listen and focus on what you’re saying.

2. Maximize your body movement

If your topic requires a dynamic approach, then feel free to move and maximize your body language. Whether you’re emphasizing a certain key point or describing something that requires exaggerated movements, do so to support and complement the object of discussion. However, it doesn’t mean that you can use whatever movements or gestures you desire to show without considering if it’ll help strengthen what you’re trying to convey.Also, make sure to turn off the laser pen when doing so to avoid pointing it towards the audience.

3. Learn to pause

If you know your topic by heart, you’ll be aware of when to stop and proceed. If you want your audience to recall an important idea, you’ll give them enough time to absorb your message by learning the art of pausing. This can be mastered through deliberate practice and preparation before your actual performance. Before you speak in front, go back to your script, pinpoint those statements that need emphasis, and mark them to guide you when to pause.You can also record yourself when rehearsing. This will help you pace your speech and match the right words with appropriate body movements.

To Sum It Up: Don’t Overuse Your Point

Whether you’ll be using a laser pointer or not, you still need a well-designed and animated PowerPoint deck to complement your message. Select the right words, maximize your body language, and learn to pause when using a laser pointer to help you deliver more interesting and impactful PowerPoint presentations.Consider using pointers as a way to highlight elements in your slide deck for a focused presentation. Never allow your laser pointers to control you. Instead, control them to aim for your purpose.Our PowerPoint professionals can assist and offer you a free quote to produce well-crafted PowerPoint decks.

Check out and share our infographic!

References

“Effective Presentations with Laser Pointers.” Colblindor. May 22, 2006. www.color-blindness.com/2006/05/22/effective-presentations-with-laser-pointers“Presentation Myths: I Need a Laser Pointer.” The Singular Scientist. July 21, 2013. www.womeninwetlands.blogspot.com/2013/07/presentation-myths-i-need-laser-pointer.html

How to Handle 4 Different Personality Types of Customers

buying expectations

personality types

presentation

Rick Enrico

sales presentation

SlideGenius

Successfully managing customer interactions requires understanding different personality types and adjusting your approach accordingly. Each customer type responds to different communication styles, and recognizing their preferences can help improve your customer service and sales efforts. Here’s how to handle four common customer personality types: Analytical, Driver, Expressive, and Amiable.


1. The Analytical Customer

Analytical customers are detail-oriented and tend to make decisions based on logic and facts. They prefer clear, well-researched information and may ask a lot of questions before committing.Why It’s Important:

  • Builds Trust: Providing thorough information helps build credibility with this customer type.
  • Reduces Friction: The more data you can provide, the more comfortable and confident they will feel in their decision.

How to Handle It:

  • Be prepared to provide detailed information, backed up by data, statistics, or research.
  • Avoid emotional appeals—stick to the facts and focus on delivering clear, concise answers to their questions.

2. The Driver Customer

Drivers are goal-oriented, assertive, and often want quick, efficient interactions. They value results and don’t have much patience for lengthy explanations or small talk.Why It’s Important:

  • Keeps the Conversation Focused: Drivers appreciate when their time is respected, so it’s important to stay on track and deliver quick solutions.
  • Improves Efficiency: Drivers are often decisive, so keeping the conversation brief and to the point can lead to faster decisions.

How to Handle It:

  • Get straight to the point and focus on results. Present clear solutions and avoid unnecessary details.
  • Highlight how your product or service will solve their problem or meet their goals, and be ready to close the sale quickly.

3. The Expressive Customer

Expressive customers are enthusiastic, social, and driven by emotions. They enjoy engaging in conversation, building relationships, and are more likely to make decisions based on how something makes them feel.Why It’s Important:

  • Builds Rapport: Expressive customers respond well to personal connections, so establishing a positive relationship can lead to a sale.
  • Increases Engagement: Showing enthusiasm and matching their energy can keep them interested and excited about your product or service.

How to Handle It:

  • Engage in conversation and be personable. Ask about their needs, and take time to build rapport.
  • Use emotion in your pitch—express excitement about your product and share customer stories or testimonials to connect with their feelings.

4. The Amiable Customer

Amiable customers are friendly, cooperative, and tend to avoid confrontation. They prefer consensus and often seek reassurance before making a decision.Why It’s Important:

  • Creates a Comfort Zone: Amiable customers need to feel safe and supported throughout the decision-making process.
  • Encourages Loyalty: Once you’ve gained their trust, they are likely to remain loyal customers.

How to Handle It:

  • Be patient and supportive, and avoid pressuring them into a decision.
  • Provide plenty of reassurance through testimonials, reviews, or guarantees to help them feel confident in their choice.

Final Thoughts

Understanding how to handle different customer personality types is essential for providing excellent service and closing more sales. By recognizing the traits of Analytical, Driver, Expressive, and Amiable customers, you can tailor your approach to meet their needs, build stronger relationships, and create a more personalized customer experience.

Prepare Your Defenses: Battling Noise in Sales Presentations

business presentation

combat noise

powerpoint slides

presentation

presentation tips

public speaking

Rick Enrico

sales presentations

SlideGenius

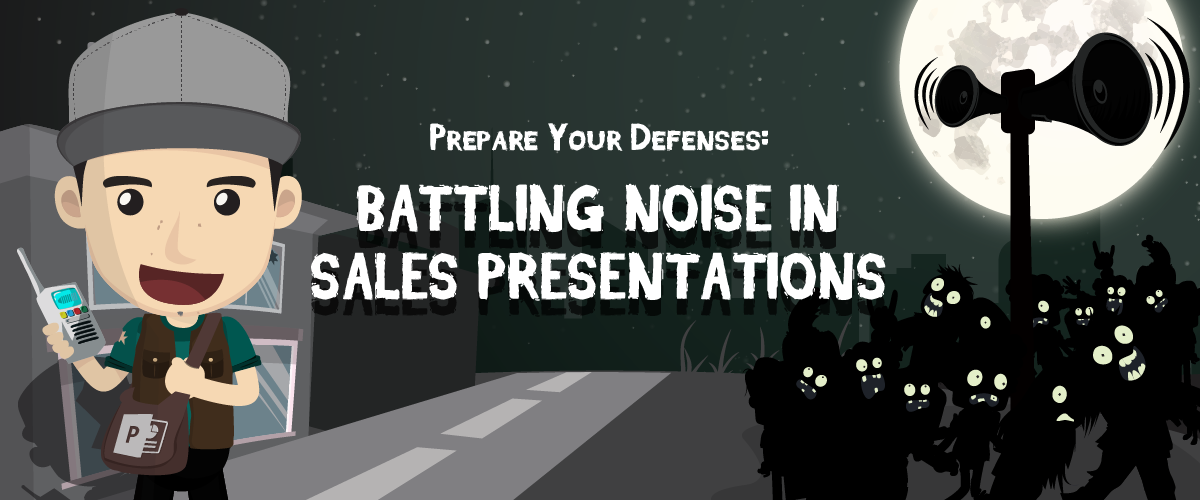
As we’ve seen in stories, zombies are drawn to loud noises. This lets them swarm you and prevent you from reaching whatever goal you have set. Applying this in our line of work as presenters, there’s no better way to infect the audience with zombie-like expressions than letting noise interfere with your own pitch.It’s impossible to get your message across if the crowd can’t hear you properly, but this isn’t limited to sounds that your audience can hear. Noise can also come in the form of unnecessary interruptions that get in the way of your business presentation. Technical glitches, distracting colors, inappropriate pictures, unreadable fonts, even a malfunctioning air conditioner can all count as noise.Simply put, anything that makes your listeners uncomfortable is a potential hazard. These can prevent you from convincing them to invest in your proposal, which means lost partners and potential profits. Fortunately, there are two types of noise and three ways to immunize your clients from it.In a post written on Public Speaking Tips, professional speaker and author, Lenny Laskowski, states that noise comes in two forms: external and internal.

External Noise

The first type may come from your surroundings, disrupting effective communication with your listeners. An unsilenced phone going off, a tall person blocking the view of another behind him, or an unexpected update notification flashing in the middle of your presentation can get in the way of delivering a successful performance.Parts of your audio-visual aid might even unintentionally distract your audience. For example, if the speaker volume isn’t high enough, any narration that might be embedded won’t be heard. The same thing applies to your visuals if the screen is too bright or too dark.Using colors can also be a distraction. If the setting or topic requires formality, using bright colors isn’t ideal to complement a formal presentation. The same goes for times when you need to put on an energetic personality and fire up your audience but end up using dark colors in your slides.The venue itself is also a factor. If it’s too hot, too dark, or uncomfortable because there aren’t enough seats, people may have trouble listening to you. That’s why you should always check out the area beforehand.

Internal Noise

The second type, internal distractions, are worse because these come from within and may include your own negative thoughts and feelings.You might be emotionally distracted by being too enthusiastic or possibly tired, which can affect the energy you have for your presentation. A lack of energy or sounding too serious can give the impression that you just want to get your speech over with. It may be fine to sound enthusiastic, but too much of it, like in an investor’s presentation, might make you sound too biased if you make promises without backing them up with hard facts. Alternatively, if you become too serious in an event that needs a more casual and friendly setting, this can send the wrong impression to your clients and infect them with that same lack of interest.On the other hand, the audience might also be biased or have misgivings about your topic, especially if you present any new unproven products that have yet to enter the market. While skepticism may be unavoidable, you need to prepare for possible contrasting opinions during your Q&A section if you have one.Here are three things to consider when combatting both types of noise to safeguard your presentation’s success:

1. Detect the Source of Noise

Damon Verial, a professional writer and contributor for various Web sites, including eHow, tackles the importance of finding the source of noise. He explains that depending on the importance of the situation, noise should be eliminated through various means.Careful preparation is what helps you avoid unwanted interruptions, but despite your best efforts, some unexpected circumstances are still hard to prepare for. For example, your laptop might randomly shut off, or your slides could suddenly freeze while presenting. In times like these, you need to have backup devices that have copies of your presentation, if possible, so you can pick up where you left off immediately.Before striking back, identify the root of the problem to find an immediate solution. Was it lack of preparation that disgruntled you? Or was it a problem with the venue that disturbed your presentation? The former can be taken as a lesson for what to prepare for next time. The latter can be resolved with some help. In this case, ask for the organizer’s help to take control of the situation and minimize any disruptions.For technical problems, politely ask the coordinator to help you fix any issues so you can continue your presentation. This will help you handle the situation and put everything in place. Lighting problems, sound systems, microphones, and even power cables are things that they should be ready for.

2. Sharpen Your Listening Skills

Your job isn’t limited to speaking; listening is also vital to dealing with your audience. With the end goal of delivering a message, improving your listening skills is an essential part of the process. You need to know what concerns your clients will have when you bring your proposal to the table. These aren’t limited to prices. Timelines, implementation costs, and possible benefits are also factors to determining how feasible your proposal can be.However, passive listening isn’t enough. To be an effective listener, actively seek out and attend to people’s concerns. This lets you better understand what they mean when they ask questions about your topic. After all, noise works both ways too: you need to ask for clarifications if clients voice out their concerns in order to prevent any misunderstanding and give appropriate responses.By being an attentive listener, you get to answer in a constructive and engaging manner while showing your audience respect. This gives the impression that you genuinely want to know what others need, as opposed to simply pushing your products out and hoping someone will be willing to invest in them.Aside from convincing them to voice out their opinions, give your viewers a chance to help you clarify anything that needs to be addressed. This prevents any possible misunderstandings that can divert their attention.

3. Harness the Power of Repetition

Never underestimate the power of repetition when combatting unwanted noise. People remembering your pitch after it’s over can make the difference between success and failure. If your prospects remember what you want them to, and you give them the means to contact you afterwards, you’re halfway to converting more leads to sales.Simply having excellent speaking skills isn’t enough. You also want your listeners to remember the best parts of your performance. That’s why audience recall is important in any presentation. Keep your points simple enough to repeat them for emphasis but not so much that you endlessly reiterate each one. Are there aspects of your proposal that you can reduce into one to three words? Use these to reinforce your speech and support your facts so that the audience will remember exactly what you stand for.A simple way to improve recall is to repeat your main points during vital breaks or at the end of your pitch. This highlights important takeaways for the audience, emphasizing your thoughts and stressing relevant information for your listeners to make your pitch memorable.Done right, it makes your pitch sound more entertaining and convincing.

The Takeaway: Always Stay Alert

Always anticipate an onslaught of diversions. These can come from the venue, your equipment, your slides, or even yourself or the audience. Consider the appropriate tools to use and have backups in place when technical breakdowns happen. It won’t hurt to coordinate with your organizers for any contingencies you can use in worst-case scenarios, too. This lets you stay focused to avoid further distracting your listeners.Instead of immediately going on the offensive, strengthen your defenses against disturbing noises that can ruin your performance. At the same time, maintain a solid feedback line for communicating with your audience. They may not always understand you, but if you take efforts to understand their side of things, you’ll be able to find out exactly what causes the noise on their end. You’ll also come across as someone who wants to build better business partnerships with other people rather than a typical salesman who simply talks about their own products without considering if it’s the right fit for his customers.Don’t let negative thoughts or circumstances overwhelm you. Combat them by detecting the unnecessary noise, enhancing your listening skills, and reiterating your ideas to make sure everyone gets the point. Once you’ve got unnecessary noise under control, you’ll have the audience focusing on the most important things: the benefits that you can give them, and why they should choose you over the competition. This’ll prevent spreading blank stares to the audience and help you convert more leads for your business.

References:

Laskowski, Lenny. “Aspect 6 – The Noise.” Public Speaking Tips, May 22, 2015. www.ljlseminars.blogspot.comVerial, Damon. “How to Overcome Noise Barriers in Communication.” eHow, n.d. www.ehow.com/how_8031308_overcome-noise-barriers-communication.html