Slidegenius, Inc.

How To Use Your Brand’s Custom Fonts in PowerPoint Design

Custom fonts evoke emotions, making them an essential tool for defining your brand. Some fonts may portray traditional aesthetics, others a modern taste and can even give communicate grace and elegance. Brands strategically utilize fonts to help visually define their overall identity. Considering fonts can express a distinct “personality” it’s important to choose one that fits well with the brand and message you want to convey.

Often you are conveying your brand message through presentations internally, to customers, or even to potential investors so it is important to consistently use your brand’s font across all platforms. Employing your custom font in your presentations can help revitalize your design and define your brand’s aesthetics through your PowerPoint presentation. 

Using Custom Fonts in PowerPoint 

In order to use your brand’s custom font in your presentation, you’ll need to install it on your computer. Go to Control Panel > Fonts, then drag-and-drop or copy-and-paste the fonts into the Fonts Manager. Make sure the files are unzipped before you do. 

Avoiding Your Custom Font Being Replaced When Shared

When you use custom fonts, there’s a possibility that PowerPoint will replace them if you share the deck with others. To avoid this try embedding the font in the presentation. PowerPoint allows this as long as the font file type is TTF or OTF. All you have to do is to click File > Option > Save, and then check the box that says, “Embed fonts in this file.” 

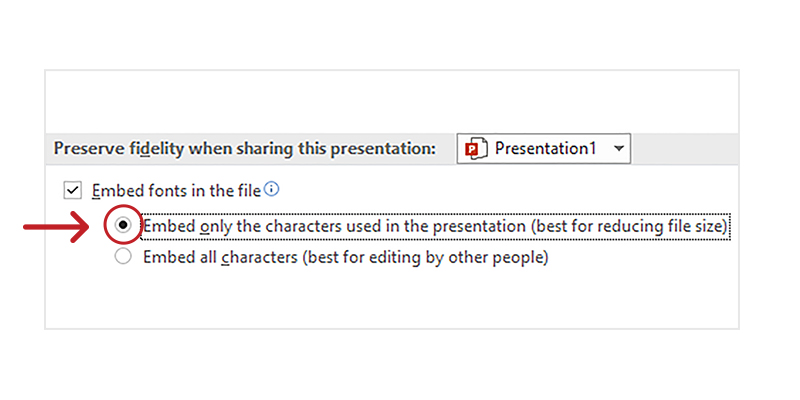
Keep in mind that this will likely increase your file size, so choose “Embed only the character used in the presentation” if you need to be wary of your file size. 

You can also share the font file itself when you’re sending the deck to others that need to edit your deck. PowerPoint will replace custom fonts with standards ones if you don’t embed the custom font, so this can be a great way to ensure your coworkers are also using the custom font and keeping your brand consistent. Keep your custom font file in an easy-to-find location for when you need to send it out.
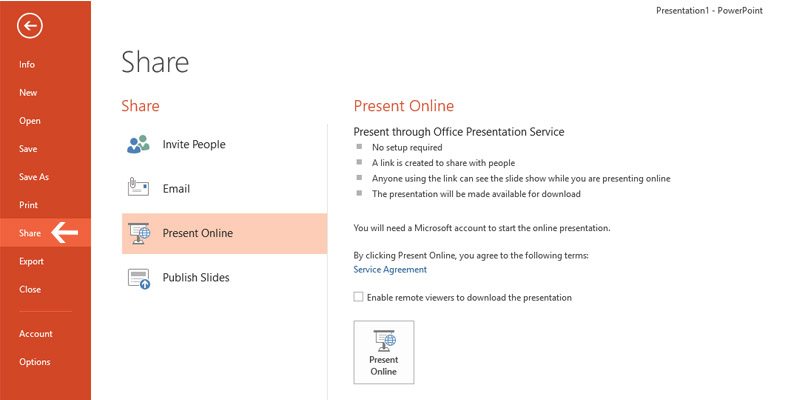
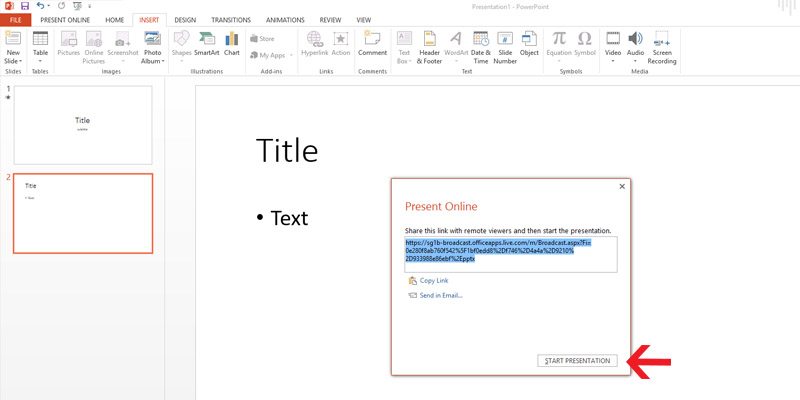
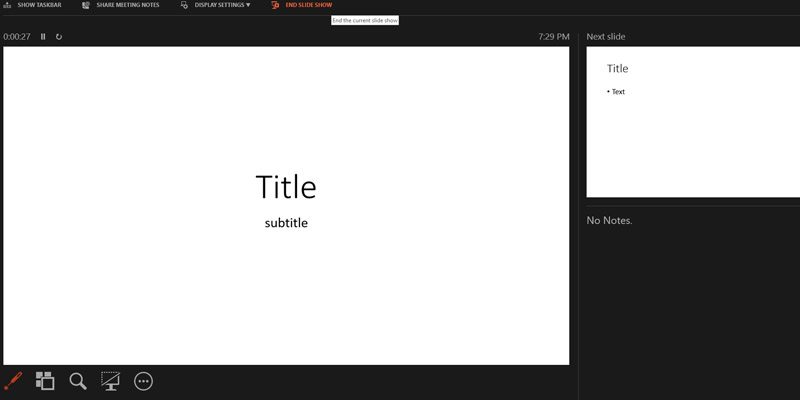
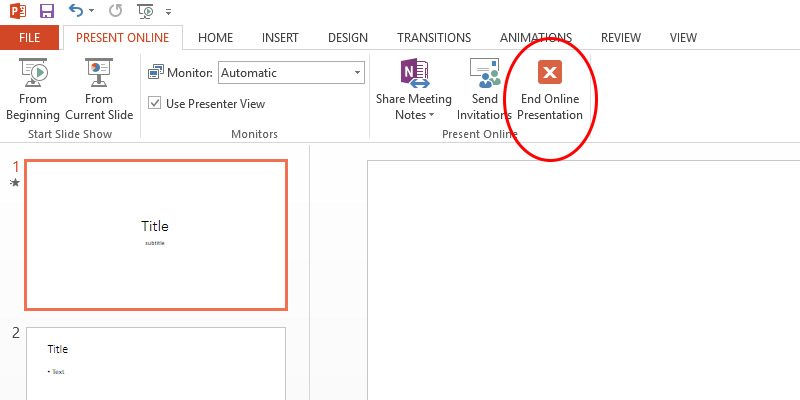
Present Online 

This is especially helpful when you want to share your PowerPoint via online hosting without having to embed the custom font (or increase your file size). Your audience may or may not have your custom font installed in their version of PowerPoint. But by taking this route, you can ensure whatever custom font you have used will appear on the audience’s end without worrying if the custom font has been installed. 

Companies with digital asset management platforms (DAMs) or learning management systems (LMS) often allow readers to view their content online. Broadcast Slide Show is a feature that lets you livestream your presentation to an online audience. 

Consistency is Key

Much like all the other aspects of your company’s identity, consistency is key to how you present yourself, your brand, and your products or services. Using your brand’s custom font in your PowerPoint templates and presentations is a simple, yet effective way to authentically represent your company no matter who you are presenting to.

3 Ways to Livestream Your PowerPoint Presentation

Don’t let distance get in between you and your audience. Livesteaming your PowerPoint allows you to still be the face of your presentation. Several online platforms can bring your presentation out of the boardroom and into digital spaces. These enable you to reach a wider audience without having to sacrifice your personal presentation style.

While many people may have figured out workarounds to livestreaming, the truth is there are many options, which are not too difficult to navigate once pointed in the right direction. Here are three ways you can livestream your next PowerPoint presentation.   

Broadcast Online from PowerPoint 

Microsoft itself offers a safe, reliable means to broadcast your PowerPoint presentation online to remote audiences (for PowerPoint 2013 and newer versions).

First, find your presentation and open it up. In the File tab, you can start livestreaming your presentation through the Share button.  

Next click the Present Online button. A dialog box will generate a custom URL for your presentation. You can then copy the link to send directly to your audience.

Once they’ve received the link, click Start Presentation. Viewers will then be able to see your presentation as you guide them through each slide in real time. 

This highlights how Presenter View will appear only on your screen. Your audience will see your slide show as you present it. 

Once you’re done, simply hit the End Online Presentation in the Present Online tab. 

This option is convenient when meeting in person is not possible. However, the slight downside is that some of your original deck’s features may be compromised. All transitions will automatically be set to “fade” from the audience’s view and a file size limit may be imposed on your upload. 

In this situation, a concise deck is more advisable for livestreaming to minimize the lag in your loading times. 

Use Office Mix  

Office Mix is a free downloadable add-on for Office 365 subscribers. It makes livestreaming presentations much easier.  

Office Mix retains more content such as audio, video, polls, and quizzes than broadcasting through PowerPoint alone. These features are helpful for presenters seeking to maximize audience engagement. using their deck. Consider reviewing each feature to see which will work best in your presentation, especially as you are livestreaming.

In the Mix tab, you can see Quizzes Video Apps

The platform also features “live digital inking.” This is a more hands-on approach that enables you to guide the audience using video, audio, and illustrations. Office Mix offers several helpful tutorials on their site for navigating these useful features.  

Office Mix requires an internet connection to share your presentation. However, your audience will be able to review your slides after you’ve concluded the presentation. And because Office Mix gathers audience data and feedback for in-depth analysis you can keep track of how your presentation went over with your audience and maximize on keeping track of after-presentation impact.

Upload to Online Platforms 

This third option offers the least audience interactivity in the moment but can maximize your audience reach. And it may be the easiest to execute. 

If the previous options are unavailable, you can upload and design your presentation on deck hosting platforms such as SlideShare. 

Publishing your slides online will allow you to reach out to a wider audience. While you can configure the presentation to be viewed by selected viewers only, default settings keep your deck open for public viewing. Adding tags to your presentation makes it easier to search online, further enabling mass sharing. 

These online platforms often require compressing your presentations to a size that websites can handle. While uploading to online platforms can be limited in file size, audiences will be able to view them at their own pace which can be a great benefit for a leave-behind aspect to your presentation.

Livestreaming Design Elements to Enhance Viewer Experience

Your deck plays a key role in the impact of your presentation and there are many ways to make your presentation accessible.

Because the presentation is being streamed from your source, you won’t need to worry about losing any of your custom fonts. That’s a common pain when people send their decks via email. Here are a few other assets that add value and enhance viewer experience: 

  • Interstitial Graphics: Controls broadcast flow and breaks it into segments 
  • Overlay Graphics: Media that plays over the main content  
  • Alert Overlays: Pulls live data from online sources and displays over the stream 

You may notice these things on streaming platforms like Twitch. Adding these elements to your presentation can give you a leg-up over other presenters and help you stand out with your audience.

Planning for the Future

Being able to present your deck effectively online will help amplify your message and showcase your skills as a presenter to your audience even while remote. And while working from home or hybrid interactions continue to be the norm, it’s essential to utilize all the tools you have at your disposal. Livestreaming solutions have made it so much easier to deliver a smooth online presentation experience. Take these tips as unique chances to improve your skills for your next big presentation.

2 Easy Ways to Avoid Missing Fonts in PowerPoint 2013

Launching a presentation that fails to display your font choices can be disappointing. Not only can this scenario be completely avoided with a few simple checks, but it’s also a waste of time invested in picking a set of fonts that match your pitch.

The problem happens when the fonts you used are unavailable on the computer you’re using for your presentation. Here are two easy ways to help you display custom fonts in your deck:

I. Embed Fonts

Embed fonts in PowerPoint first to guarantee font compatibility when transferring your deck to another computer. Follow these steps so that your fonts won’t go missing during a presentation:

1. Click the File tab on the ribbon. You’ll be taken to the Backstage view.

how to embed fonts in powerpoint 2013

2. Click on Options at the bottom of the vertical ribbon.

how to embed fonts in powerpoint 2013 steps

3. A window called PowerPoint Options will appear. Click on Save in the left column.

how to embed fonts in powerpoint 2013

4. Scroll down further and check the box for Embed fonts in the file under the heading that says Preserve fidelity when sharing this presentation.

5. Select Embed only the characters used in the presentation (best for reducing file size).

how to embed fonts in powerpoint 2013: embed only

6. Click OK.

how to embed fonts in powerpoint 2013: click ok

Your custom fonts should now be embedded within the presentation. This method eliminates the need of having to install your custom fonts to every computer that will view the presentation.

II. Save as PDF

When you’re pressed for time, saving your presentation as PDF is also a great alternative. It’s ideal for maintaining the appearance of fixed slide layout and fonts. However, this format will be unable to play animations, so do take note if your pitch needs to be viewed with dynamic animation.

1. Click on the File tab, select Export, then choose Create PDF/XPS Document.

how to embed fonts in powerpoint 2013: create as pdf

2. Click on Create PDF/XPS.

how to embed fonts in powerpoint 2013: create as pdf / xps

3. A confirmation window will appear. Put a check next to Open file after publishing, below Save as type.

how to embed fonts in powerpoint 2013: open file after publishing

4. Enable Standard (publishing online and printing).

how to embed fonts in powerpoint 2013: standard publishing

5. Give a file name for your presentation, then click Publish in the lower right corner.

how to embed fonts in powerpoint 2013: click publish

Have a Backup Plan

Using great font combinations for your PowerPoint slides can give your presentation maximum readability. There’s also the added bonus of making your deck stand out from a sea of boring, default font types with a custom font unique to your presentation.

That’s why instances like missing fonts and changes in font formats may put a dent on your well-designed deck. This doesn’t have to happen. Embed your fonts within PowerPoint 2013 to ensure that your custom fonts appear exactly as you want them to during your pitch. You also have the option to save your file as a PDF when you’re in a pinch. Although you’ll preserve the appearance of your slides, a PDF file can’t play any animations that you’ve set in each slide.

Choose among these two easy options so that your fonts won’t disappear when you have a big presentation coming up.


References

“How to embed fonts in PowerPoint.” Microsoft. n.d. www.support.microsoft.com/en-us/kb/826832
“Troubleshoot font problems.” PPTools. n.d. www.pptfaq.com/FAQ00402_Troubleshoot_font_problems.htm

A Step-by-Step Guide for Using Custom Fonts in PowerPoint Design

One of the easiest ways to improve PowerPoint designs is by playing with typography. By simply changing up fonts, you can instantly create unique slides. You don’t have to stick with using standard fonts, either. If you want to dabble in typography, plenty of custom fonts can be found online.

High Quality, Fast, Ashburn PowerPoint Design
Get a FREE Design Quote Now!

Open Today!

Despite its many advantages, custom fonts can complicate your PowerPoint process. You will need to install the new fonts on your computer. You also have to ensure that PowerPoint doesn’t substitute your custom fonts with a standard one when it’s time to share the deck with others. Here’s a step-by-step guide to making sure the process is as smooth and easy for you.

Need a Presentation Designed?
Click Here To View Our Amazing Portfolio!

Downloading custom fonts

Choose 1 to 2 fonts from any of the following sources. Make sure you use the same fonts throughout your presentation. Check out the infographic from yesterday’s post for more tips on choosing and combining different fonts.

The fonts on these sites are OpenType fonts (OTF) and TrueType fonts (TTF). Download your choices following the instructions provided on the sites. They will usually come in a ZIP archive, so make sure you have software like WinRAR to extract the files you need.

Installing custom fonts

Once extracted, the fonts will need to be installed on your computer. Double-click the TrueType or OpenType font file and click Install.

Installing Authentic Hilton by Maelle.K via DaFont.com

Head to PowerPoint and check if you can access the new fonts. If you can, you’re ready to experiment with typography. Work as you usually would and build your PowerPoint deck. Once you’re done, you’ll need to take one extra step to ensure your fonts will look the same on other computers. There are two different techniques to save custom fonts in PowerPoint. You can choose to embed fonts or turn your text into pictures.

Technique #1: Embedding fonts

PowerPoint allows you to embed non-standard fonts as long as they are TTF or OTF files. All you have to do is head to File and choose Options. Click Save and check the box for “Embed fonts in this file.”

Keep in mind that this technique will likely bloat your file size, so it’s best if you choose “Embed only the characters used in the presentation“.

Technique #2: Save text as a picture

You can also save the text as a picture instead. Simply right-click on the text placeholder and choose Save as Picture.

You can then replace the text with the picture afterward. This will take a lot more time, but it’s a great technique if your chosen font is neither a TTF nor OTF file. It’s also the best way to ensure that your text looks the same on any device.

SlideGenius Blog Module One

Download free PowerPoint templates now.

Get professionally designed PowerPoint slides weekly.

Sign Up Now

Your PowerPoint deck can significantly improve by simply using unique and custom fonts. Make sure your experimentation with typography ends a success by following this guide.

High Quality, Fast, Ashburn PowerPoint Design
Get a FREE Design Quote Now!

-->