3 Cost-Effective PowerPoint Tips to Enhance Your Deck

artistic effects

Powerpoint tips

powerpoint tutorial

presentation

Rick Enrico

slide elements

SlideGenius

PowerPoint is designed to be a user-friendly tool. Because of this, anyone can easily access and operate the program to create a basic deck.However, we’ve barely scratched the surface of this diverse presentation program.There’s more to the visual aid than meets the eye.Here are three tips on how to save time with PowerPoint to ease your design process:

1. Edit Your Images in PowerPoint

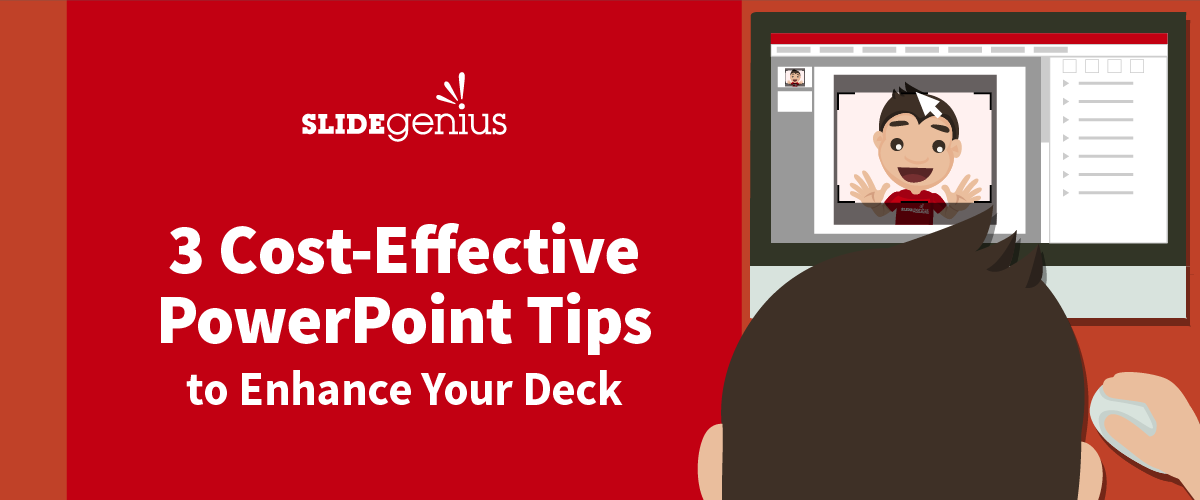
If you’re struggling with a third party program and you want to see your pictures alongside the actual slide layout, edit your images directly in PowerPoint.Although this won’t give you the same flexibility compared to editing programs like Photoshop, it does give you options to enhance images in your slides. You can use this option for basic formatting, especially if you’re still beginning with design essentials.A Format tab will appear once you’ve selected your desired object. Explore the options on this tab to transform your pictures into attractive slide elements.One of the most common editing tools in PowerPoint is the Crop tool. It cuts your image down to size without adjusting its dimensions.You can also select a number of designs for your image with Picture Styles. This frames your picture, and even changes its shape and angle.Draw attention to key objects without needing to make the rest of your slide too plain. Tick Artistic Effects to make your images stand out from your background.Editing straight in PowerPoint saves you time and money that would have taken to design your images in a separate platform.

2. Adjust Your Slide Size

Most presenters stick with the default slide dimensions on PowerPoint. Earlier versions were in the standard 4:3 square size. There worked best for presentations that will be printed later on.This changed with PowerPoint 2013 onwards, where the default slide size used the 16:9 widescreen format. This configuration was used with visual content reserved only for on-screen presentations.Other than that, these later versions now also let you adjust your slides to whatever size you choose.PowerPoint 2013 users will find this option under the Design tab. Click Slide Size > Custom Slide Size to modify your slide according to the size you want it to be.According to the guide, 4:3 is best used for decks to be printed or presented on different media. On the other hand, 16:9 is best for presentations that are going to stay on screen, particularly for formal conferences or business presentations.Knowing which sizes are compatible with your presentation leaves out the trouble of printing slides that are too small, or presenting a deck that’s too big onscreen.

3. Check Out Their New Features

PowerPoint is a constantly evolving program.Its developers are aware of the criticisms hurled against it, so the presentation aid’s been optimized to respond with even better features.For example, just last year, Microsoft released two new add-ins for Microsoft 2016 – Designer and Morph.Designer eliminates the hassle of customizing layouts and color schemes to fit your chosen background. Just insert an image in PowerPoint and the program will analyze what design goes best with it.Morph also gives you an easier job at crafting transitions and basic animation.Simply drag the object you want to animate along a path after clicking the Morph option, and the slide element will follow that path once you play the Slide Show.Make sure to check the new add-ins for a cost-effective PowerPoint that improves both your experience and deck design.

Conclusion

PowerPoint is a deceivingly simple tool to use, but there are plenty of things yet to be discovered about its functions. Most of these will help you cut back on time and effort, while still producing a winning deck for your presentation.Edit your images directly in PowerPoint using the options in the Format tab.Adjust your slide size to match your presentation type.Always update yourself with the latest PowerPoint add-ins to find out what can make your designing a breeze.Need help with your presentation design needs? Contact our SlideGenius experts today for a free quote!

Reference

“What Slide Size Should You Use?” Presentitude. November 19, 2014. Accessed December 29, 2015. http://presentitude.com/slide-size-use

Choose and Customize View Panes in PowerPoint 2013

custom ppt

customize powerpoint

powerpoint 2013

powerpoint basics

powerpoint tutorial

presenter

Rick Enrico

Slide Show

SlideGenius

view

PowerPoint 2013 offers several view panes that help streamline the presentation creation process by giving you different perspectives and tools for editing, organizing, and managing your slides. Each view serves a specific function, whether you’re working on content, structure, or design. Understanding how to choose and customize view panes can enhance your workflow and make it easier to build professional presentations.Here’s how to choose and customize view panes in PowerPoint 2013 to optimize your slide creation experience.

1. Choosing View Panes in PowerPoint 2013

PowerPoint provides several different views, each designed to help you with specific tasks like editing, organizing, or reviewing your slides. You can easily toggle between views using the View tab in the PowerPoint ribbon.

Key View Panes:

a) Normal View

  • Purpose: This is the default view in PowerPoint, allowing you to edit and design your slides. It includes three main sections: the Slide Thumbnails pane on the left, the Slide pane (where you edit the current slide), and the Notes pane at the bottom.
  • When to Use: Ideal for building and editing slides one by one.

How to Access:

  • Go to the View tab and click Normal.

b) Slide Sorter View

  • Purpose: Displays thumbnails of all your slides in a grid, allowing you to rearrange, delete, or reorder them easily.
  • When to Use: Best for organizing and rearranging your slide order or getting an overview of the entire presentation.

How to Access:

  • Go to the View tab and click Slide Sorter.

c) Reading View

  • Purpose: Lets you view the presentation as the audience would see it, but within the PowerPoint window. It’s helpful for reviewing your presentation without entering full screen mode.
  • When to Use: Use this view to preview animations, transitions, and overall flow.

How to Access:

  • Go to the View tab and click Reading View.

d) Slide Show View

  • Purpose: Runs the entire presentation in full screen, showing slides as they will appear to your audience.
  • When to Use: Use this view to rehearse the timing of your presentation or to present it live.

How to Access:

  • Go to the View tab and click From Beginning or press F5.

e) Outline View

  • Purpose: Displays only the text of each slide in outline form, making it easier to focus on the structure and content.
  • When to Use: Ideal for working on slide content, especially when you want to ensure clarity and consistency in text flow.

How to Access:

  • Go to the View tab and click Outline View.

f) Notes Page View

  • Purpose: Shows each slide along with the notes you’ve added. You can add speaker notes here that are visible only to you while presenting.
  • When to Use: Best for preparing and reviewing speaker notes for your presentation.

How to Access:

  • Go to the View tab and click Notes Page.

2. Customizing View Panes in PowerPoint 2013

You can adjust and customize view panes in PowerPoint to make your workflow more efficient. Here’s how to modify each pane based on your needs:

a) Slide Thumbnails Pane

  • Purpose: Located on the left side of the Normal View, the Slide Thumbnails pane displays mini versions of all slides, allowing for easy navigation and rearrangement.

How to Customize:

  • Resize: You can adjust the size of the Slide Thumbnails pane by hovering over the right edge of the pane until your cursor turns into a double arrow. Click and drag left or right to resize the pane.
  • Collapse or Expand: Click the small arrow at the top of the pane to collapse or expand it as needed. Collapsing it gives you more room for slide editing.

b) Notes Pane

  • Purpose: The Notes Pane, located below the Slide pane in Normal View, allows you to add notes for each slide.

How to Customize:

  • Resize the Pane: Click and drag the top edge of the Notes pane to make it larger or smaller based on how much space you need for notes.
  • View Notes on a Larger Scale: If you need to focus more on your notes, switch to Notes Page View for a more detailed view.

c) Zoom Feature

  • Purpose: Allows you to zoom in or out on your slides in the Slide pane.

How to Customize:

  • Adjust Zoom: Use the Zoom Slider at the bottom-right corner of the PowerPoint window to zoom in or out. You can also access the Zoom button in the View tab to manually set the zoom percentage.
  • Fit to Window: To reset the view and fit the entire slide into the window, click the Fit Slide to Current Window button in the View tab.

d) Gridlines and Guides

  • Purpose: Gridlines and guides help you align objects on your slides more precisely.

How to Customize:

  • Show or Hide Gridlines/Guides: Go to the View tab, and in the Show group, check or uncheck Gridlines and Guides.
  • Add More Guides: Right-click on an existing guide, then choose Add Vertical Guide or Add Horizontal Guide to increase the number of guides.
  • Snap Objects to Grid: If you want objects to align perfectly to the grid, select Snap objects to grid under the View tab.

e) Presenter View (When Using Slide Show Mode)

  • Purpose: Presenter View offers a dual-screen setup where you see speaker notes, upcoming slides, and a timer, while the audience sees only the current slide.

How to Customize:

  • Enable Presenter View: Go to the Slide Show tab and check the Use Presenter View box.
  • Customize Screen Layout: During the presentation, you can move or resize the panes in Presenter View to suit your preferences, showing more or less of the notes, timer, or slide preview.

3. Other Customization Options

a) Ruler

  • Purpose: Helps you align text, shapes, and objects on your slide.

How to Enable:

  • Go to the View tab and check Ruler in the Show group.

b) Multiple Windows

  • Purpose: If you’re working on multiple presentations, you can view them in separate windows to easily compare or copy content between them.

How to Open Multiple Windows:

  • Go to the View tab and click New Window to open another instance of the current presentation in a new window. You can arrange them side-by-side using the Arrange All button.

Final Thoughts

Choosing and customizing view panes in PowerPoint 2013 is a powerful way to improve your workflow, helping you focus on specific aspects of your presentation. Whether you’re editing content, organizing slides, or preparing notes, PowerPoint’s flexible views and customization options give you the tools to work more efficiently and design professional presentations with ease.By mastering these view pane options and making them work for your needs, you can streamline your presentation-building process and ensure that your final output is polished and effective.

How to Rehearse Timings in PowerPoint 2013

powerpoint 2013

powerpoint tutorial

presentation

Rick Enrico

slide transitions

SlideGenius

One of the most important aspects of delivering a presentation is managing your time effectively. PowerPoint 2013 offers a handy tool that allows you to rehearse the timings of your slides, helping you stay on track during your actual presentation. Here’s how to use the Rehearse Timings feature in PowerPoint 2013.


1. Open Rehearse Timings

PowerPoint 2013 has a built-in feature that allows you to practice your presentation and record the time spent on each slide.Why It’s Important:

  • Keeps You on Track: Rehearsing timings ensures that you stay within your allotted time without rushing or dragging out certain sections.
  • Improves Delivery: Practicing with real-time feedback helps you pace your delivery more effectively.

How to Do It:

  • Go to the Slide Show tab and click Rehearse Timings.
  • PowerPoint will automatically begin timing each slide as you rehearse your presentation.

2. Record Your Timing

As you progress through your presentation, PowerPoint will record the amount of time you spend on each slide. This allows you to review your timing and make adjustments where necessary.Why It’s Important:

  • Helps with Pacing: Recording timings lets you see where you may be spending too much or too little time.
  • Prepares You for the Real Presentation: Rehearsing under real-time conditions helps simulate the actual presentation experience.

How to Do It:

  • Move through your slides at your normal speaking pace. When you reach the end, PowerPoint will display the total time spent on each slide.

3. Review and Adjust Timings

Once you’ve completed your rehearsal, PowerPoint allows you to review your slide timings. You can adjust the timings if you need to spend more or less time on certain slides.Why It’s Important:

  • Allows for Adjustments: Reviewing your timings gives you the opportunity to refine your pacing and adjust the presentation’s flow.
  • Ensures Timing Accuracy: Fine-tuning your slide timings helps you hit your time limit with precision.

How to Do It:

  • PowerPoint will display the total rehearsal time once you complete your practice session.
  • Adjust your slides based on where you spent too much or too little time.

4. Save Your Timings

After rehearsing, PowerPoint will ask if you want to save your timings. If you plan to use these timings during your actual presentation, make sure to save them.Why It’s Important:

  • Automates Slide Transitions: Saving your rehearsed timings allows PowerPoint to automatically advance slides based on the time you practiced.
  • Keeps You On Track: Automated timings ensure that your presentation moves at the right pace without you manually advancing the slides.

How to Do It:

  • After completing your rehearsal, click Yes when prompted to save your timings.
  • Your presentation will now use the rehearsed timings when played in Slide Show mode.

Final Thoughts

Rehearsing slide timings in PowerPoint 2013 is a valuable tool for ensuring that your presentation flows smoothly and stays within your allotted time. By using the Rehearse Timings feature, you can practice your delivery, refine your pacing, and feel confident that your presentation will be perfectly timed. Incorporate this step into your preparation to improve the overall delivery of your presentation.

Your Quick Guide to Outline Text Fonts in PowerPoint 2013

outline text fonts

powerpoint 2013

powerpoint tutorial

presentation tip

Rick Enrico

SlideGenius

Outlining text in PowerPoint 2013 can add emphasis and make your text stand out in a presentation. While it’s not a commonly used design feature, adding an outline to text can create a bold, unique look that enhances readability, especially when used with large headings or titles.Here’s a quick guide to outline text fonts in PowerPoint 2013:


1. Adding an Outline to Text

PowerPoint 2013 offers an easy way to add an outline (or stroke) to any text box, helping the text pop off the slide. This is particularly useful when your text is placed over an image or a busy background.How to Do It:

  • Select the text box or specific text that you want to outline.
  • On the Home tab, in the Drawing group, click the Text Outline button.
  • Choose a color for your outline from the color palette.
  • To further customize the outline, click Weight to adjust the thickness of the outline or Dashes to choose a different line style.

Example: If your slide has a dark background, outlining light-colored text with a darker border (such as white text with a black outline) can improve readability and visual impact.


2. Customizing the Outline Color

The color of the text outline should complement both your font color and the background of your slide. Choose a high-contrast color to ensure that your outlined text stands out.How to Do It:

  • Click Text Outline from the toolbar and select a color from the Theme Colors or Standard Colors section.
  • For more customization, select More Outline Colors to access a full color wheel or enter specific RGB values for a custom color.

Example: Use brand colors for your text outline to reinforce your brand identity in your presentation.


3. Adjusting the Outline Weight

The thickness of the outline, known as its weight, determines how bold or subtle the outline appears. You can adjust the weight of the text outline depending on the font size and the overall style of your presentation.How to Do It:

  • After applying an outline, go to Text Outline > Weight and choose from several preset thickness options.
  • For larger text, like titles or headings, you can choose a thicker outline (e.g., 2-3pt). For smaller text, use a thinner outline for a subtle effect (e.g., 0.5-1pt).

Example: A bold heading in 72pt font might look great with a 2pt outline, while smaller body text (24pt) may only need a 0.5pt outline for subtle emphasis.


4. Exploring Other Outline Styles

PowerPoint 2013 also allows you to create more creative text outlines by using dashed or dotted lines. This can add a unique design element to your presentation, especially if you’re going for a playful or creative look.How to Do It:

  • Select the text and go to Text Outline > Dashes to choose from a variety of dashed or dotted line styles.
  • Apply these styles sparingly to avoid making the slide look too busy or difficult to read.

Example: Use a dotted outline on text in a slide meant to showcase creative ideas or brainstorming sessions, adding visual flair to the content.


5. When to Use Outlined Text

Outlined text works best for large titles, headers, or key phrases that need emphasis. It’s not ideal for long paragraphs or body text, as it can reduce readability if overused.When to Use It:

  • Use outlined text for titles, quotes, or key points that need to stand out from the rest of the slide.
  • Avoid using outlined text for dense paragraphs or small text to maintain clarity and readability.

Example: Add an outline to the title slide to make the main headline stand out, while keeping the body text plain and easy to read.


Final Thoughts

Outlining text in PowerPoint 2013 is a great way to add emphasis and visual interest to your slides. By adjusting the color, weight, and style of the outline, you can create striking text that stands out while complementing your overall presentation design. Remember to use text outlines sparingly and thoughtfully to enhance readability and maintain a professional look.

How to Loop a GIF Background in PowerPoint 2013

animation

gif

powerpoint presentations

Powerpoint tips

Rick Enrico

SlideGenius

GIFs (Graphics Interchange Format) can bring motion and energy to your PowerPoint presentation. Whether you’re using a GIF as a background or as part of your content, looping it correctly ensures that the animation repeats smoothly throughout your presentation. Here’s how to loop a GIF background in PowerPoint 2013.


1. Insert the GIF into Your Slide

To use a GIF as a background or part of your presentation, you first need to insert it into your slide.Why It’s Important:

  • Adds Dynamic Visuals: GIFs can add motion to your presentation, making it more visually engaging.
  • Provides Continuous Animation: A looping GIF keeps the motion going, maintaining the dynamic energy throughout your presentation.

How to Do It:

  • Go to the Insert tab, click Pictures, and select This Device.
  • Navigate to the location of your GIF, select it, and click Insert.

2. Set the GIF as the Background

If you want to use the GIF as a slide background, you’ll need to adjust its size and positioning to cover the entire slide.Why It’s Important:

  • Creates a Visually Engaging Background: A GIF background can add movement and life to an otherwise static slide.
  • Enhances Presentation Design: A well-chosen GIF background can align with your theme and create a professional look.

How to Do It:

  • Once the GIF is inserted, drag the corners to resize it until it covers the entire slide.
  • Right-click the GIF, choose Send to Back, so it doesn’t cover other content on the slide.

3. Set the GIF to Loop Continuously

By default, GIFs in PowerPoint don’t always loop. To ensure that your GIF background loops seamlessly throughout the presentation, you need to adjust the settings.Why It’s Important:

  • Ensures Smooth Playback: Setting the GIF to loop ensures that it plays continuously without restarting or pausing.
  • Keeps the Animation Going: A looping GIF maintains the motion throughout the duration of the slide.

How to Do It:

  • Click on the GIF to select it.
  • Go to the Playback tab in the ribbon, and under Video Options, check the box labeled Loop until Stopped.

4. Test the GIF in Slideshow Mode

Once you’ve set your GIF to loop, it’s important to test it in Slideshow mode to ensure that it works as intended.Why It’s Important:

  • Avoids Technical Issues: Testing ensures that the GIF loops smoothly without interruptions during your presentation.
  • Ensures Consistent Motion: Make sure the GIF continues to loop without restarting or freezing.

How to Do It:

  • Press F5 or click Slide Show > From Beginning to start the presentation.
  • Watch the GIF to ensure it loops smoothly and doesn’t disrupt the flow of your presentation.

Final Thoughts

Looping a GIF background in PowerPoint 2013 is a simple yet effective way to add motion and energy to your presentation. By setting your GIF to loop continuously, you ensure that it plays smoothly throughout the duration of your slide, keeping your audience engaged and enhancing the overall visual appeal of your presentation. Just be sure to test the GIF in Slideshow mode to guarantee seamless playback.

How to Open the .ODP Format Using PowerPoint 2013

.odp

business presentations

odp format

powerpoint 2013

powerpoint tutorial

Rick Enrico

SlideGenius

The .ODP (Open Document Presentation) format is commonly used in open-source office programs like LibreOffice or OpenOffice. While PowerPoint uses its own proprietary formats (.PPT and .PPTX), it can still open and edit .ODP files with a few simple steps.Here’s how to open and work with .ODP files using PowerPoint 2013:


1. Open the .ODP File in PowerPoint

PowerPoint 2013 has built-in support for .ODP files, so you can open them directly without needing any additional software.Why It’s Important:

  • Saves Time: You don’t need to convert the file beforehand—PowerPoint can open it natively.
  • Maintains Compatibility: This allows you to collaborate with colleagues who use open-source office programs.

How to Do It:

  • Open PowerPoint 2013 and click File, then Open.
  • Navigate to the location of your .ODP file and select it.
  • Click Open. PowerPoint will automatically convert the .ODP file into a format it can edit.

2. Check Formatting After Opening

While PowerPoint can open .ODP files, there may be some formatting discrepancies, especially with complex layouts, fonts, or animations.Why It’s Important:

  • Ensures Professionalism: You want to make sure your slides look exactly how you intended them.
  • Avoids Presentation Issues: Checking for formatting errors prevents any issues when delivering your presentation.

How to Do It:

  • After opening the .ODP file, go through each slide and check for formatting issues such as misplaced text, images, or animations.
  • Make any necessary adjustments to ensure the presentation looks clean and professional.

3. Save the File as .PPTX

To ensure maximum compatibility and access to all PowerPoint features, it’s a good idea to save the .ODP file as a .PPTX file once you’ve finished making edits.Why It’s Important:

  • Access to PowerPoint Features: Saving the file as .PPTX unlocks all of PowerPoint’s advanced features that may not be fully supported in the .ODP format.
  • Improves Compatibility: Saving in .PPTX format makes it easier to share the file with others using PowerPoint.

How to Do It:

  • Once you’ve made your edits, click File > Save As.
  • Choose PowerPoint Presentation (.PPTX) as the file type and click Save.

Final Thoughts

Opening and editing .ODP files in PowerPoint 2013 is a simple process, thanks to built-in support for this open-source format. However, always check for formatting issues and save your file as .PPTX for better compatibility and access to all PowerPoint features. By following these steps, you can seamlessly work with .ODP files and ensure your presentation is professional and polished.

How to Align Slide Objects in PowerPoint 2013

powerpoint presentation

Powerpoint tips

PowerPoint Tutorials

Rick Enrico

slide objects

SlideGenius

Aligning objects in PowerPoint can make your slides look more organized and professional. Whether you’re working with text boxes, images, shapes, or charts, aligning these elements ensures consistency and clarity in your presentation. PowerPoint 2013 offers several tools to help you align objects quickly and precisely. In this guide, we’ll walk you through the process of aligning slide objects to improve the overall layout and flow of your presentation.

Step 1: Select the Objects You Want to Align

Before aligning, you’ll need to select the objects you wish to align. PowerPoint allows you to align multiple objects at once.

  1. Click on an Object: Select one object by clicking on it.
  2. Select Multiple Objects: To select more than one object, hold down the Ctrl key and click on each object you want to align.

Alternatively, you can use the Shift key to select multiple objects, or click and drag your mouse around the objects you want to select.

Step 2: Open the Alignment Tools

Once you’ve selected the objects, it’s time to access the alignment tools. These are located in the Drawing Tools section.

  1. Go to the Format Tab: At the top of the screen, the Drawing Tools will appear as a new section whenever an object is selected. Click on the Format tab under the Drawing Tools section.
  2. Click the Align Button: In the Arrange group of the Format tab, click on the Align button. This will open a drop-down menu with several alignment options.

Step 3: Choose an Alignment Option

PowerPoint offers several ways to align objects. You can align objects horizontally or vertically, or distribute them evenly across the slide. Here are the alignment options available:

Horizontal Alignment Options:

  • Align Left: Aligns the selected objects to the leftmost object.
  • Align Center: Aligns the selected objects to the center of the slide or relative to each other.
  • Align Right: Aligns the selected objects to the rightmost object.

Vertical Alignment Options:

  • Align Top: Aligns the top of the selected objects with the topmost object.
  • Align Middle: Aligns the objects vertically through their centers.
  • Align Bottom: Aligns the bottom of the selected objects with the bottommost object.

Distribute Options:

  • Distribute Horizontally: Spreads the selected objects evenly across the horizontal axis.
  • Distribute Vertically: Spreads the selected objects evenly across the vertical axis.

Example of Horizontal Alignment:

If you select three objects and choose Align Left, all of the selected objects will align to the leftmost point of the first object selected.

Example of Vertical Alignment:

Choosing Align Middle will center the objects along the vertical axis, making sure they are equally spaced along that line.

Step 4: Align Objects to the Slide

In addition to aligning objects relative to each other, you can also align them relative to the slide itself.

  1. Select the Objects: Highlight the objects you want to align as you did earlier.
  2. Click the Align Button: Go back to the Align button in the Format tab.
  3. Choose Align to Slide: In the drop-down menu, select Align to Slide. This will ensure that the objects are aligned based on the entire slide’s dimensions.
  4. Select an Alignment Option: After selecting Align to Slide, choose an alignment option like Align Left, Align Right, or Align Center to position the objects relative to the slide.

Step 5: Use Smart Guides for Automatic Alignment

PowerPoint 2013 includes a helpful feature called Smart Guides that automatically displays alignment guides as you move objects around the slide.

  1. Move an Object: Click and drag any object on the slide.
  2. Watch for Smart Guides: As you move the object, Smart Guides (dotted red lines) will appear when the object is aligned with other objects or centered on the slide.
  3. Release the Object: Once the guides appear, release the object, and it will snap into alignment with the other elements on the slide.

Step 6: Align Objects Using the Grid and Guides

If you prefer precise manual alignment, you can enable Gridlines and Guides to assist with placing objects accurately on the slide.

Enabling Gridlines:

  1. Go to the View Tab: Click the View tab on the ribbon.
  2. Check Gridlines: Under the Show group, check the Gridlines option. Gridlines will appear on your slide to help you align objects.

Enabling Guides:

  1. Go to the View Tab: Click the View tab on the ribbon.
  2. Check Guides: Under the Show group, check the Guides option. Vertical and horizontal guide lines will appear, which you can use to align objects.

You can move the guides by clicking and dragging them to different positions on the slide, creating a custom grid for object placement.

Snapping Objects to Grid:

PowerPoint allows objects to snap to gridlines for perfect alignment. To enable snapping:

  1. Go to the View Tab: Click on the View tab.
  2. Click the Dialog Launcher: In the Show group, click the small arrow at the bottom-right corner of the section to open the Grid and Guides settings.
  3. Check the Snap Objects to Grid Option: Ensure that the Snap objects to grid option is checked. This will allow objects to automatically snap into place along the grid as you move them.

Step 7: Grouping Aligned Objects (Optional)

Once you’ve aligned your objects, you can group them to ensure they stay aligned as you move or resize them.

  1. Select All Objects: Hold down the Ctrl key and click on each object you want to group.
  2. Right-click and Select Group: After selecting the objects, right-click on any of them and choose GroupGroup. This combines the objects into a single unit.
  3. Move or Resize as One: Now that the objects are grouped, you can move or resize them as a single element without losing their alignment.

Final Thoughts

Aligning objects in PowerPoint 2013 is essential for creating clean, professional presentations. Whether you’re working with multiple text boxes, images, or charts, using PowerPoint’s alignment tools helps ensure consistency and visual harmony. By following these simple steps and making use of features like Smart Guides, Gridlines, and Alignment options, you can easily align your slide objects and deliver polished, engaging presentations.

How to Optimize and Embed Audio in PowerPoint 2013

audio

powerpoint 2013

powerpoint tutorial

presentation

Rick Enrico

SlideGenius

Adding audio to your PowerPoint presentation can bring your slides to life, whether you’re using background music, sound effects, or voiceovers. Optimizing and embedding audio files ensures smooth playback and a professional presentation experience. Here’s a step-by-step guide to optimizing and embedding audio in PowerPoint 2013.


1. Choose the Right Audio Format

To ensure that your audio plays smoothly during your presentation, it’s important to use the right file format. PowerPoint supports several audio formats, but MP3 is the most widely compatible.Why It’s Important:

  • Ensures Compatibility: MP3 files are supported across different devices and platforms.
  • Improves Playback: Optimized audio ensures smooth playback without lag or errors.

How to Do It:

  • Convert your audio files to MP3 format before embedding them into PowerPoint for the best compatibility.

2. Embed Audio in Your Presentation

Instead of linking to an external audio file, it’s better to embed the audio directly into your presentation. This ensures that the audio stays with your file and plays correctly, even if you share the presentation.Why It’s Important:

  • Ensures Audio Stays Linked: Embedding audio prevents issues where the file gets disconnected or lost.
  • Allows for Easy Sharing: Embedded audio travels with your PowerPoint file, making it easier to share.

How to Do It:

  • Go to the Insert tab in PowerPoint and click Audio.
  • Select Audio on My PC, navigate to your audio file, and click Insert.
  • The audio will now be embedded in your presentation, not linked.

3. Optimize Audio Settings

Once your audio is embedded, you can adjust the playback settings to ensure it plays exactly when and how you want.Why It’s Important:

  • Controls Timing: Optimizing settings allows you to control when the audio plays and how it behaves during your presentation.
  • Enhances Professionalism: Proper audio settings prevent awkward moments where the audio starts at the wrong time or overlaps with other elements.

How to Do It:

  • Select the audio icon and go to the Playback tab.
  • Choose whether you want the audio to start Automatically or On Click.
  • Use the Trim Audio tool to cut out unnecessary parts of the audio file.

4. Compress the Audio

Large audio files can make your PowerPoint presentation difficult to share or slow to load. Compressing the audio file helps reduce the overall size of your presentation without sacrificing too much quality.Why It’s Important:

  • Reduces File Size: Compression ensures that your presentation remains shareable and doesn’t take up too much storage space.
  • Improves Performance: A smaller file size means faster loading and smoother transitions.

How to Do It:

  • Select the File tab, click Info, and then click Compress Media.
  • Choose Internet Quality or Low Quality depending on your needs.

5. Test the Audio Before Presenting

Before delivering your presentation, it’s essential to test your audio on the device and environment where you’ll be presenting. This ensures there are no playback issues, especially if you’re presenting on a different system than your own.Why It’s Important:

  • Prevents Technical Issues: Testing ahead of time ensures smooth audio playback during your presentation.
  • Ensures Compatibility: Audio playback can sometimes behave differently on other systems, so testing prevents surprises.

How to Do It:

  • Play the entire presentation in Slide Show mode and make sure the audio starts and stops where you intended.
  • Test the audio’s volume level and clarity in the actual room where you’ll be presenting.

Final Thoughts

Embedding and optimizing audio in PowerPoint 2013 can add a dynamic layer to your presentation. By choosing the right file format, embedding the audio, adjusting playback settings, and compressing large files, you ensure a professional and smooth presentation experience. Don’t forget to test everything before your live presentation to avoid technical issues and ensure the audio enhances your message.

Back to Basics: Making the Most of PowerPoint Gradients

gradient tool

PowerPoint Design

PowerPoint gradients

powerpoint presentation

Powerpoint tips

Rick Enrico

SlideGenius

Gradients are one of PowerPoint’s most versatile design tools, allowing you to create a smooth transition between colors to give your presentation a polished, modern look. When used effectively, gradients can add depth, visual interest, and professionalism to your slides. However, it’s essential to use them carefully to avoid overwhelming your audience with overly complex designs.In this guide, we’ll take you back to the basics of PowerPoint gradients and explore how to use them to enhance your presentations without distracting from your message.

What is a Gradient in PowerPoint?

A gradient is a gradual transition between two or more colors. In PowerPoint, gradients can be applied to backgrounds, shapes, text, and other slide elements. PowerPoint allows you to customize the direction, angle, and intensity of the gradient, making it a powerful tool for creating dynamic visuals.

Types of Gradients in PowerPoint:

  1. Linear Gradient: A smooth transition between colors in a straight line (horizontal, vertical, diagonal).
  2. Radial Gradient: Colors radiate from the center, creating a circular or elliptical color transition.
  3. Rectangular Gradient: Colors spread outward from the center of a shape in a rectangular pattern.
  4. Path Gradient: Colors follow the path of the object, often used for complex shapes.

How to Apply Gradients in PowerPoint

Step 1: Select the Object

You can apply gradients to various elements such as text, shapes, or backgrounds. First, select the object you want to apply the gradient to:

  • Background: Click on the slide background.
  • Shape: Select the shape or object on the slide.
  • Text: Highlight the text.

Step 2: Open the Format Pane

  1. Right-click on the selected object.
  2. Choose “Format Shape” or “Format Text Effects” depending on what you’re formatting.

Step 3: Apply a Gradient

  1. In the Format Shape pane, go to Fill (for shapes and backgrounds) or Text Options (for text).
  2. Select Gradient Fill.
  3. PowerPoint will automatically apply a basic gradient, but you can customize it to suit your needs.

Step 4: Customize the Gradient

a) Choose Gradient Colors

  • You can use a preset gradient or create a custom gradient.
  • To add or change colors:
    • Under Gradient Stops, click on each stop (markers on the gradient line) and choose a color.
    • You can add more stops by clicking on the gradient line or remove stops by dragging them off.

b) Adjust the Gradient Type

  • Choose between Linear, Radial, Rectangular, or Path gradients, depending on the design.
    • Linear Gradients are great for backgrounds or transitions between sections of a slide.
    • Radial Gradients work well for spotlight effects.

c) Direction and Angle

  • Direction: Set the direction of the gradient transition, such as left to right, top to bottom, or diagonally.
  • Angle: Adjust the angle of the gradient, which is particularly useful for linear gradients.

d) Transparency and Brightness

  • Transparency: Adjust the transparency of each gradient stop to create smoother transitions or highlight certain areas.
  • Brightness: Modify the brightness of each stop to make your gradient appear lighter or darker.

Step 5: Apply the Gradient

Once you’re satisfied with your customization, apply the gradient by clicking outside the Format Shape pane. Your gradient will now be visible on the selected object.

Best Practices for Using Gradients in PowerPoint

While gradients can enhance the visual appeal of your presentation, it’s important to use them thoughtfully to avoid overwhelming or distracting your audience. Here are some best practices for using gradients effectively:

1. Use Subtle Transitions

Gradients work best when they are subtle and not overly complex. Stick to transitions between two or three colors that blend smoothly. Overly complex gradients with too many colors can become distracting and reduce readability.

Tip:

Use gradients to create soft backgrounds that make your text or key points stand out. For example, a gradient from light gray to white can create a clean, modern background without overpowering the content.

2. Stick to Brand Colors

When applying gradients, stay within your brand’s color palette to ensure consistency and professionalism. You can create gradients by transitioning between different shades of your brand’s primary color or blending your primary and secondary brand colors.

Tip:

If your brand colors are blue and green, create a gradient from a light blue to a darker blue or from blue to green to maintain brand identity.

3. Enhance Key Elements

Use gradients to draw attention to specific slide elements like headings, charts, or important data points. Applying a gradient to a shape or background behind a key point can help emphasize that information without overwhelming the design.

Tip:

Create a radial gradient behind key statistics or product images to give them a “spotlight” effect, drawing the audience’s eye toward the center.

4. Be Mindful of Text Legibility

When using gradients as backgrounds, ensure that your text is still easily readable. Avoid high-contrast gradients that make it difficult to read the text over the background. Instead, opt for softer transitions and pair them with high-contrast text (e.g., dark text on light backgrounds or vice versa).

Tip:

If you’re using a light-to-dark gradient, place white or light-colored text on the darker section of the gradient for better legibility.

5. Use Gradients for Modern Design Elements

Gradients are a hallmark of modern design. You can use them in modern, minimalistic slide designs to create depth and movement. Avoid using gradients in every element, but selectively apply them to backgrounds, shapes, and icons to create a sleek, contemporary look.

Tip:

Incorporate gradients into section dividers, slide headers, or as accent colors in graphs and charts to create a visually appealing and cohesive design.

6. Keep it Consistent Across Slides

Consistency is key when using gradients in your presentation. If you decide to use gradients, maintain a consistent color scheme and gradient style throughout your slides. This ensures that your presentation looks professional and cohesive.

Tip:

Use the Slide Master feature in PowerPoint to apply the same gradient background or design element across multiple slides, maintaining a uniform look and feel.

Final Thoughts

Gradients can transform your PowerPoint slides from basic to visually stunning, adding a layer of sophistication and professionalism to your presentation. By following these basic steps and best practices, you can create gradients that enhance your design without overwhelming your message.Whether you’re using them as subtle backgrounds, attention-grabbing highlights, or modern design elements, gradients are a powerful tool in PowerPoint that can help elevate your presentations and keep your audience engaged. As with any design element, balance and simplicity are key—gradients should enhance, not detract from, your content.

Converting Presentations into Videos in PowerPoint 2013

powerpoint 2013

powerpoint tutorial

presentation

Rick Enrico

SlideGenius

videos

videos in presentations

PowerPoint 2013 offers a built-in feature to convert your presentations into video files. This is particularly useful if you want to share your presentation in a format that can be viewed without PowerPoint or distributed via email, social media, or on websites. Turning your PowerPoint into a video helps retain animations, transitions, and narration, making it a great tool for training videos, webinars, and more.Here’s a step-by-step guide on how to convert your PowerPoint 2013 presentation into a video.

Step 1: Finalize Your Presentation

Before converting your PowerPoint presentation into a video, make sure everything is in place:

  • Check Slide Content: Ensure all slides are complete with the correct text, images, charts, and other elements.
  • Verify Animations and Transitions: Review your animations and transitions to ensure they flow as intended in the video.
  • Add Narration and Timings (Optional): If you want to include narration or specific timings for each slide, make sure to add them before starting the conversion.

How to Add Narration and Timings:

  1. Go to the “Slide Show” tab in PowerPoint.
  2. Click on “Record Slide Show” and choose “Start Recording from Beginning”.
  3. Record your voice narration and adjust the timing of each slide transition.
  4. Once done, PowerPoint will save the narration and timing with the slides.

Step 2: Save the Presentation as a Video

Once your presentation is finalized, you can start the conversion process.

Step-by-Step Process:

  1. Click the “File” Tab: Go to the upper left corner of the screen and click on the “File” tab.
  2. Choose “Export”: From the menu on the left, select “Export”.
  3. Select “Create a Video”: In the Export options, choose “Create a Video”.
  4. Set the Video Quality:
    • Choose the quality you want for your video from the “Create a Video” options. There are three quality settings:
      • Computer & HD Displays: Highest quality (1080p), best for large screens.
      • Internet & DVD: Medium quality (720p), ideal for sharing online or on DVDs.
      • Portable Devices: Lower quality (480p), good for mobile devices with limited storage.
  5. Set Timings and Narration:
    • If you recorded narration or timings, PowerPoint will automatically include them. Ensure that the “Use Recorded Timings and Narrations” option is selected.
    • If you didn’t record timings, you can set the duration for each slide manually by selecting “Don’t Use Recorded Timings and Narrations” and entering the number of seconds for each slide in the Seconds spent on each slide box.
  6. Click “Create Video”: After selecting the appropriate settings, click the “Create Video” button.

Step 3: Save and Export the Video

  1. Choose File Destination: After clicking “Create Video”, PowerPoint will prompt you to choose a location to save your video file. Browse to your desired folder and name the file.
  2. Select File Format: PowerPoint will automatically save the video as an MP4 file, which is the most common format. You can also choose Windows Media Video (WMV) if needed.
  3. Click “Save”: After choosing the file name and location, click “Save”. PowerPoint will begin converting your presentation into a video.

Step 4: Wait for the Conversion

Depending on the size and complexity of your presentation, it may take a few minutes for PowerPoint to convert your file. You can monitor the progress at the bottom of the screen. Once the conversion is complete, your video will be saved in the location you specified.

Step 5: Play and Share Your Video

After the video is created, you can play it in any media player that supports the MP4 (or WMV) format. You can also share it via email, social media platforms, or upload it to video-sharing sites like YouTube.

Additional Sharing Tips:

  • Upload to YouTube or Vimeo: If your presentation is meant for a wide audience, consider uploading it to video platforms like YouTube or Vimeo. These platforms make it easy to share your video via a link or embed it in websites.
  • Email or Share via Cloud: For smaller audiences, share the video via email or use cloud services like Google Drive, Dropbox, or OneDrive.

Tips for a Smooth Video Conversion

  1. Keep the File Size Manageable: High-quality videos can result in large file sizes, especially for lengthy presentations. If file size is a concern, consider lowering the resolution or compressing the video after exporting.
  2. Test Before Sharing: Always review the video after conversion to ensure all animations, transitions, and narrations are functioning properly.
  3. Optimize for Mobile: If you anticipate that your audience will view the video on mobile devices, use the Portable Devices (480p) setting for a lower resolution and smaller file size.

Conclusion

Converting your PowerPoint 2013 presentation into a video is an excellent way to share your presentation widely and ensure that viewers can access it without needing PowerPoint software. By following these steps, you can create a professional-quality video that retains all the animations, transitions, and narrations from your original presentation. This capability is perfect for webinars, online tutorials, and business presentations that need to be accessible on multiple platforms.