After you finish delivering your presentation, you might find it necessary to share your deck with others. Perhaps you’ll have to send it over to audience members who asked for a copy of your slides. You might even want to share it online to gain a wider reach. When you do this, you will want to make sure your hard work won’t be edited or changed by anyone else. Through Permissions, PowerPoint allows you to protect your files from harmless editing to blatant plagiarism.
By default, PowerPoint allows anyone to open, change, and copy any part of your presentation deck. To change permissions, simply click on the File tab and head to Info.
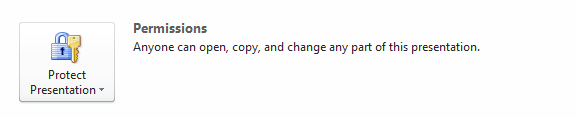
From there, you can choose four different ways to restrict permissions and protect your PowerPoint deck:
1.) Mark as Final
![]() This option will allow you to save your presentation deck as a read-only file, restricting access for those you plan to share it with. Use it to discourage others from editing your content. As its name suggests, it is the final copy of your presentation.
This option will allow you to save your presentation deck as a read-only file, restricting access for those you plan to share it with. Use it to discourage others from editing your content. As its name suggests, it is the final copy of your presentation.
2.) Encrypt with Password
![]() Using this option will allow you to assign a password for your presentation deck. This is crucial if your slides contain sensitive information that you’d want to keep confidential. Choose a password that is easy to remember, but difficult to crack.
Using this option will allow you to assign a password for your presentation deck. This is crucial if your slides contain sensitive information that you’d want to keep confidential. Choose a password that is easy to remember, but difficult to crack.
3.) Restrict Permission by People
![]() With this option, you will be able to grant specific people access to your presentation. You and the people you plan to share your file with should have a Microsoft account or a Windows Live ID. You will also need to install the Windows Rights Management to successfully restrict permissions. PowerPoint will automatically prompt you to sign up for an account if you don’t have one yet.
With this option, you will be able to grant specific people access to your presentation. You and the people you plan to share your file with should have a Microsoft account or a Windows Live ID. You will also need to install the Windows Rights Management to successfully restrict permissions. PowerPoint will automatically prompt you to sign up for an account if you don’t have one yet.
4.) Add a Digital Signature
![]() You will be able to establish the integrity and ownership of your presentation by adding an invisible digital signature to your PowerPoint file. You can use the information you have on your Microsoft account or create a digital ID from the device you’re currently using.
You will be able to establish the integrity and ownership of your presentation by adding an invisible digital signature to your PowerPoint file. You can use the information you have on your Microsoft account or create a digital ID from the device you’re currently using.
A lot of time and effort goes into creating an effective presentation deck. Secure your hard work by using the PowerPoint Permissions option that works best for you.
Featured Image: Mark Fischer via Flickr