Visual content is currently ruling social media. If you want to capture the attention of your audience, an infographic is a wise way to do it. As we’ve mentioned in the past, Internet users prefer how infographics can effectively break down the information they need through easy-to-comprehend illustrations. Here’s a quick tutorial on how you can make a simple infographic using PowerPoint SmartArt:
Step One: Resize slide
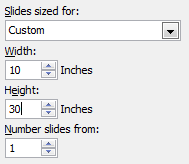
With a blank slide, go to the Design tab and click on Slide Size. Set the size for Custom and define the dimensions you want to work with. For PowerPoint 2010, you can do this by clicking on Page Setup in the Design tab.
If you want a general idea of what’s usually acceptable for slide sizes, decks that will be exported or shared across other platforms and projected on a traditional screen usually use the Standard size 10″ x 7.5″. On the other hand, widescreen (13.3″ x 7.5″) is preferable for a deck meant for TV or a monitor. Knowing your venue and the equipment that will be used beforehand will come in handy in determining what size your slides should be.
Step Two: Choose the perfect SmartArt shapes
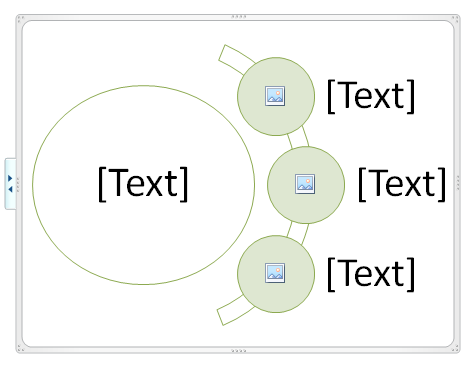
Once you’ve successfully resized your slide, go to the Insert tab and click on SmartArt. Choose the template that will work best with the infographic you’re planning to make. It will be better if you choose a template that allows you to automatically add pictures.
In the image above, the template already provides a guideline of where you can put in images and text. This saves you time from deciding how to layout your SmartArt design.
Step Three: Customize
Insert text and data you’ve gathered through research. And most importantly, add some images to make your infographic pop. You can make use of the icons from The Noun Project or make your own by customizing PowerPoint shapes. You can also find some stylized font types from DaFont. Be creative and think outside the box. Experiment by playing with colors and white space.
Step Four: Save your work
Once you’re pleased with your handy work, you can save the infographic by going to the File tab and clicking Save As. Remember to save your infographic as a JPG or PNG file. When a dialogue box appears, choose Current Slide Only.
Your infographic won’t look as complex as what you’d normally see online. But if you use your imagination and take some inspiration from some of our previous PowerPoint tutorials, you can come up with something that is just as unique and exciting.
Infographics and PowePoint designs have plenty in common. Let your infographic reach its full potential with the help of a design expert. Contact our SlideGenius professionals today for a free quote!
Featured Image: Paul Hudson via Flickr


