Slidegenius, Inc.

Fourth of July: A Celebration of Small Business Independence

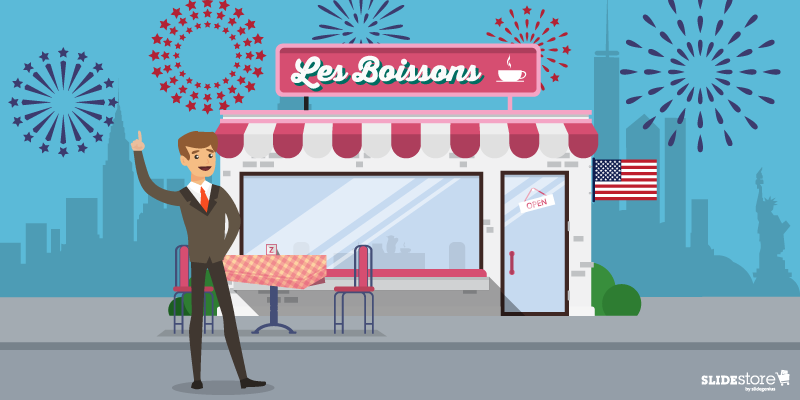
Americans sure love independence. The biggest event in the country happens every fourth of July as a celebration of its emancipation from foreign governments. During that day, pompous fireworks displays fill the atmosphere and flag-laden parades grace the streets. If Americans can go to great lengths to commemorate their history and government, they can surely do the same to honor not only their personal freedom but also the independence attained by their small businesses.
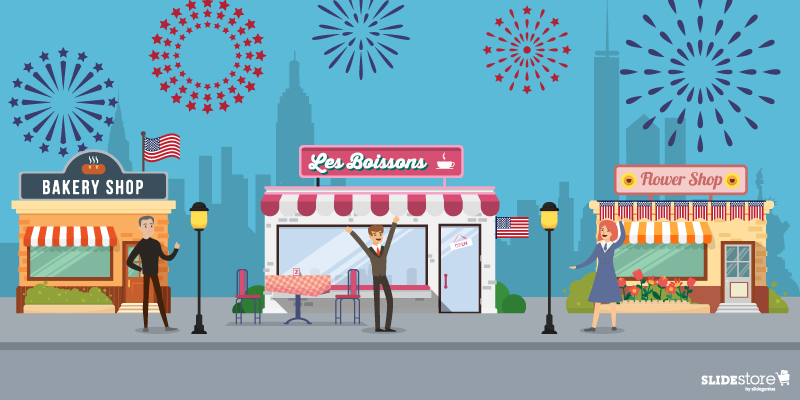
According to the U.S. Small Business Administration, there are currently 28 million small businesses in the country, and they are all responsible for 66 percent of the new jobs created since the 1970s. This only proves how resilient small businesses are. Indeed, they are the underrated cornerstones of the U.S. economy.

Celebrating Small Business Independence This Fourth of July

Seeking Small Business Independence

More and more Americans set to establish their own businesses every year. While it’s true that owning a business has its own complications, a survey by Endurance International Group found that almost 70 percent of entrepreneurs believe that going solo is the best career decision they’ve ever made. A similar study by Yodle Small Business Sentiment came to the same conclusion. They found that nine out of ten respondents are happy with their present stations as small entrepreneurs.
Indeed, the present landscape for small businesses is at its all-time high. To quote Hari Ravichandran, the CEO and founder of Endurance, “Small businesses are the backbone of the American economy, and it’s encouraging to see that so many small business owners are pursuing their passion in a way that provides them the most independence.”            
Celebrating Small Business Independence This Fourth of July | The Rewards to Reap

The Rewards to Reap

The number of people who are enticed to be more independent career-wise is growing. People are setting out to be solo entrepreneurs, and for a good reason. There are many perks you can get by being your own boss and setting your own business. Here are some of them:

Freedom to manage your business processes.

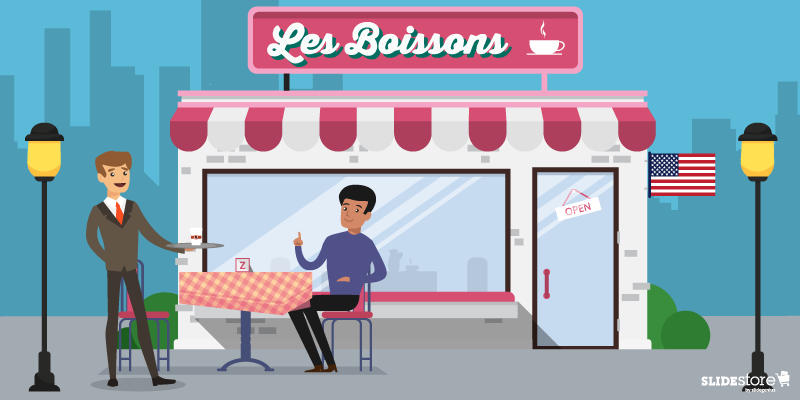
What’s great about running your own business is that you get to have full control of your time. You can choose when to start or end your day, and depending on your business model, you can even choose where to work. You have full freedom and flexibility to do as you please, as long as you take into consideration the best interests of your business.

Balance between work and personal lives.

When you are your own boss, you have the power to work in your own terms. It’s easier to strike a balance between your work and personal lives because you can decide where the horizon ends. The aforementioned Yodle study revealed that 50 percent of small business owners enjoy a decent work-life balance, 52 percent work a maximum of 40 hours a week, and almost 72 percent take at least two weeks of vacation each year. Not a bad deal, right?

More time to pursue your other passions.

If your business doesn’t bind you to a certain timeframe, you’ll have more time to realize your other dreams. This is why most small business owners join the game in the first place—they want to be independent so that they can have more time to do the things they actually love.

Opportunity to challenge the status quo.

By venturing into small business independence, you can expand your network and meet other forward-thinking entrepreneurs. As such, you’ll have more people with you to challenge the status quo and ultimately change the small business atmosphere for the better.

Full control of your business growth.

When you go solo, you’ll have no one to rely on for advancing your interests, so it’s up to you to map your own path. The future of your business is in your hands—your own strategies will determine how long you’ll stay in the game.
Celebrating Small Business Independence This Fourth of July | The Prices to Pay

The Prices to Pay

Small business independence may be good in its own right, but it’s still far from perfect. To become an effective small business owner, you have to live and embody your business every day. Sometimes, you need to make sacrifices to stay in the game. Below are some of the downsides of running your own business:

Absolute financial commitment.

Sometimes, when you’re still starting out, you won’t have enough investors to back you up, so you have no choice but shell out some of your own personal money. Also, when times are tough and the economy is at a low point, you’ll have no one to rely on for financial support, so be ready to break the bank a few times. But don’t worry—it’s all part of the deal. When you do things right, everything will fall into place and all of this will be nothing but the phase you have to go through before attaining growth and expansion. 

Missing the fine line between work and life.

The thing about attaining small business independence is that you can’t always predict how things will turn out. Yes, you can have full control over most of your business processes, but it’s also precisely for that reason that you can’t tell whether work-life balance is something that you can have easily or have to fight hard for.

More saturated business landscape.

It’s hard to break through in the small business scene when you have a lot of competitors in the field. Couple this with financial insecurity and work-life imbalance, and you’ll have in your hands more challenges in the future. This is why building a business is not for the weak-willed.
Remember that this fourth of July, you have more than one type of independence to celebrate. If there’s a good time to acknowledge the importance of small business independence, it is on the same day that the country celebrates its political freedom. Make sure to pay tribute to small businesses worldwide because they are the true unsung heroes of the American economy.
 

Resources:

Beesley, Caron. “Why Owning a Small Business Is the Best Independence There Is.” Fundbox. July 1, 2015. fundbox.com/blog/why-owning-a-small-business-is-the-best-independence-there-is
Hoagland-Smith, Leanne. “Small Business Owners Drawn to Independence.” Chicago Tribune. July 4, 2016. www.chicagotribune.com/suburbs/post-tribune/opinion/ct-ptb-hoagland-smith-column-st-0706-20150704-story.html
Tarr, Simon. “Independents’ Day: A Time to Celebrate Local Businesses.” The Guardian. July 3, 2015. www.theguardian.com/small-business-network/2015/jul/03/independents-day-celebrate-local-small-business
“Survey: Small Business Owners Thrive on Independence.” PR Newswire. June 30, 2016. www.prnewswire.com/news-releases/survey-small-business-owners-thrive-on-independence-300292587.html
“Small Business Profile.” U.S. Small Business Administration. n.d. www.sba.gov/sites/default/files/advocacy/United_States.pdf

Cultivating the Right Presentation Mindset

Someone once said, “The human brain is a wonderful thing. It starts working the moment you are born, and never stops until you stand up to speak in public.” Indeed, public speaking is so emotionally taxing that many people make all kinds of excuses to dodge it. Some say they don’t have the expertise yet while others say they’re not emotionally ready. To many, these excuses are a sign of weakness and an inability to deliver.

However, most people don’t realize that this is a natural response. In fact, it is expected, and in some cases, desired and encouraged. The can’t-do attitude towards public speaking is not always negative. If any, it’s a good asset waiting to be unraveled. You can channel the energy you use to dwell into your hesitation and self-doubt into something more positive. You can turn your can’t-do mindset into a presentation asset.

Focus on yourself, not on others.

This doesn’t mean you have to disregard your audience’s needs and preferences. It only means you shouldn’t worry too much about what others think of you. It’s okay to fret a little if you’re new to public speaking, but you have to remember that you don’t need to perfect it the first time. No matter how well you prepare and deliver your speech, there will always be room for improvement.

Look past the temptation to look smart. Instead of worrying about things that are out of your control, why not focus on honing your skills? Be open for growth, and embrace any challenge that might come your way. A lot of things can go wrong in a presentation, and sometimes, there’s nothing you can do to stop them. However, your attitude towards the situation will determine how it affects you.

Doubt yourself, but only for a minute.

There are two types of mindsets: fixed and growth. A fixed mindset encompasses static givens such as character, intelligence, and creative ability. These aspects can’t be changed in any meaningful way. A person with a dominant fixed mindset typically strives for success and avoids failure. A person with a growth mindset, on the other hand, sees failure not as a drawback but as a springboard for improvement. Both types of mindsets can have a profound impact in your life.

For you to overcome stage fright, you need to let your growth mindset take over. Think of your speaking engagement as an opportunity to expand your knowledge and enhance your experience. 

Find a motivation, not a reason to quit.

What’s good about having a growth mindset is that you can cultivate a passion for learning instead of a hunger for approval. People with this kind of outlook view things from a different light. To a conventional person, for example, the words, “not yet,” ring with a negative connotation, like being stuck in a certain state. However, to a progressive mind, “not yet” suggests something to look forward to in the future.

If you think you’re not yet ready to give a talk, strive harder to become better at public speaking until you are fully prepared to take the stage. Looking at things in a better light will free you from presentation anxiety and make you more confident.

Don’t let a can’t-do mindset stop you from reaching your full potential. Develop a can-do attitude that will let you find and conquer greater possibilities.

Resources:

Britton, Kathryn. “I Can’t Do It Yet.” Positive Psychology. June 18, 2014. positivepsychologynews.com/news/kathryn-britton/2014061829119

North, Marjorie Lee. “10 Tips for Improving Your Public Speaking Skills.” Harvard Extension. n.d. www.extension.harvard.edu/professional-development/blog/10-tips-improving-your-public-speaking-skills

Peck, Sarah. “Why a Growth Mindset is Essential for Learning.” One Month. May 12, 2015. learn.onemonth.com/why-a-growth-mindset-is-essential-for-learning
Popova, Maria. “Fixed vs. Growth: The Two Basic Mindsets that Shape Our Lives.” Brain Pickings. n.d. www.brainpickings.org/2014/01/29/carol-dweck-mindset

Roll, Oliver. “6 Steps to Overcoming Stage Fright and Giving a Presentation Everybody Listens to.” Entrepreneur. October 21, 2014. www.entrepreneur.com/article/238442

6 Things to Watch Out for During Presentation Q&As

“By doubting we are led to question, by questioning we arrive at the truth,” said Peter Abelard. The French philosopher and theologian certainly knew what he was talking about.

At the end of any presentation comes the ever-present Q&A session. It’s never not present. You don’t just present and walk away. There will always be members of the audience who will ask for clarifications and/or just want to understand more.

And it’s your job to answer them. You’re already there onstage, presumably with a great visual aid you or an awesome PowerPoint design agency created, and you’re the one they’re addressing their questions to. Not to mention that your presentation made them think of these queries. If you don’t respond, apart from not getting the answers the audience wanted, it also makes you look unprofessional. Let’s set the difference though: purposefully not answering is not the same as not knowing the answer.

So what mistakes should you avoid during Q&As? Or at least keep in check? Here are some of them:

Presentation Matters: Question and answer

Silence

This can come from both sides: presenter and audience. It’s either they have no or no more questions or the presenter takes a long time to answer. Either way, silence can make the whole mood awkward.

If you’re having a mental block after the question is given, take a moment and pause. If you still don’t have an answer after a few seconds, you can always say, “Excuse me, but let me gather my thoughts for a few more seconds.” This honest move shows that you took the time to really think about your answer—which, in all fairness, you really did.

Tone of Voice

Be conscious of how you talk—not just how you pronounce your words but also how you say, in general, your speech. It’s not just about your intonation or where you place stresses and pauses (you know, for dramatic effect). It’s also how you make your message heard and felt.

The same goes for answering questions. If you come off too strong, the gesture may be seen as defensive; come off too weak and risk being thought of as a weak answerer. A friendly tone is the best tone to use and is also the most welcoming.

Presentation Matters: Long Answer

Long Answers

When faced with a long question, it doesn’t mean you need to respond with an answer of the same length; besides, long questions don’t warrant that. Instead, give your answer as straight and concise as you can.

You risk losing the attention of your audience the more you dwell on an answer—worse, you may even repeat points over and over again, putting into question your expertise on the subject. You’ve already got limited time as it is.

Fillers

Speaking of diminishing subject-matter expertise, “Um,” “Well,” “You know,” and “Uh” will not help establish that. Repeating these filler words over and over will only serve to annoy your audience and damage your credibility, not to mention that they will also eat time.

Granted, no one can speak fluently without practice, especially with impromptu answers, but the best you could do is lessen these fillers. It’s always a good idea to take a pause and gather your thoughts, then speak.

Presentation Matters: Composure

Composure

Keeping your cool is already a given, especially if you’re onstage. If you’re thrown off by awkward questions, dissenting opinions, or even hecklers, that’s going to reflect on your general demeanor. Don’t let these situations—and many more—faze you.

Keep calm, and stay polite throughout the entire session. Once you lose your composure and try to pick a fight with a member of your audience, especially with hecklers, your night will just be ruined… and that’s the best you end up with. Don’t bring more harm to your credibility.

Arguments

Closely linked to the last point, arguments, especially heated ones, will only end up wasting everybody’s time. It will also show that you’re defensive, combative, and hostile, three things (among others) you don’t want your audience thinking of you.

Instead, lead questions to the right track. If someone offers an opposing opinion, acknowledge the difference (because there’s really not much you can do after), and, if possible, offer a middle ground. Or just end with the acknowledgment and move on to the next question.

It’s not easy having a question and answer portion to end your presentation. Being a moderator comes with its own duties, responsibilities, and rules completely different from being a speaker. But once you get the hang of it, you’ll be acing both in no time.

Of course, preparation is a must. You’ve already prepared for the presentation; what’s stopping you from doing the same for the Q&A? You’re already the subject-matter expert, so it makes sense that you’re the one they’ll be asking questions from. Allay their fears and satisfy their curiosity. Answer them in the best way possible: your own.


Resources:

Decker, Ben. “Avoid These Don’ts During Presentation Q&A Sessions.” PresentationXpert. n.d. www.presentationxpert.com/avoid-these-donts-during-qa-sessions

Greene, Charles III. “Presentation Skills: 5 Tips to Improve Your Q&A.” CharlesGreene.com. August 27, 2012. www.charlesgreene.com/2012/08/5-tips-to-improve-your-qa-sessions

Holtzclaw, Eric. “9 Tips for Handling a Q&A Session.” Inc. February 5, 2013. www.inc.com/eric-v-holtzclaw/9-tips-for-handling-a-qa-session.html

Posey, Cheryl. “The Importance of Using the Correct Tone of Voice.” SpeakingYouBestOnline.com. April 18, 2012. www.speakingyourbestonline.com/blog/the-importance-of-using-the-correct-tone-of-voice

Watts, Rich. “The Complete Guide to Handling Q&A Sessions.” LinkedIn Pulse. June 13, 2014. www.linkedin.com/pulse/20140613151624-131038283-the-complete-guide-to-handling-q-a-sessions

Windingland, Diane. “13 Tips for Handling a Question and Answer Session.” VirtualSpeechCoach.com. May 2, 2012. www.virtualspeechcoach.com/2012/05/02/12-tips-for-handling-a-question-and-answer-session

“Top Tips on Handling a Question and Answer Session.” University of Bedfordshire. December 2009. www.beds.ac.uk/knowledgehub/events/toptips/questionandanswer

Looking for creative presentations that can leverage your business? Enjoy free PowerPoint templates from SlideStore! Sign up today.

You’re Doing It Wrong: PowerPoint Rules You Should Be Following

For years now, people have been relying on PowerPoint to communicate ideas, sell products, facilitate meetings, and conferences. Many presenters, however, still fall short and end up with lousy, poorly designed slides that do nothing but torture their audience. Thankfully, there are experts in the field who have set the rules or standards for others to follow.

SlideGenius Blog Module One

Get hundreds of PowerPoint slides for free.

Sign up for your free account today.

Sign Up now

After a quick search, we found two sets of the most popular PowerPoint rules that many people subscribe to. Both may not be all-encompassing but they are excellent guidelines, nonetheless.

Guy Kawasaki’s 10/20/30 Rule of PowerPoint

Guy Kawasaki is a venture capitalist, among other things. If we’re going to talk about quality and importance of simplicity in presentation design, he’s the go-to, well, Guy. He practically listens to hundreds of pitches all the time, making him knowledgeable of what works and doesn’t. For him, a PowerPoint presentation should:

  • Feature 10 slides or less
  • Last no more than 20 minutes
  • Contain font not smaller than 30pt

This rule is applicable to pitches and office meetings. And because most people cannot absorb more than 10 concepts in a single meeting, it is best that you limit your presentation to 10 slides. The 20-minute duration should give you enough time to host a Q and A discussion afterwards. A 30-point typeface will make information on a slide large enough to be readable without making it look too crowded.

Seth Godin’s Five Rules for Creating Amazing Presentations

Seth Godin is a man of many interests and as a public speaker, he’s no stranger to PowerPoint presentations. He even wrote an e-book about it.

If you want to create an amazing presentation, here are the points we have taken from the book:

  1. Use no more than six words on every slide (If you include too much text, the audience will simply read the slides ahead of you).
  2. Do not use cheesy images and look for professional stock photos instead.
  3. Avoid fancy transitions such as dissolves, spins, etc, as these can be distracting, making you seem less professional.
  4. Use sound effects, but not the built-in types. You may want to rip from CDs or use the “Proust effect.”
  5. Do not provide print collateral at the start of the meeting. You want your audience to focus on the presentation, not read ahead of you.

Great presentations can trigger the right emotions, inspire change, and move people. These two sets of rules can raise the level of your next presentation from boring to life-changing. You don’t need to choose between the two, though. Applying both of them is sure to produce excellent results. But whatever you do, here’s another rule for you to remember. This one’s from presentation expert Nancy Duarte:

Never deliver a presentation you would not want to sit through.

Now, if there’s One PowerPoint Rule to rule them all, that would be it.

SlideGenius Blog Module One

Download free PowerPoint templates now.

Get professionally designed PowerPoint slides weekly.

Sign Up Now

PowerPoint Storyboard: A Powerful Way to Share Your Ideas

 
Producing a corporate video – be it for sales, training, or any other business purposes – involves careful planning. To plan out your video effectively, one of the first things you need to do is to create a storyboard.

What’s a storyboard?

A storyboard is a shot-by-shot representation of how a video will unfold. It is typically composed of a series of frames with illustrations or images that represent each shot. Each frame also comes with short notes to explain what’s happening in the scene as well as script details (such as dialogues and directions).

SlideGenius Blog Module One

Download free PowerPoint templates now.

Get professionally designed PowerPoint slides weekly.

Sign Up Now

Advantages of creating a storyboard

Sharing your vision for your video is much easier using a storyboard. There are times when, no matter brilliant our idea is and how hard we try to explain it, people just couldn’t understand it.  With a storyboard, you can show your team how the video is going to unravel.  It will also make it easier for everyone to get behind your idea.

Storyboarding can also make production is relatively hassle-free. As you create a video storyboard, what you’re basically doing is setting up a production plan. You are laying out the shots needed as well as their sequence. And since you already have a guide, it also makes editing easier. In other words, the entire creation process can go smoothly.

Using PowerPoint to create your storyboard

PowerPoint has many features that can bring an ordinary storyboard to life. You can turn any idea into something graphic using shapes, text, animation, and all the other tools that PowerPoint provides.

You can use the Storyboard template in PowerPoint after installing Microsoft Visual Studio 2011. With Visual Studio, making storyboards is as easy as creating and working on new slides. To create a PowerPoint Storyboard, the first things that you should is write down everything that you want to show for every frame. You can use the program’s tools to illustrate your descriptions. Once you are done with a basic storyboard, you may want to add sound and transition effects to make it more interesting.

You can also use storyboards not just in creating videos but also in preparing presentation slides.

Storyboarding your presentation

To create a storyboard for your presentation, determine first the number of slides you will need. This would be dictated by the length of your entire presentation. Ideally, though, don’t use over five or six slides every 10 minutes. After that, simply follow the outline of your presentation script. Think about how to fit it into the sequential frames. Moreover, make sure that the slides show the key ideas clearly and logically.

By storyboarding your presentation, you will be able to express your ideas beyond the usual bullet points. Instead, the series of frames will help you translate information into something visual.


Sound Slides: A PowerPoint Tutorial on Music and Sound Effects

Your presentation audience makes use of their visual and auditory senses the most during your pitch.

Because we often emphasize the importance of visuals in PowerPoint design, it’s time we consider audio, especially if you’re planning to share your presentation online.

Sometimes, it’s not enough to enhance your PowerPoint deck with eye-catching pictures and illustrations. There are moments when you need to add another dimension to your presentation design. A careful mix of visuals and audio can really add life to your slides and take your presentation further.

Add life and sound to your slides in three easy steps:

Step 1: Insert audio file

For the purpose of this tutorial, we’ll be using PowerPoint 2010.

Get started by looking for the Media group under the Insert tab.

From there, choose the Audio icon and select what type of audio file you’d like to insert into your PowerPoint presentation. You can choose an audio file that’s saved in your computer, record your own, or use a file from the Clip Art gallery.

powerpoint tutorial audio 01

If you’re going to use something that you already have saved or that you downloaded from the Internet, make sure the file is compatible with PowerPoint. They have to be in any of the following formats:

  • Windows Media Audio (.wma)
  • Windows Audio (.wav)
  • MP3 (.mp3)

Step 2: Preview selected audio file

After successfully inserting your chosen audio file, you will see a sound icon appear on the slide you’re currently working on. When you select it, a toolbar will appear. This is where you can press Play to preview your audio.

powerpoint tutorial audio 02

Always check to see if the music or sound effects you’ve chosen are working properly. If the audio skips or lags, you might want to use a file with a smaller size.

Step 3: Select playback option

Lastly, choose a play back option for your audio file. After selecting the sound icon, go to the Playback tab under Audio Tools. Among the following options, choose the one that’s most applicable to how you envision your PowerPoint deck.

powerpoint tutorial audio 03

  • Automatically – The audio file will start to play as soon as you reach the current slide
  • On Click – Play the audio on demand by clicking the icon
  • Play Across Slides – The audio file will play throughout the entire PowerPoint deck
  • Loop Until Stopped – The file will play loop unless you move on to a new slide

You can also opt to hide the sound icon if you don’t want it cluttering the look of your slide. After you’ve selected the playback option that suits your presentation, tick the box for Hide During Show that’s under Audio Options.

It’s easy to take a simple PowerPoint presentation and turn it into an experience that the audience won’t soon forget. This PowerPoint tutorial is perfect for anyone looking to make sure their presentations are a little bit better than before.

Sprinkle a few sound effects to add impact to your presentation. For online presentations, use these steps to integrate a voice over to your slides. Contact our PowerPoint experts to learn how else you can improve your PowerPoint designs and presentation outcomes.


References

Add and Play Sounds in a Presentation.” Office Support. Accessed March 5, 2015.
Visual Simplicity Is Captivating in Presentations.” SlideGenius, Inc. September 30, 2014.Accessed March 5, 2015.


Featured Image: picjumbo

Be a Presentation Virtuoso with Deliberate Practice

Delivering an effective presentation requires skills that you need to work on and develop. While some might seem to have a natural knack for it, no one is immediately born a great presenter. Your colleague might be more inclined to it than yourself, but excellent presentation skills still come from constantly exerting effort to improve. Just like musicians playing in concert halls and orchestras, you can’t skip steps if you really want to improve presentation skills.

SlideGenius Blog Module One

Get hundreds of PowerPoint slides for free.

Sign up for your free account today.

Sign Up now

There are no shortcuts to becoming a better presenter, but there’s a way you can hone your skills and become an expert. Andrew Ng, a professor from Stanford University, wrote about this in LinkedIn Pulse. He borrowed a term called “deliberate practice,” from the field of music and sports, and elaborated how you can do the same to improve your presentation techniques.

What is deliberate practice? 

Have you seen a pianist or gymnast in practice to improve their skills? When preparing for a big rehearsal, a pianist would focus on perfecting challenging passages from his score. He will play these parts repeatedly until he can play the entire piece perfectly. A gymnast will practice her routine the same way. She will repeat specific parts of her routine until she can do the whole thing flawlessly. This is deliberate practice. You focus on the most difficult and challenging parts.

As Ng had put it in his brief article, “[deliberate practice is] hard work—you focus in every attempt, try to figure out what you’re doing wrong, and tweak your performance to make it better.”

For professionals looking to improve their public speaking, deliberate practice means setting aside time to rehearse presentations and focusing on areas that they need to improve. It could be your body language or your ability to project your voice and speak clearly. Whatever these pain points might be, you should spend at least 30 minutes in rehearsal to iron out the kinks. Do it even if you’re not preparing for a big presentation. After all, these skills play a vital role in the professional world. Whether you’re in sales, marketing, or looking for investors, improving your ability to communicate and share a message will help you go a long way. All you have to do is dedicate a few minutes of your day.

Improve your presentation skills with deliberate practice

Now that you’re familiar with deliberate practice, it’s time to put it into action. Take note of the following steps to make sure your next presentation comes out flawlessly. Repeat this process over a course of several days until you see results and are satisfied with your improvement.

Step One: Select a portion in a presentation you had difficulty with

Go over the presentation you just finished preparing or review an old you made recently. Select a short, 60-second portion that you’re having trouble with. It can be a part where you just can’t pronounce the words right, or hold yourself right on stage. It can also be a part where you’re having a hard time expounding some points eloquently.

Step Two: Record your practice

After you’ve decided, record yourself rehearsing the particular portion you chose. You can use the webcam on your laptop or the camera on your phone. Just make sure the set-up is arranged in a way that you can see and hear much of yourself in the recording.

Step Three: Take down notes

After you finish rehearsing the 60-second portion, watch your recording and take note of the parts you’d like to change. List down comments about how you would want to change how you say certain words or move in a certain way. If you think you look awkward in the recording, try to figure out why that’s so and think of ways you can improve.

Step Four: Adjust your performance

Review the notes you made and adjust your performance accordingly. Repeat your performance with the feedback you gave yourself and record the whole thing again.

Step Five: Repeat steps until you see results

Keep rehearsing the 60-second portion of your presentation until you’ve improved on all the points you took note of. Once you’re satisfied with the results, move on to a different 60-second portion that you think also needs work. Stick to this routine until you’ve covered the entire length of your presentation. If it’s possible, you can enlist the help of a friend or family member so you can receive feedback from them. This will make the whole process go a lot faster.

You can be a virtuoso in the field of presentations with some deliberate practice. Just set aside a few minutes in a day to fix the pain points you encounter when facing an audience. Follow this routine and see a marked improvement in your delivery and performance. All it takes is some hard work and determination.

SlideGenius Blog Module One

Download free PowerPoint templates now.

Get professionally designed PowerPoint slides weekly.

Sign Up Now

Reference:

Ng, Andrew. “Learn to Speak or Teach Better in 30 Minutes.” LinkedIn Pulse. March 20, 2014.


Featured Image: picjumbo.com

Notes from TED: Presentation Tips from Memorable TED Talks

We’re big fans of TED Talks around here. Aside from getting to hear “ideas worth sharing,” the best TED Talks can also act as a crash course on presentation. If you’re looking to improve your presentation skills, TED.com is just a click away. You’re sure to find valuable lessons you can learn from.

With that, we decided to take a closer look at some of the most popular TED Talks to date. We picked out three from the venerable list and broke down their benefits and methods for you. In this process, we hope to point out the different takeaways that could help improve the next presentation you deliver.

Take a closer look at some of the most memorable TED Talks for valuable presentation lessons:

Ken Robinson on how to engage an audience in ‘How schools kill creativity’

Ken Robinson’s critique on today’s educational system is the most popular TED Talk, having over 30 million views. It’s no surprise that it’s a great study on how presenters can engage with their audience. Watch his delivery closely and see how the following points contribute to audience engagement:

1.) While the premise is presented straight away, Robinson was able to underline its importance with two stories that show the amazing creativity of children. The second story was even about his own son, which allowed the audience to see a part of him that they could easily relate to. He continued to share stories between discussions of his main arguments, allowing the audience to understand them better.

2.) He also encouraged audience engagement by posing rhetorical questions throughout his speech. By pausing every now and then to ask a question, he challenged his audience to think about the assertions he was making. They might not have had the chance to share their thoughts, but they were still actively participating by forming their own opinions.

3.) He made it easy for the audience to follow his presentation. His takeaways were always highlighted by transition phrases that prompt the audience to sit up and listen. By using phrases like “I think you’d have to conclude”, he made it clear that he was about to say something important.

Al Gore is clear and consistent in ‘Averting the global warming crisis’

The best thing about Al Gore’s TED Talk is his no-nonsense, straight-to-the-point delivery. While he made sure to engage the audience with humor and anecdotes, what really stands out is his ability to talk about a complex and often controversial topic.

1.) Gore didn’t spend much time with preludes and introductions. After gaining the audience’s attention, he plunged straight into the  discussion. This is something that’s important for business presentations. While it’s important to keep people engaged, you also need to make sure that your goals and purpose are clear to everyone.

2.) The structure he followed makes this easy. He introduced one point, gave an explanation, and offered an example. Through it all, he offered call-to-action statements that gave the audience a specific idea on how to contribute to his cause.

3.) Most importantly, he made use of visuals to elevate his message. His slides contained plenty of data that were simplified into charts to help the audience digest all the new information.

Elizabeth Gilbert is a powerful storyteller in ‘Your elusive creative genius’ 

In her TED Talk, best-selling author Elizabeth Gilbert goes into the intricacies of living a creative life. To teach artists and writers like her to overcome the anxiety and apprehension they feel about their work, she starts by sharing stories. Observe how she carefully integrates storytelling to a cohesive presentation:

1.) She raised the emotional stakes by starting with personal anecdotes. To give the audience a chance to connect with her message, she made use of examples from her personal experience. She shared her own anxieties and positioned herself as someone who is relatable and personable.

2.) To highlight her points, she shared stories from other cultures and fellow writers. This allowed her audience to envision real people behind the concepts being discussed. To tie her entire presentation together, she then returned to her own experience and shared how she finally overcame the problem she initially presented.

3.) Even when she told a wide array of stories, none of these digressed from the core message of her presentation. In fact, it helped her message resonate throughout the presentation because these stories were perfectly in line with her original premise.

TED Talks can teach you insights from a wide-array of topics that can help improve your own work or career. They can also provide you a handful of important presentation tips and lessons. Whether you’re preparing for a sales pitch or a big conference, take note of these TED Talk lessons to successfully get your message across.


References

Hook, Line, and Sinker: What Makes a Great Presentation Story.” SlideGenius, Inc. December 11, 2014. Accessed February 16, 2015.
The Art of Graphs and Charts.” SlideGenius, Inc. April 21, 2014. Accessed February 17, 2015.
The most popular talks of all timeTED. Accessed February 17, 2015.
Presentation Tips: 5 Quick Steps to Audience Engagement.” SlideGenius, Inc. December 16, 2014. Accessed February 17, 2015.


Featured Image: Stefan Schäfer, Lich via Wikimedia Commons

How to Prepare a Flipbook: The Presentation’s Fine Print

As we’ve established in the past, a majority of people respond positively to visual information. Avoid unloading too much data on your audience and trying to fit everything in a short series of slides.

This doesn’t mean that you can leave out the fine print completely. Sometimes key individuals like investors in your audience will want a closer look at the details.

As a solution, provide them with a flipbook—a document where they can examine the details they need in their own time.

Unlike a PowerPoint deck, a flipbook carries a lot more text and information. It’s similar to a report, but with a better sense of design. Even if it’s meant to act as a supplementary document, a flipbook will need to be as visually engaging as the presentation you delivered.

Here are our top pointers to make sure your flipbook works well with the rest of your presentation:

Your flipbook needs to stand out

Business documents are often kept simple, printed in a subtle black and white. However, if you’re looking to impress people, you need something more that will encourage your recipients to keep flipping through the pages.

As with a PowerPoint deck, make sure that key information stands out in your flipbook. Learn to experiment with different design elements to add life to the information you’re presenting.

While expounding on details, make use of images, illustrations, and color accents to help key points stand out.

Keep basic design principles in mind

Even as you make sure your flipbook stands out with great design, still be mindful of the same principles that guide your PowerPoint deck.

Remember that people have limited attention spans, and need room to relax their gaze so they can focus on more important objects.

Continue to observe basic design elements such as contrast, white space, and the rule of thirds in order to strike the perfect balance.

You’ll be able to grab your viewers’ attentions without saturating them with too many slide elements this way.

Structure your content properly

Proper structure helps your document become much easier to read, regardless of its length. If you can cut up your content into consumable chunks, recipients will be able to easily scan your document for the information they need.

For some tips, here are just a few ways you can keep your content organized:

  • Break down discussion with headlines
  • Highlight the key takeaway with a subheading
  • Discuss a single point per paragraph
  • Use bullet points to list down key information
  • Add pull-quotes to emphasize important parts of your content

Use grids and columns as a layout guide

Documents are also much harder to read when the layout is haphazardly done. You can’t just arrange your content randomly.

Make sure your layout encourages the reader to keep going, guiding them from one point on the page to the next.

To solve this problem, utilize grids and columns as you format both design and content.

Design blogger, Sean Hodge, explains in his article on Smashing Magazine, the benefits and purpose of grid-based design. Hodge included a grid’s optimization of variety and transformation of disharmony into something that enhances design rather than detracts it.

These can guide you in arranging your content in a satisfying and creative layout, so make use of them for visual appeal.

Whether you’re creating a PowerPoint deck or a flipbook, powerful visuals play an important role in helping your ideas stand out. If the occasion calls for a closer look at the details, give the audience your presentation’s fine print. Follow these tips to prepare a flipbook that magnifies the importance of the message you’re delivering.


References

Design 101: Basic Principles for Your PowerPoint Designs.” SlideGenius, Inc. July 31, 2014. Accessed February 6, 2015.
Hodge, Sean. “Grid-Based Design: Six Creative Column Techniques.” Smashing Magazine. March 25, 2008. Accessed February 6, 2015.
PowerPoint Lesson: The Rule of Thirds in Slide Design.” SlideGenius, Inc. November 10, 2014. Accessed February 6, 2015.
The Visual (spatial) Learning Style.” Learning Styles. Accessed February 6, 2015.
Using White Space in PowerPoint Design-a Closer Look.” SlideGenius, Inc. December 4, 2014. Accessed February 6, 2015.
Watson, Leon. “Humans Have Shorter Attention Span than Goldfish, Thanks to Smartphones.” The Telegraph. Accessed February 6, 2015.


Featured Image: siBorg via Flickr

Tutorial: How to Use PowerPoint as a Photo Editor

Despite what others might think, PowerPoint remains to be a flexible tool. It may get a bad reputation from the “Death by PowerPoint” dilemma in board rooms, but like any other tool, correct use of PowerPoint lies on your ability to familiarize yourself with its different functions.

If you take the time to learn what you can, you’ll find space to explore your creativity.

In this regard, we thought it might be useful to discuss using PowerPoint for other purposes. Other than building slide decks, you can actually tap into the classic presentation software in plenty of ways, one of which is using PowerPoint as a photo editor.

If you don’t know your way around Photoshop yet, use PowerPoint to do basic photo editing and enhance images you want to use for your presentations.

For the purpose of this tutorial, we’ll be using PowerPoint 2010 to demonstrate the program’s various functions.

Here’s everything you need to know to get started:

The basic commands

To start using PowerPoint as a photo editor, we have to familiarize ourselves with the Format tab under Picture Tools. Insert the image you want to edit into a blank slide. Once you select that picture, this tab appears on your ribbon:

powerpoint photo editor 01
(Click for larger view)

From this tab, the most basic photo editing commands you’ll need to know are the following:

1.) Pictures Style – This entire group signified by the icons that fill most of the tab allows you to easily customize pictures with just a click. There are plenty of styles to choose from. You can choose to add different effects or borders, and even change the shape of your picture. The icon for Picture Layout allows you to convert your picture into a SmartArt graphic.

2.) Corrections – The sun icon on the left side of the tab allows you to edit a photo’s brightness and contrast. You can also choose to either sharpen or soften its focus.

3.) Color – Right beside the Corrections icon is where you can change the saturation and tone of your chosen picture. It also gives you the option to overlay different color filters to get the exact look you’re going for.

4.) Crop – On the right most part of the tab, you’ll find the Crop icon. Aside from using it to trim down your image to a particular size, you also have the choice to crop your image into a particular shape. All you have to do is click the arrow right below the Crop icon and choose Crop to Shape.

Adding captions to images

Something else that you might want to do is add text to your images. Adding captions is pretty straightforward on PowerPoint. All you have to do is use the TextBox as you usually would when building a PowerPoint slide. Click on the Insert tab and select the Text Box icon.

powerpoint photo editor 04

From there, you just have to create a TextBox anywhere you’d like on the picture and start typing your caption from there. To make the text stand out, you can add a background color by selecting Shape Fill. Adjusting the transparency of the box will often give you the best look.

powerpoint photo editor 05
(Original image from Death to the Stock Photo)

For this example, we set the Shape Fill effect at about 30% transparency. You can adjust this by selecting the Shape Fill icon and choosing More Fill Colors.

powerpoint photo editor 07

From here, it’s easy enough to adjust your TextBox to get the look that works best with the picture.

Saving your pictures

Once you’re happy with the edits you’ve made, you can go ahead and save your picture as its own file. All you have to do is right-click on your edited image and choose Save Picture As.

You can also save several objects as one picture. This will be useful if you added a text box for captioning. Hold the Shift key and select all the elements you want to include in a single picture. After that, all you have to do is right-click and choose Group. After that, you can finally save your picture as usual.

Creating a Polaroid effect 

Using these techniques, you can now edit your pictures easily. Practice your skills by trying your hand at creating a Polaroid effect on PowerPoint.

powerpoint photo editor 06

All you have to do is follow these steps:

1.) Select your image and crop it into a 1:1 ratio.
2.) Right above your cropped image, use the Shape tool to draw a rectangle.
3.) Select the rectangle and add a Shadow (Outer) effect through the Drawing Tools Format Tab. Once you get the drop-shadow, change the rectangle’s color to white and remove the shape outline.
4.) Select the rectangle again and right-click. Click on Send to Back and select Send Backward. From here, your cropped image will appear again.
5.) Adjust the picture to create the look of a Polaroid. Make sure you leave more space at the bottom when you’re moving the image around the rectangle.
6.) Finally, group the shape and the image together and save as instructed above.

As you can see, PowerPoint isn’t as stifling a tool as most people make it out to be. If you know how to get creative, you can use it as a photo editor and achieve unique designs. Explore and utilize its different functions to get the most out of this classic presentation software.


Featured Image: Death to the Stock Photo

-->