PowerPoint animations can be a good way to enhance your slides, especially if you plan to share your deck online. You’ve probably read a lot about how you shouldn’t put animations on your slide. It’s true that if you use too much, your PowerPoint deck can look sloppy and unprofessional. However, if you know how to use it the right way, you can get interesting effects.
There’s a PowerPoint animation trick you can do to generate drama or nostalgia in your slides. If it suits the topic of your online presentation, try animating a picture to slowly turn into black and white. Here’s how it would look like:
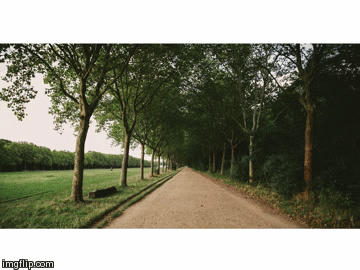
This PowerPoint animation mimics some transition effects you’d see on TV. As Ellen Finkelstein points out, you see this in the TV show NCIS. In order to add some drama to a heightened scene, a still shot would turn into black and white before fading into the next frame.
If you want the same effect for your online presentation, follow these steps:
Step One
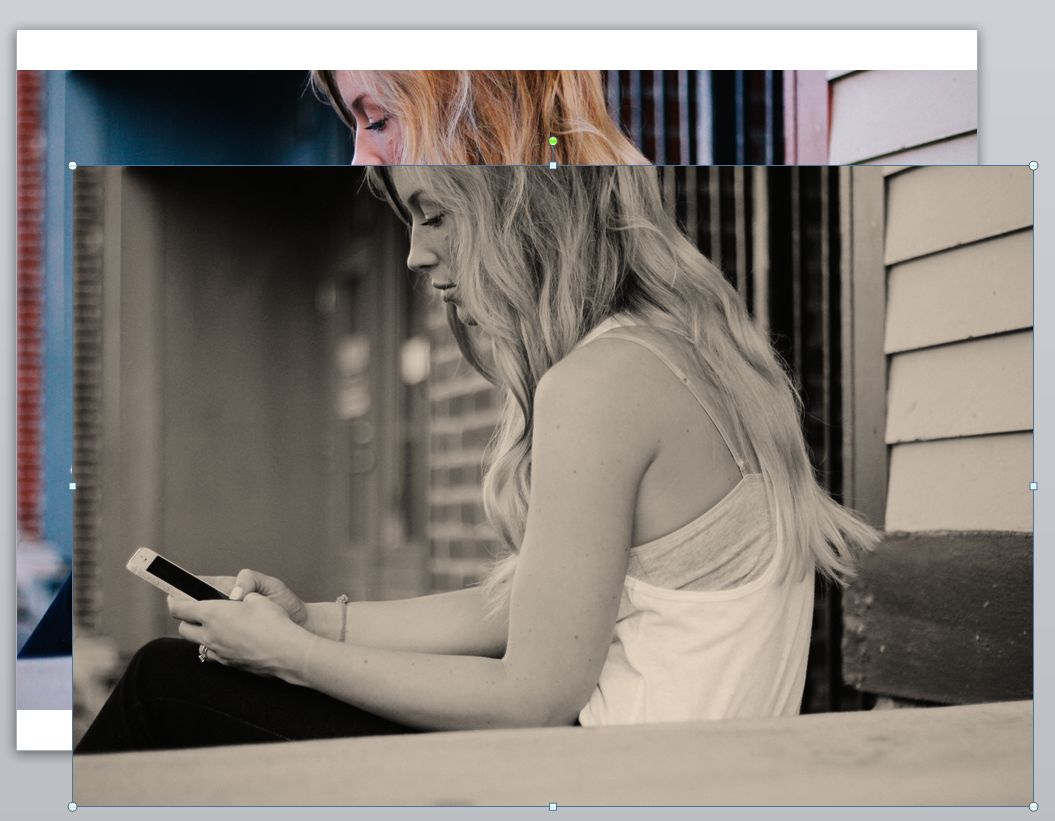
On a blank slide, add the picture you want to use. Place it and make a copy by either hitting CTRL + C or right clicking and choosing ![]() . Paste the duplicate image, select it, go to the Picture Tools Format tab and apply the gray scale effect under Color. If you don’t want to turn the picture into black and white, you can add a different effect. For this tutorial, I decided to give the second image a sepia tone.
. Paste the duplicate image, select it, go to the Picture Tools Format tab and apply the gray scale effect under Color. If you don’t want to turn the picture into black and white, you can add a different effect. For this tutorial, I decided to give the second image a sepia tone.
Step Two
Place the duplicate image directly above the original one. PowerPoint can give you grids and guide lines to make this part easier for you. To do that, just right click on the slide and choose Grid and Guides. When a dialogue box appears, choose Snap objects to grid and Snap objects to other objects.

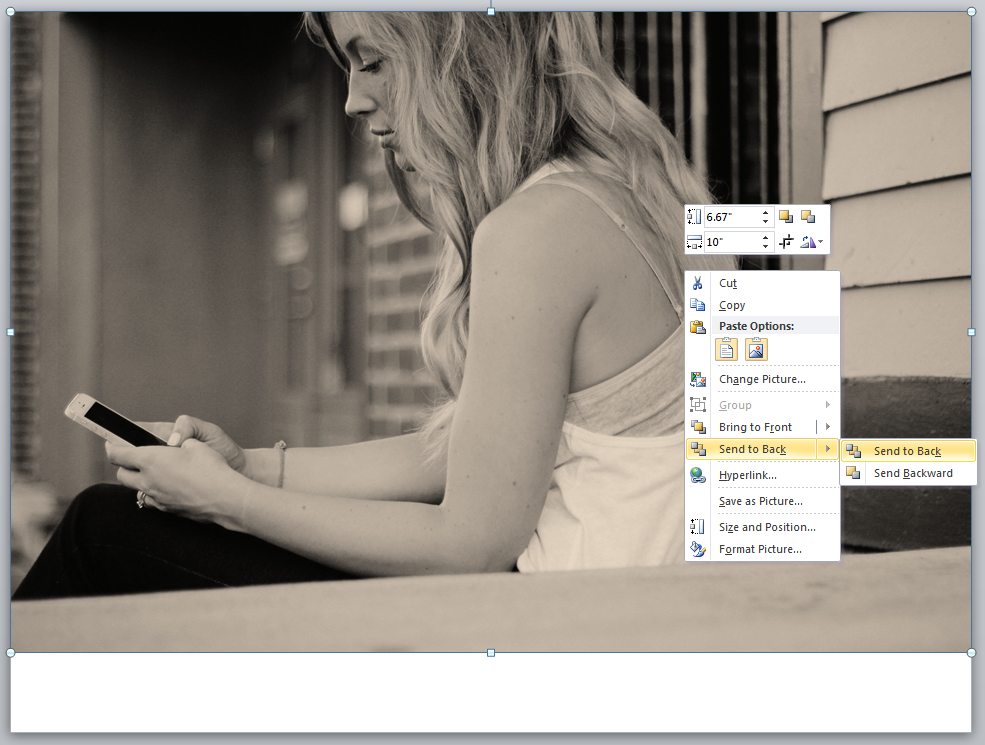
When you have the duplicate picture perfectly placed, select it, right click and choose Send to Back.
Step Three
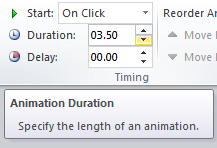
Add the PowerPoint animation to the original colored image by selecting it and going to the Animations tab. To achieve the effect we want, you need to apply only the animations illustrated using red stars, particularly Fade, Split, Wipe, Shape, Wheel, and Random Bars.

For this tutorial, I chose the Shape effect.
When you add a PowerPoint animation, you’re given a preview of what it looks like. If it seems too fast or too slow for you, you can adjust the timing by adjusting the settings under Timing. Here, I slowed down the animation to 3 seconds.
Step Four
You can now add text to the slide if you need to. You can also add a PowerPoint animation to the text. Just be sure you’re aware of how you want each animation to progress. If you want to change anything, just go to Reorder Animation under Timing.

There you have it!
You can now work on the rest of your deck. You can use this PowerPoint animation trick in Section Headers or if you want to emphasize a point. When you’re done, don’t forget to turn your PowerPoint presentation into a video so you can share online. Go to the Slide Show tab and choose Record Slide Show. Learn the specifics by checking out a previous tutorial we made called “How to Make a Trade Show Video Loop Using PowerPoint“.
Here’s how the PowerPoint animation I made turned out:

Featured Image: Cristian Bortes via Flickr
Image used for tutorial via Death to the Stock Photo