If you’re still starting out with PowerPoint, it’s important to explore the program’s different features. Before you can go to the presentation tool’s more advanced options, however, you’ll need to figure out its basic components first.
One of these primary elements is the gradient tool. You don’t need to stick to solid colors all the time. This PowerPoint tool can give a plain slide background or shape some depth and shading, making it more realistic. However, be careful not to overdo it to avoid making your deck look clunky and cluttered. Opt for a cleaner PowerPoint with just the right design.
Learn to use gradients strategically in creating effective shading techniques on a professional deck:
Choosing the Right Color Combination
A gradient is the combination of two or more colors. These colors bleed into each other and overlap, but both are always visible.
Earlier versions of PowerPoint provide built-in gradient fills with their own color combination, but PowerPoint 2010 onward has its preset gradient fills for one color with light and dark variations. You can customize these later on to your preference. This includes adding more colors to your gradient.
Choosing an appropriate color combination is necessary in making hues complement each other. For shading purposes, it’s better to use analogous color schemes or similar color temperatures. As an example, using only warm or cool colors on your gradient will give the illusion of seamless color transition.
Using Preset Gradients
Built-in gradients are the simplest to use and may be preferable for first-time users of PowerPoint. To apply this gradient to shapes, do the following steps: Select the shape you’ll be applying the gradient to. A Format tab will appear in your toolbar.
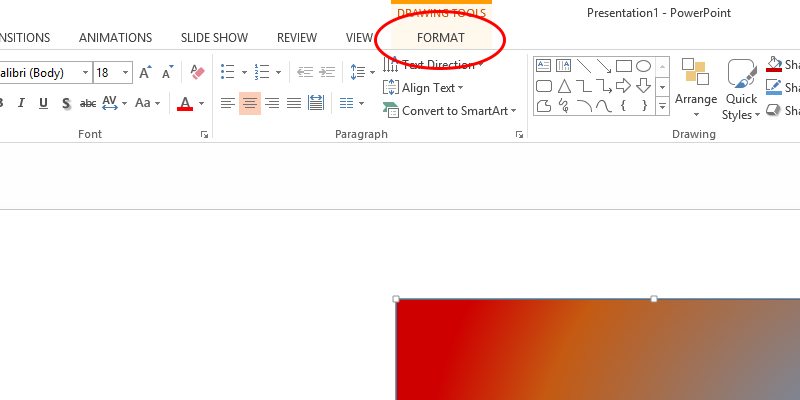
Under the Shape Styles group, select Shape Fill > Gradient.
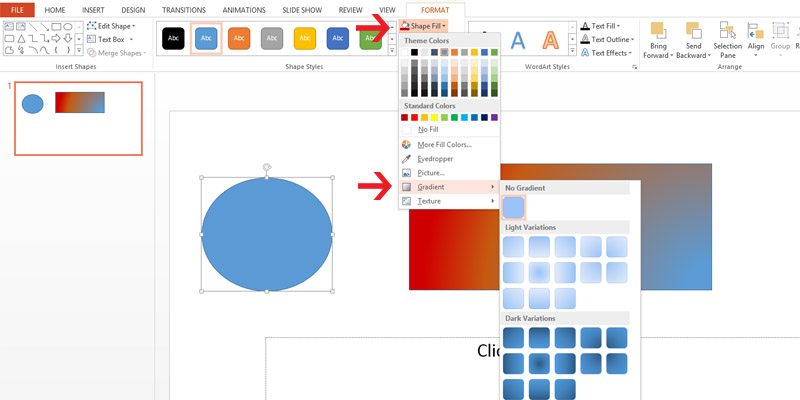
Choose from any of the variations available. There are two selections for any solid color in the gradient: Light and dark.
Light variations are your original color mixed with white. On the other hand, its dark counterpart is also your original color with black.
To go to the Gradient option for your slide background, just right click the slide you want to apply the gradient to, and select Format Background.
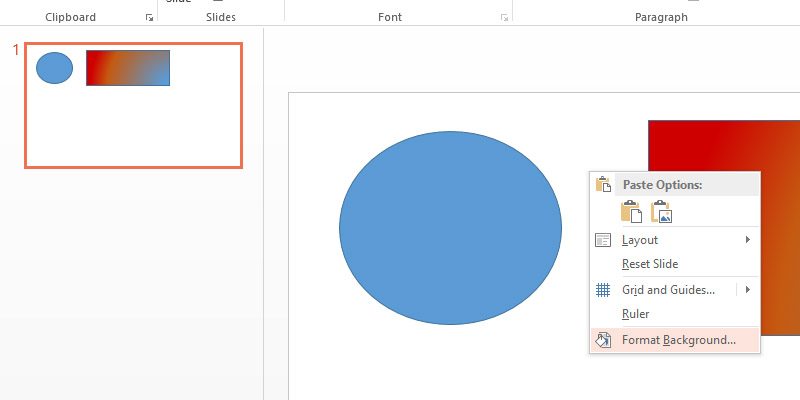
From there, follow the same set of instructions as applying gradients to shapes.
Customizing Gradients
If you aren’t satisfied with the available gradient choices, you’re free to customize your gradients.
Click on the More Gradients option below the gradient variations.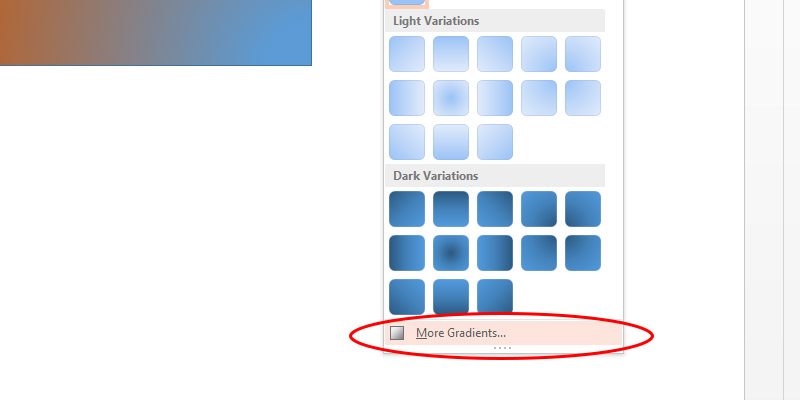
Here you can choose the Type of gradient you want. It can be radial, rectangular, linear, or path.
You can also pick the Direction you want your colors to take.
Making use of Gradient Stops will let you control how much of each shade blends with the rest.
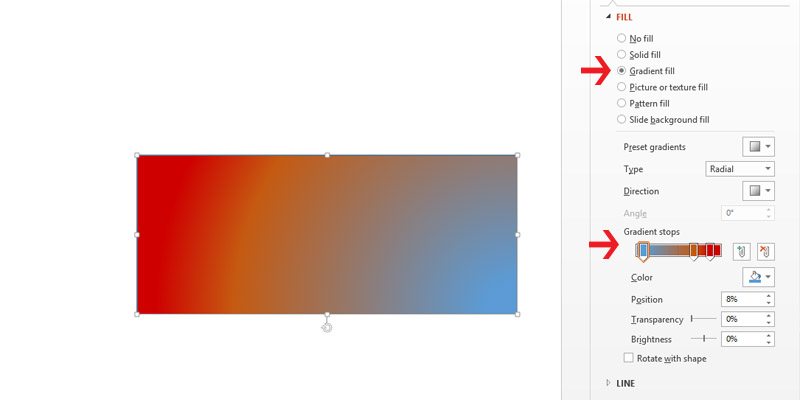
To change the color of a specific shade, select a gradient stop and change it on the color picker.
Other aspects of your selected gradient stop that you can change include its Position, Transparency, and Brightness.
Experiment with these options until you achieve your desired gradient.
Conclusion
Gradients may be a basic PowerPoint feature, but using it in the right way can still transform your deck into something understandable and easy on the eyes.
Make sure you select the right color combination. This can evoke the right moods for your pitch and achieve an effect that leverages rather than detracts your design.
If you want to familiarize yourself with the basics of PowerPoint gradients, start with preset gradients. Depending on what you want to do with your shape or slide background, choose between light or dark variations of your solid color fill. Customize your gradient and play around with the amount, type, and direction of your colors to add depth and shading. Using the correct color combinations can highlight your brand to make it more distinct and memorable.
Need help with your deck design? Contact our SlideGenius experts today for a free quote!
References
“Add a Gradient Fill to a Shape.” Office Support. www.support.office.com/en-us/article/Add-a-gradient-fill-to-a-shape-11cf6392-723c-4be8-840a-b2dab4b2ba3e
“Color Harmonies.” Tiger Color. www.tigercolor.com/color-lab/color-theory/color-harmonies.htm
Featured Image: “Convergence (Explored!)” by Mohammed Moosa on flickr.com